Rationalising the 323 GTX, part 3: pipe
In part 1, I spoke of things being either old or badly modified, and those things being targets of my 323 GTX "rationalisation" subproject. The hard pipe between the intercooler and intake manifold was both of those things, though the bad modifications offended me most. Because I am an idiot (also, because I didn't expect to be writing about any of this in detail), I didn't take a photograph of the pipe before I started work on it. I'm sure you can extrapolate what it looked like from the various pictures (those pictures being rather bad for someone who has a website about cameras because of my phone's pathological desire to focus on the wrong thing). So let's move on!
When new, the Mazda had an air-recirculation system to prevent turbo stall when coming off-throttle. This was gone long before I bought the car, and it had been replaced with a dump valve (which vents excess intake pressure to the atmosphere). The vestige of this system was an outlet on the pipe which was blanked off like this:
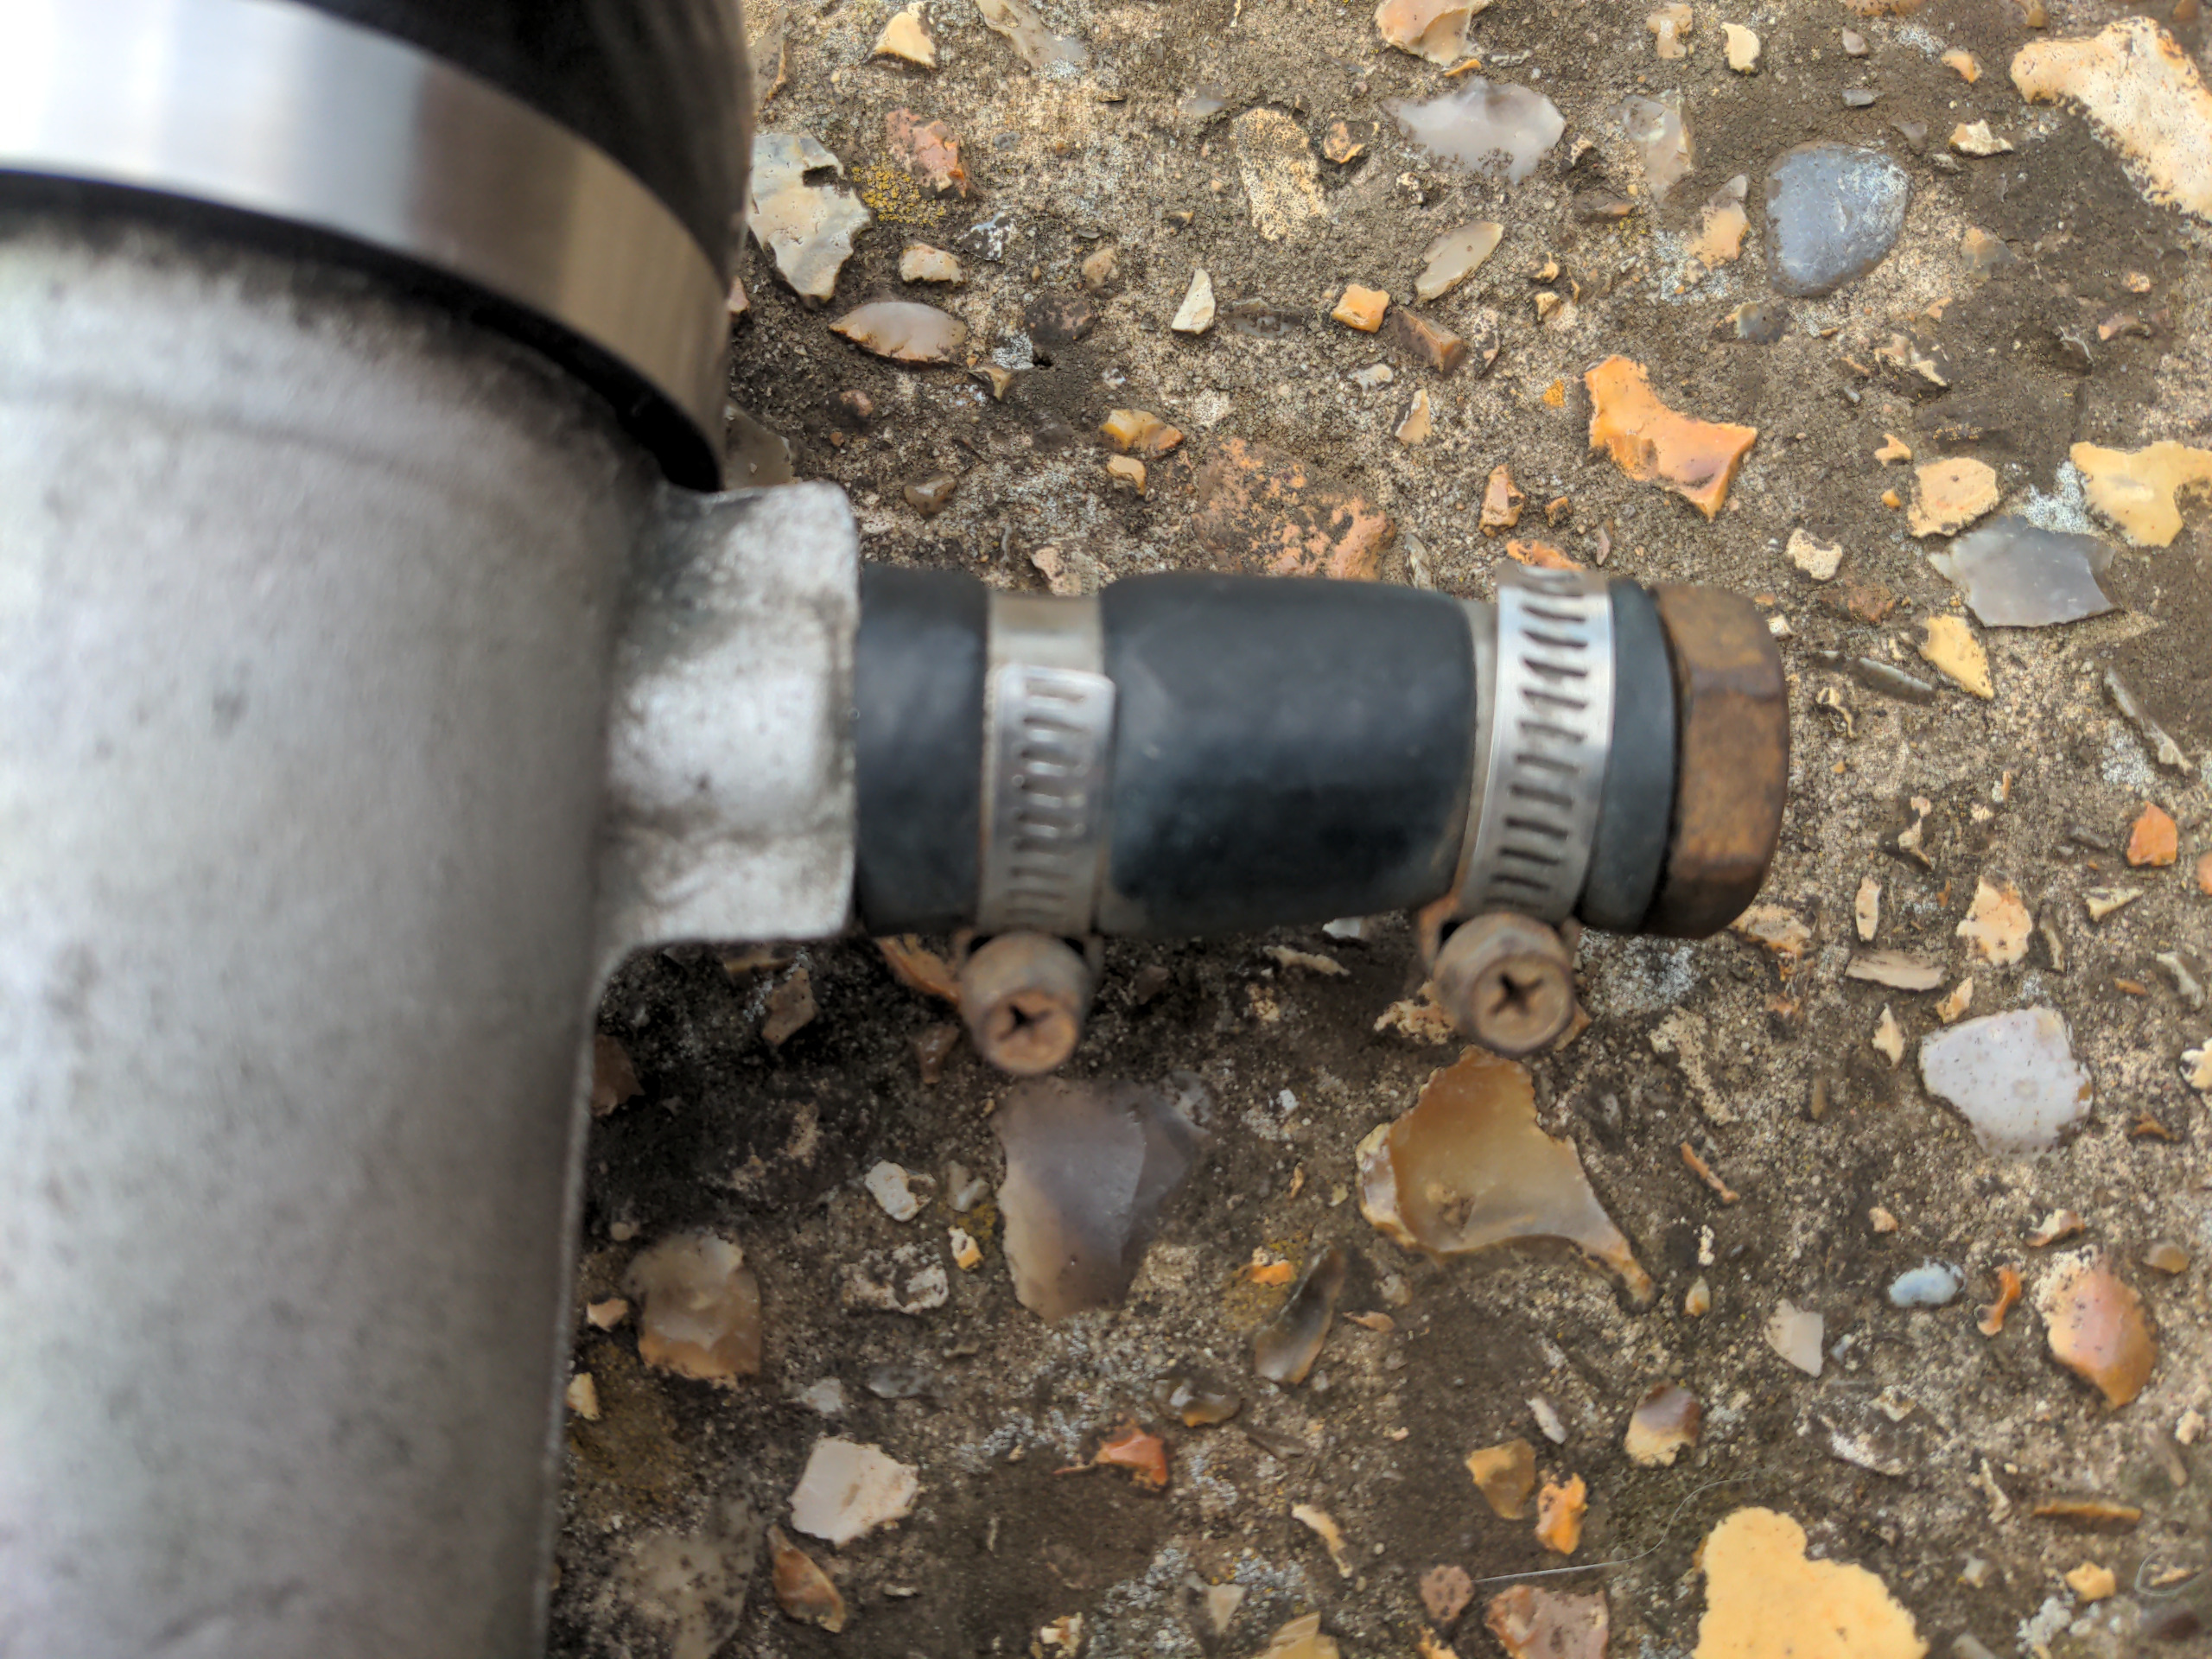
I don't like this. It works, but it is ugly and unnecessarily space-consuming; it is a bad modification. So, my plan was to remove the hose, grind off the stub of pipe it was clamped to, then do something to blank it off permanently. But it turned out...
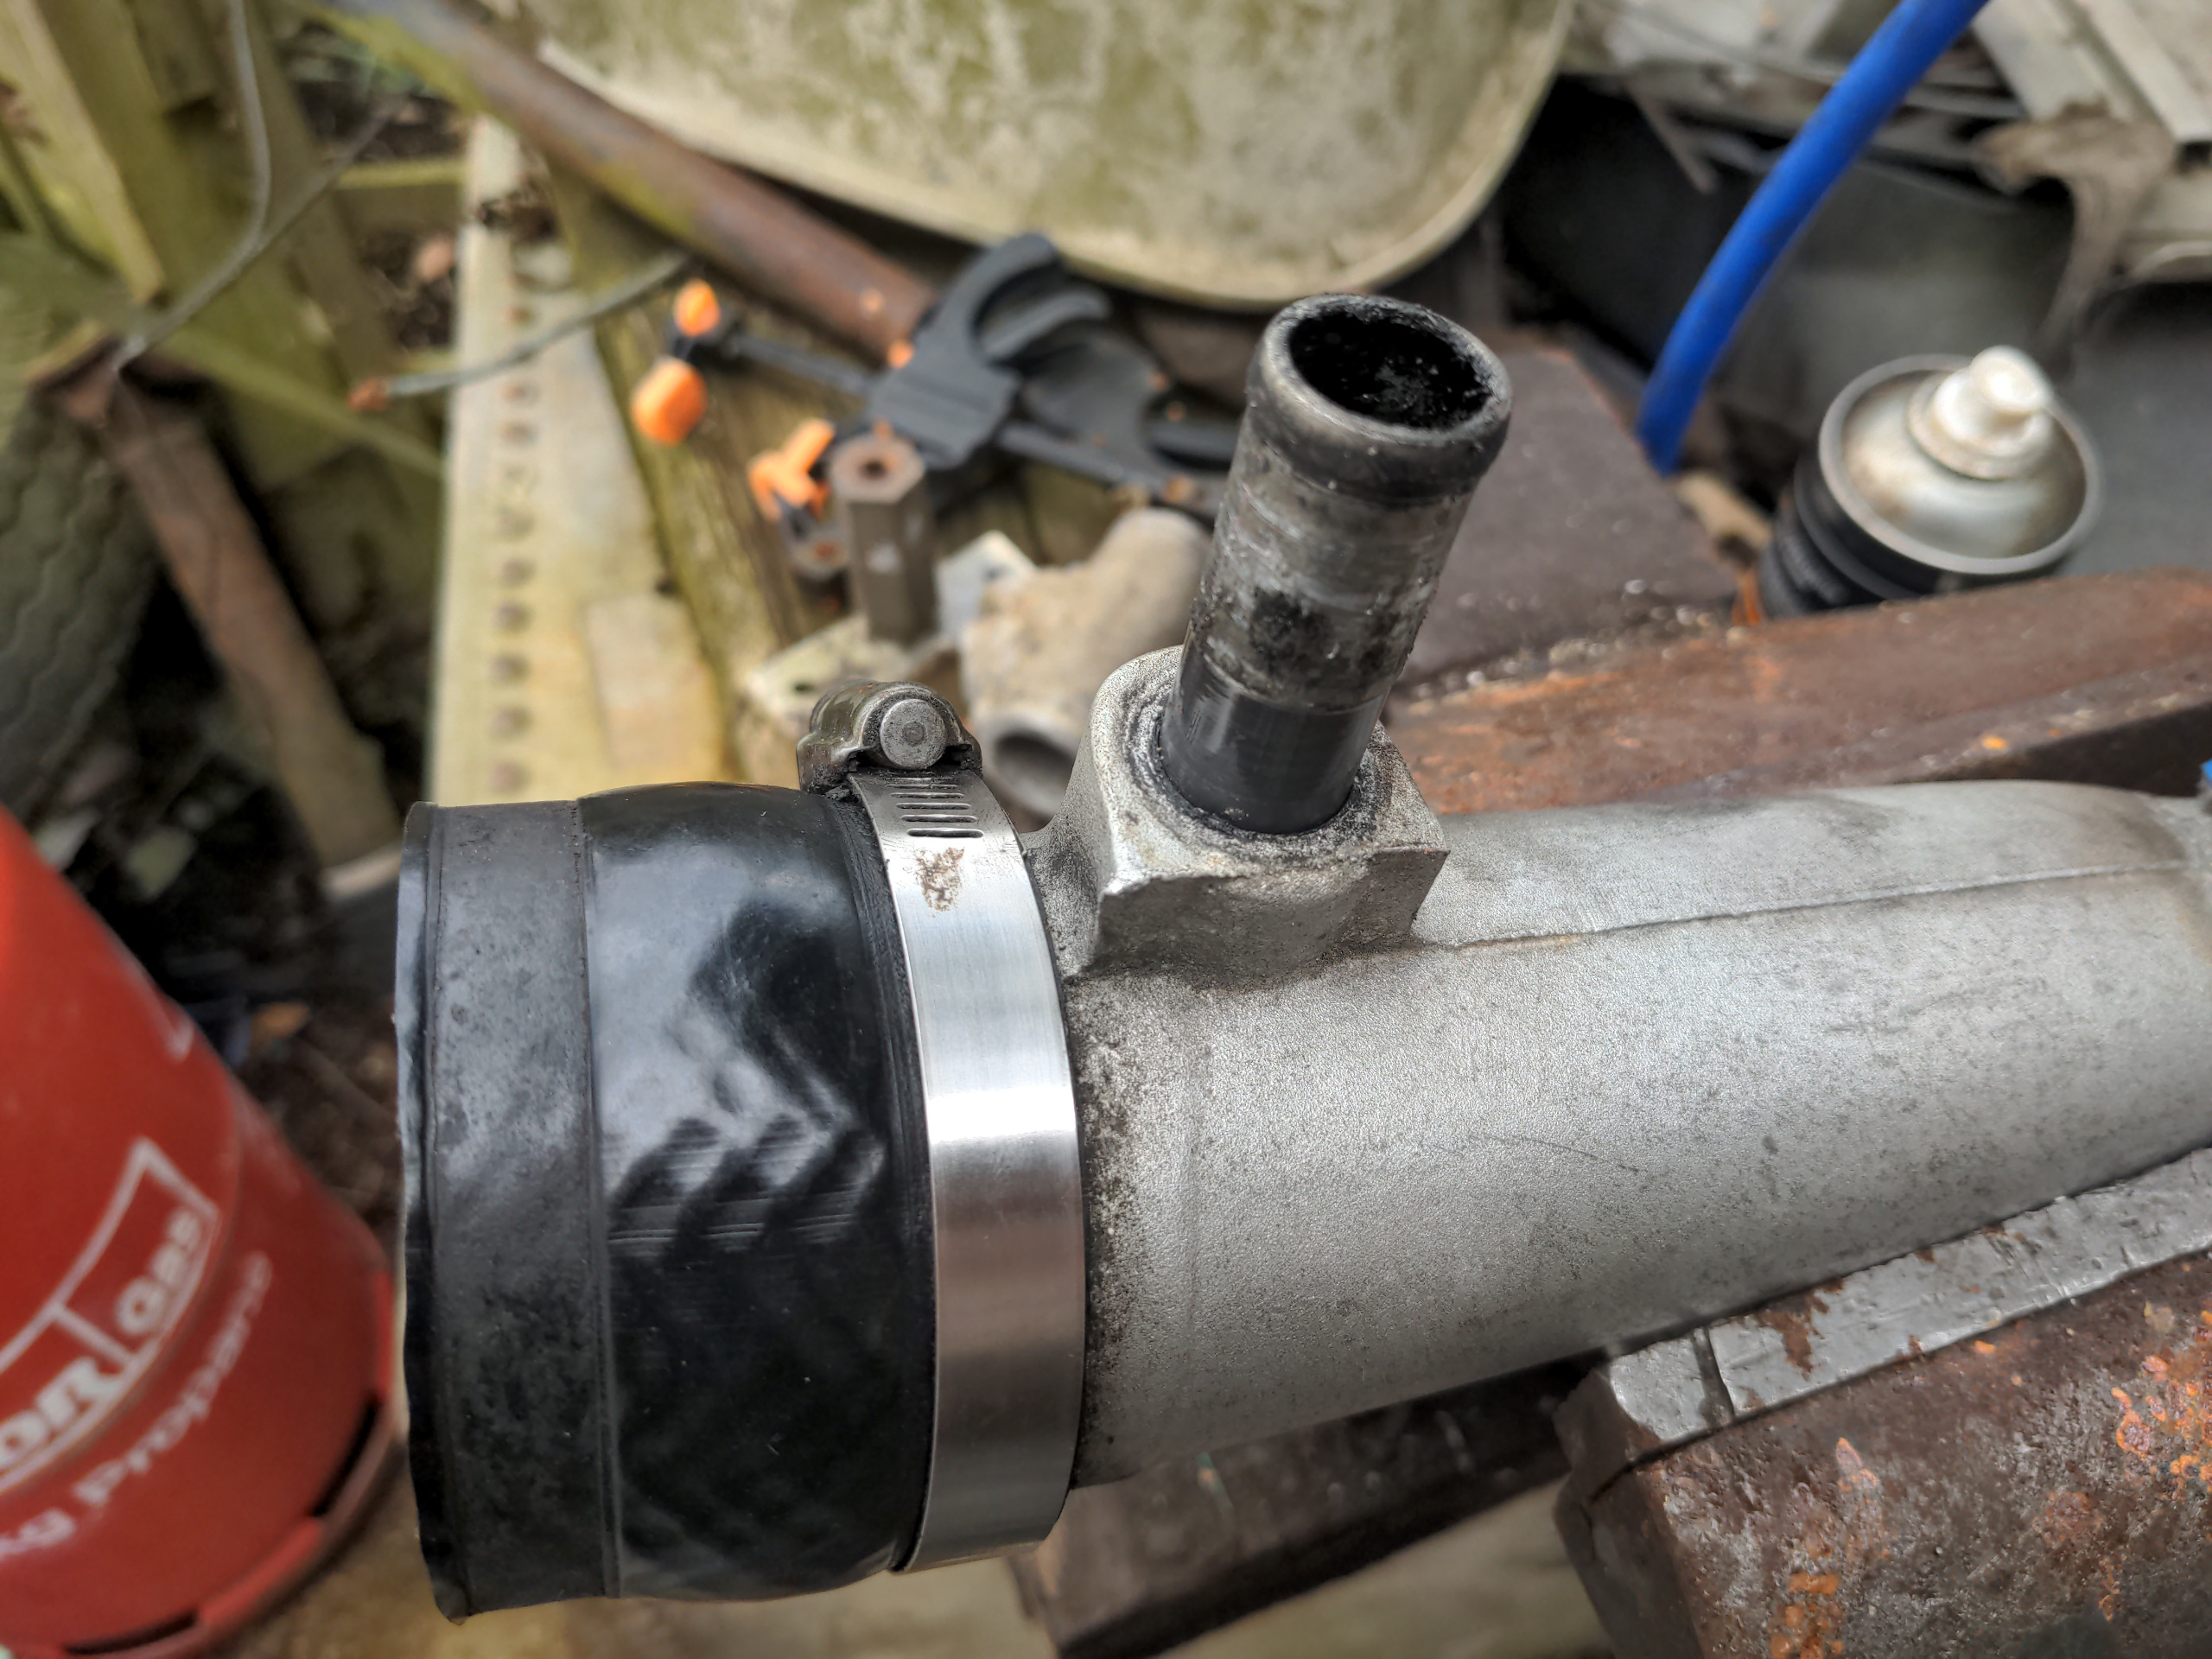
...that I didn't need to grind it off, because the stub is pressed in, which rather makes sense if you think about it for a few seconds. Mole grips pulled it out with not too much persuasion. There was no need to apply heat either. That disappointed me because I wanted an excuse to use my oxy-propane torch, because it is dangerous and exciting.
A brief debate with myself ensued as to how to blank off the hole. My first thought was that I could get or make a fractionally-oversized plug of aluminium, heat it up (excuse to use my oxy-propane torch), and force it into the hole with a hydraulic press. My second thought was that if this didn't work as well as I hoped my intake pipe would become a firearm about half a second after the turbo wakes up. That would be pretty sick, actually, but firearms are largely illegal in the United Kingdom. So the third thought was to tap an M18x1.5 thread into it and put a blanking plug (which is really just a somewhat pricey bolt) into it.
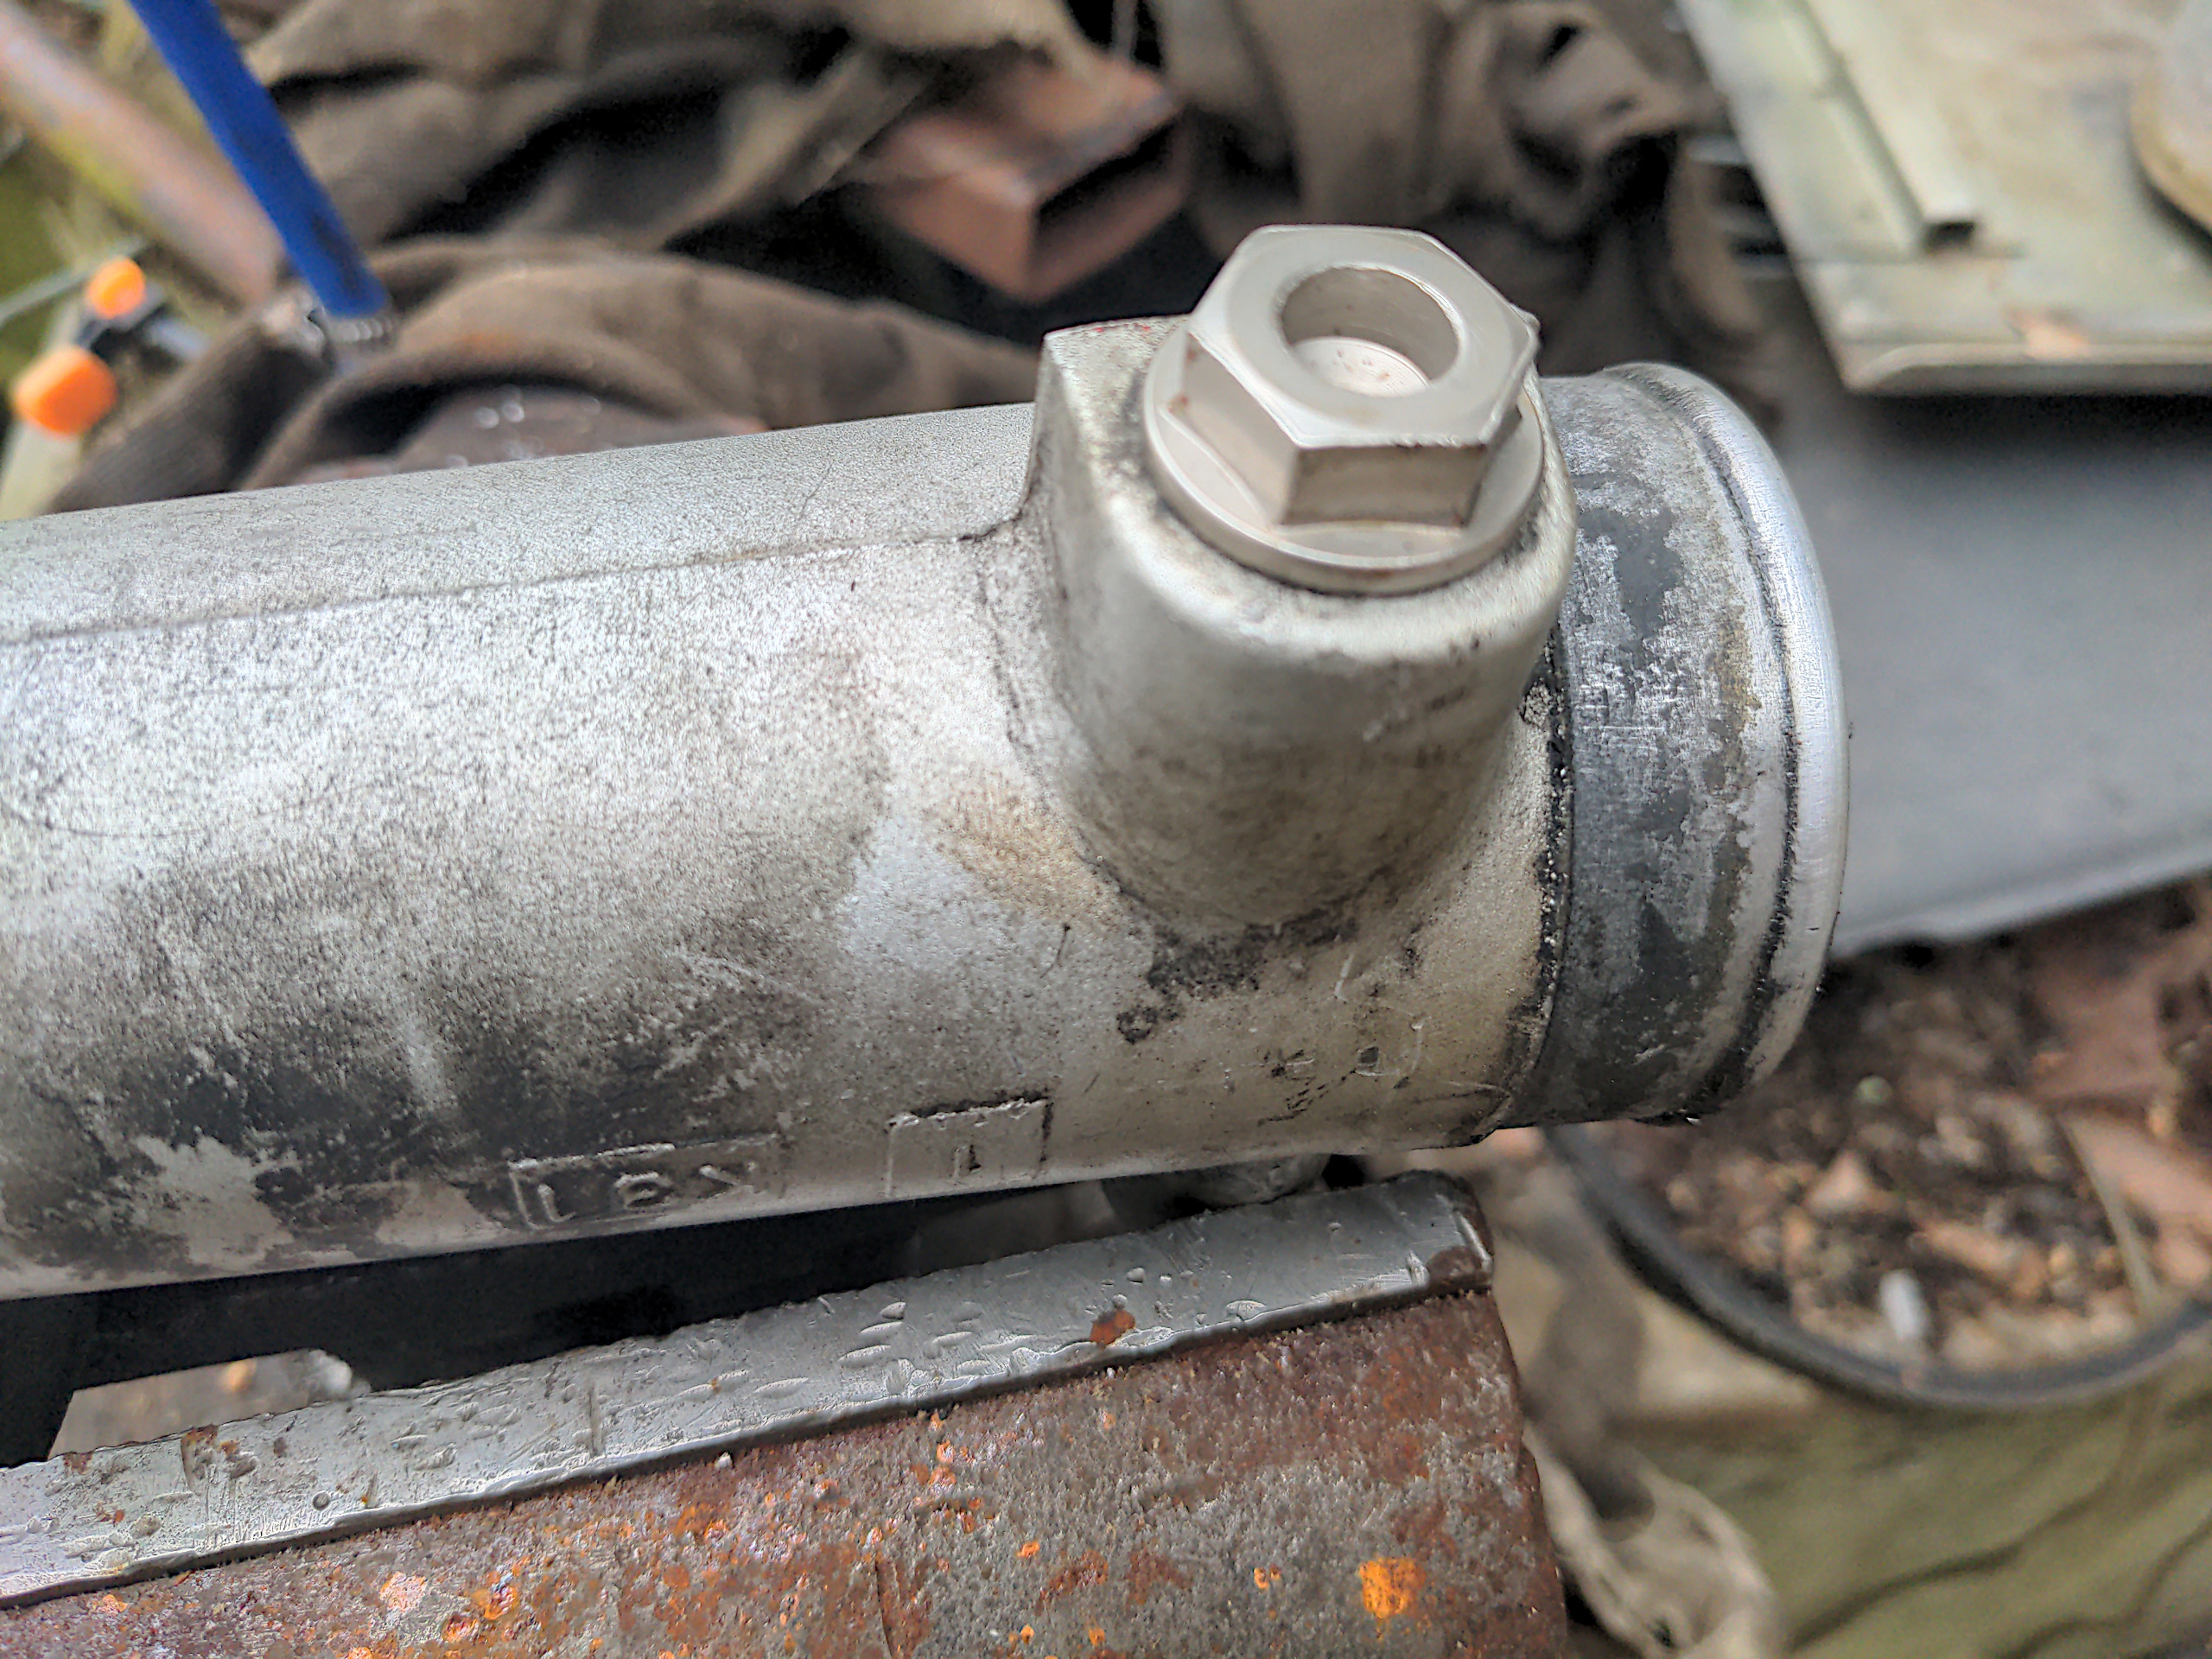
That looks tidy, and threading it gave me the option to screw a sensor or something in there in the future.
Next up was the dump valve. It is a Bailey DV26 (I think), and it is roughly 20 years old. It did the job well and it sounded nice, but I did not like the way it was attached.
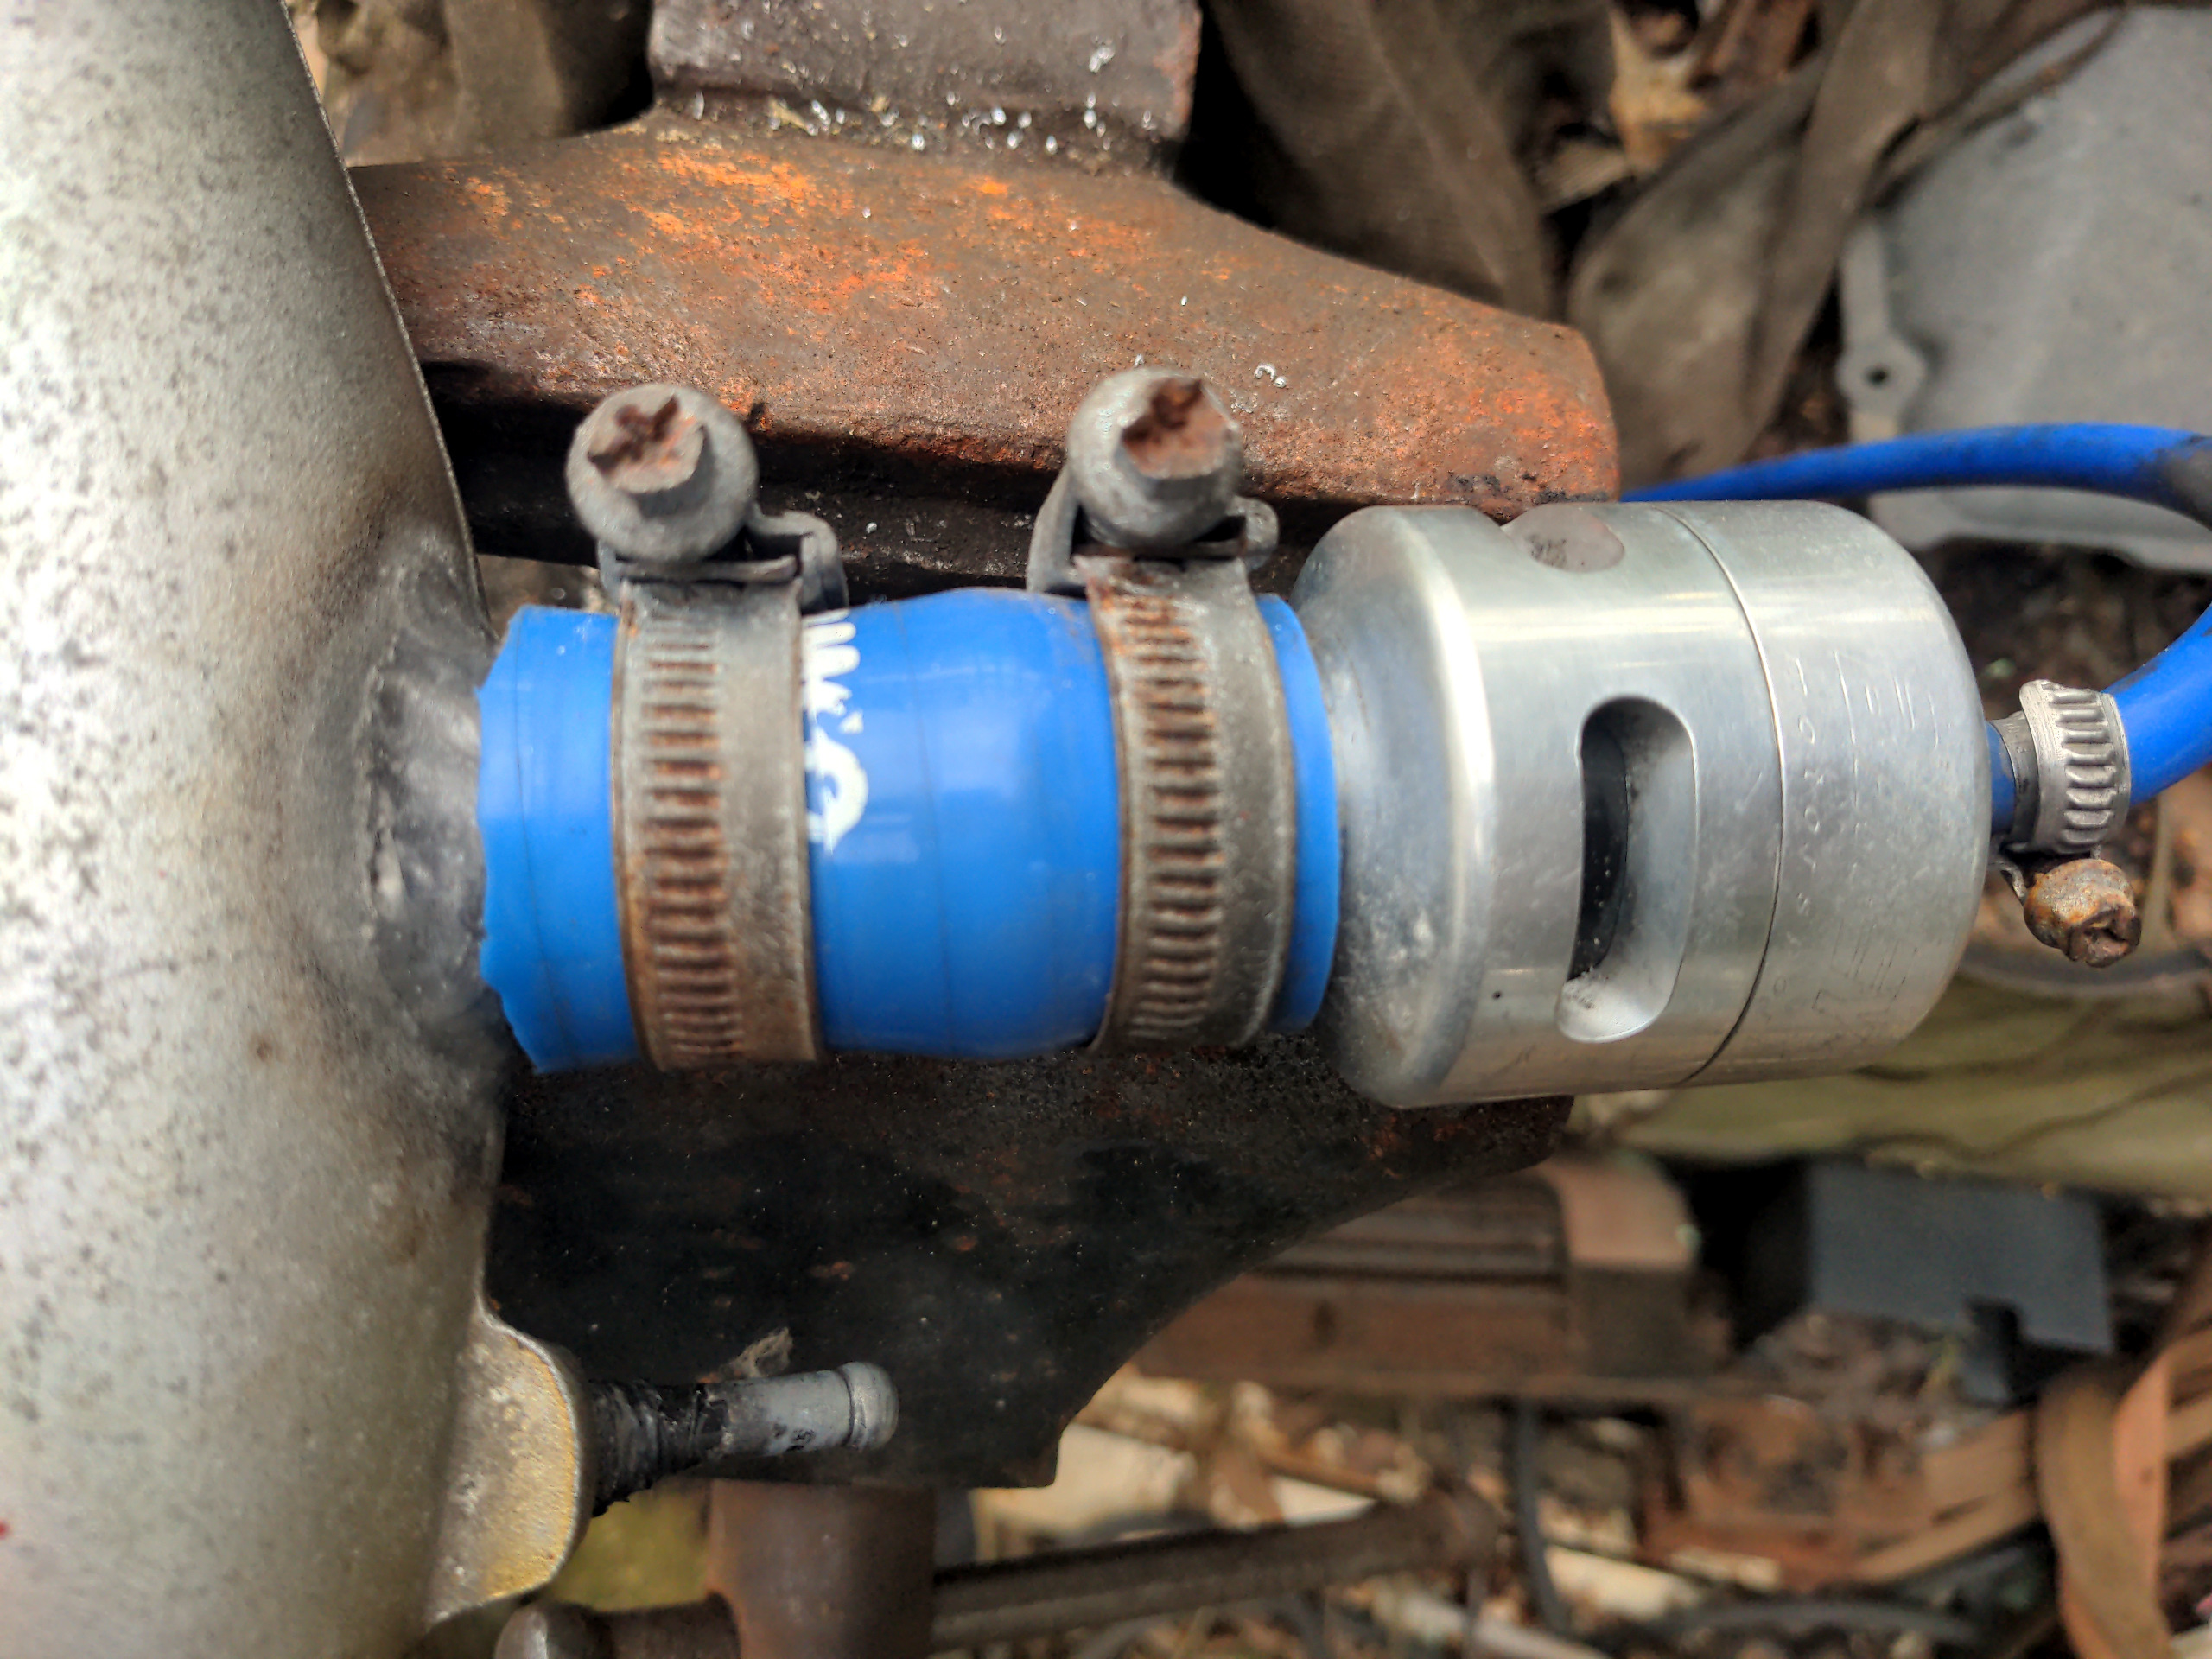
Specifically, I do not like the look of blue hoses; they are too blingy and "modified car"-looking. I actually bought some black hose to replace the blue hose, but changed my mind again because after testing the new hose I still didn't like the way it attached; the use of a coupling hose seemed unnecessarily complicated. I had some thought about cutting a thread onto the end of the Bailey BOV and then screwing that into a step-down threaded adapter to the M18 thread I made earlier. Or, I could throw it in the bin...
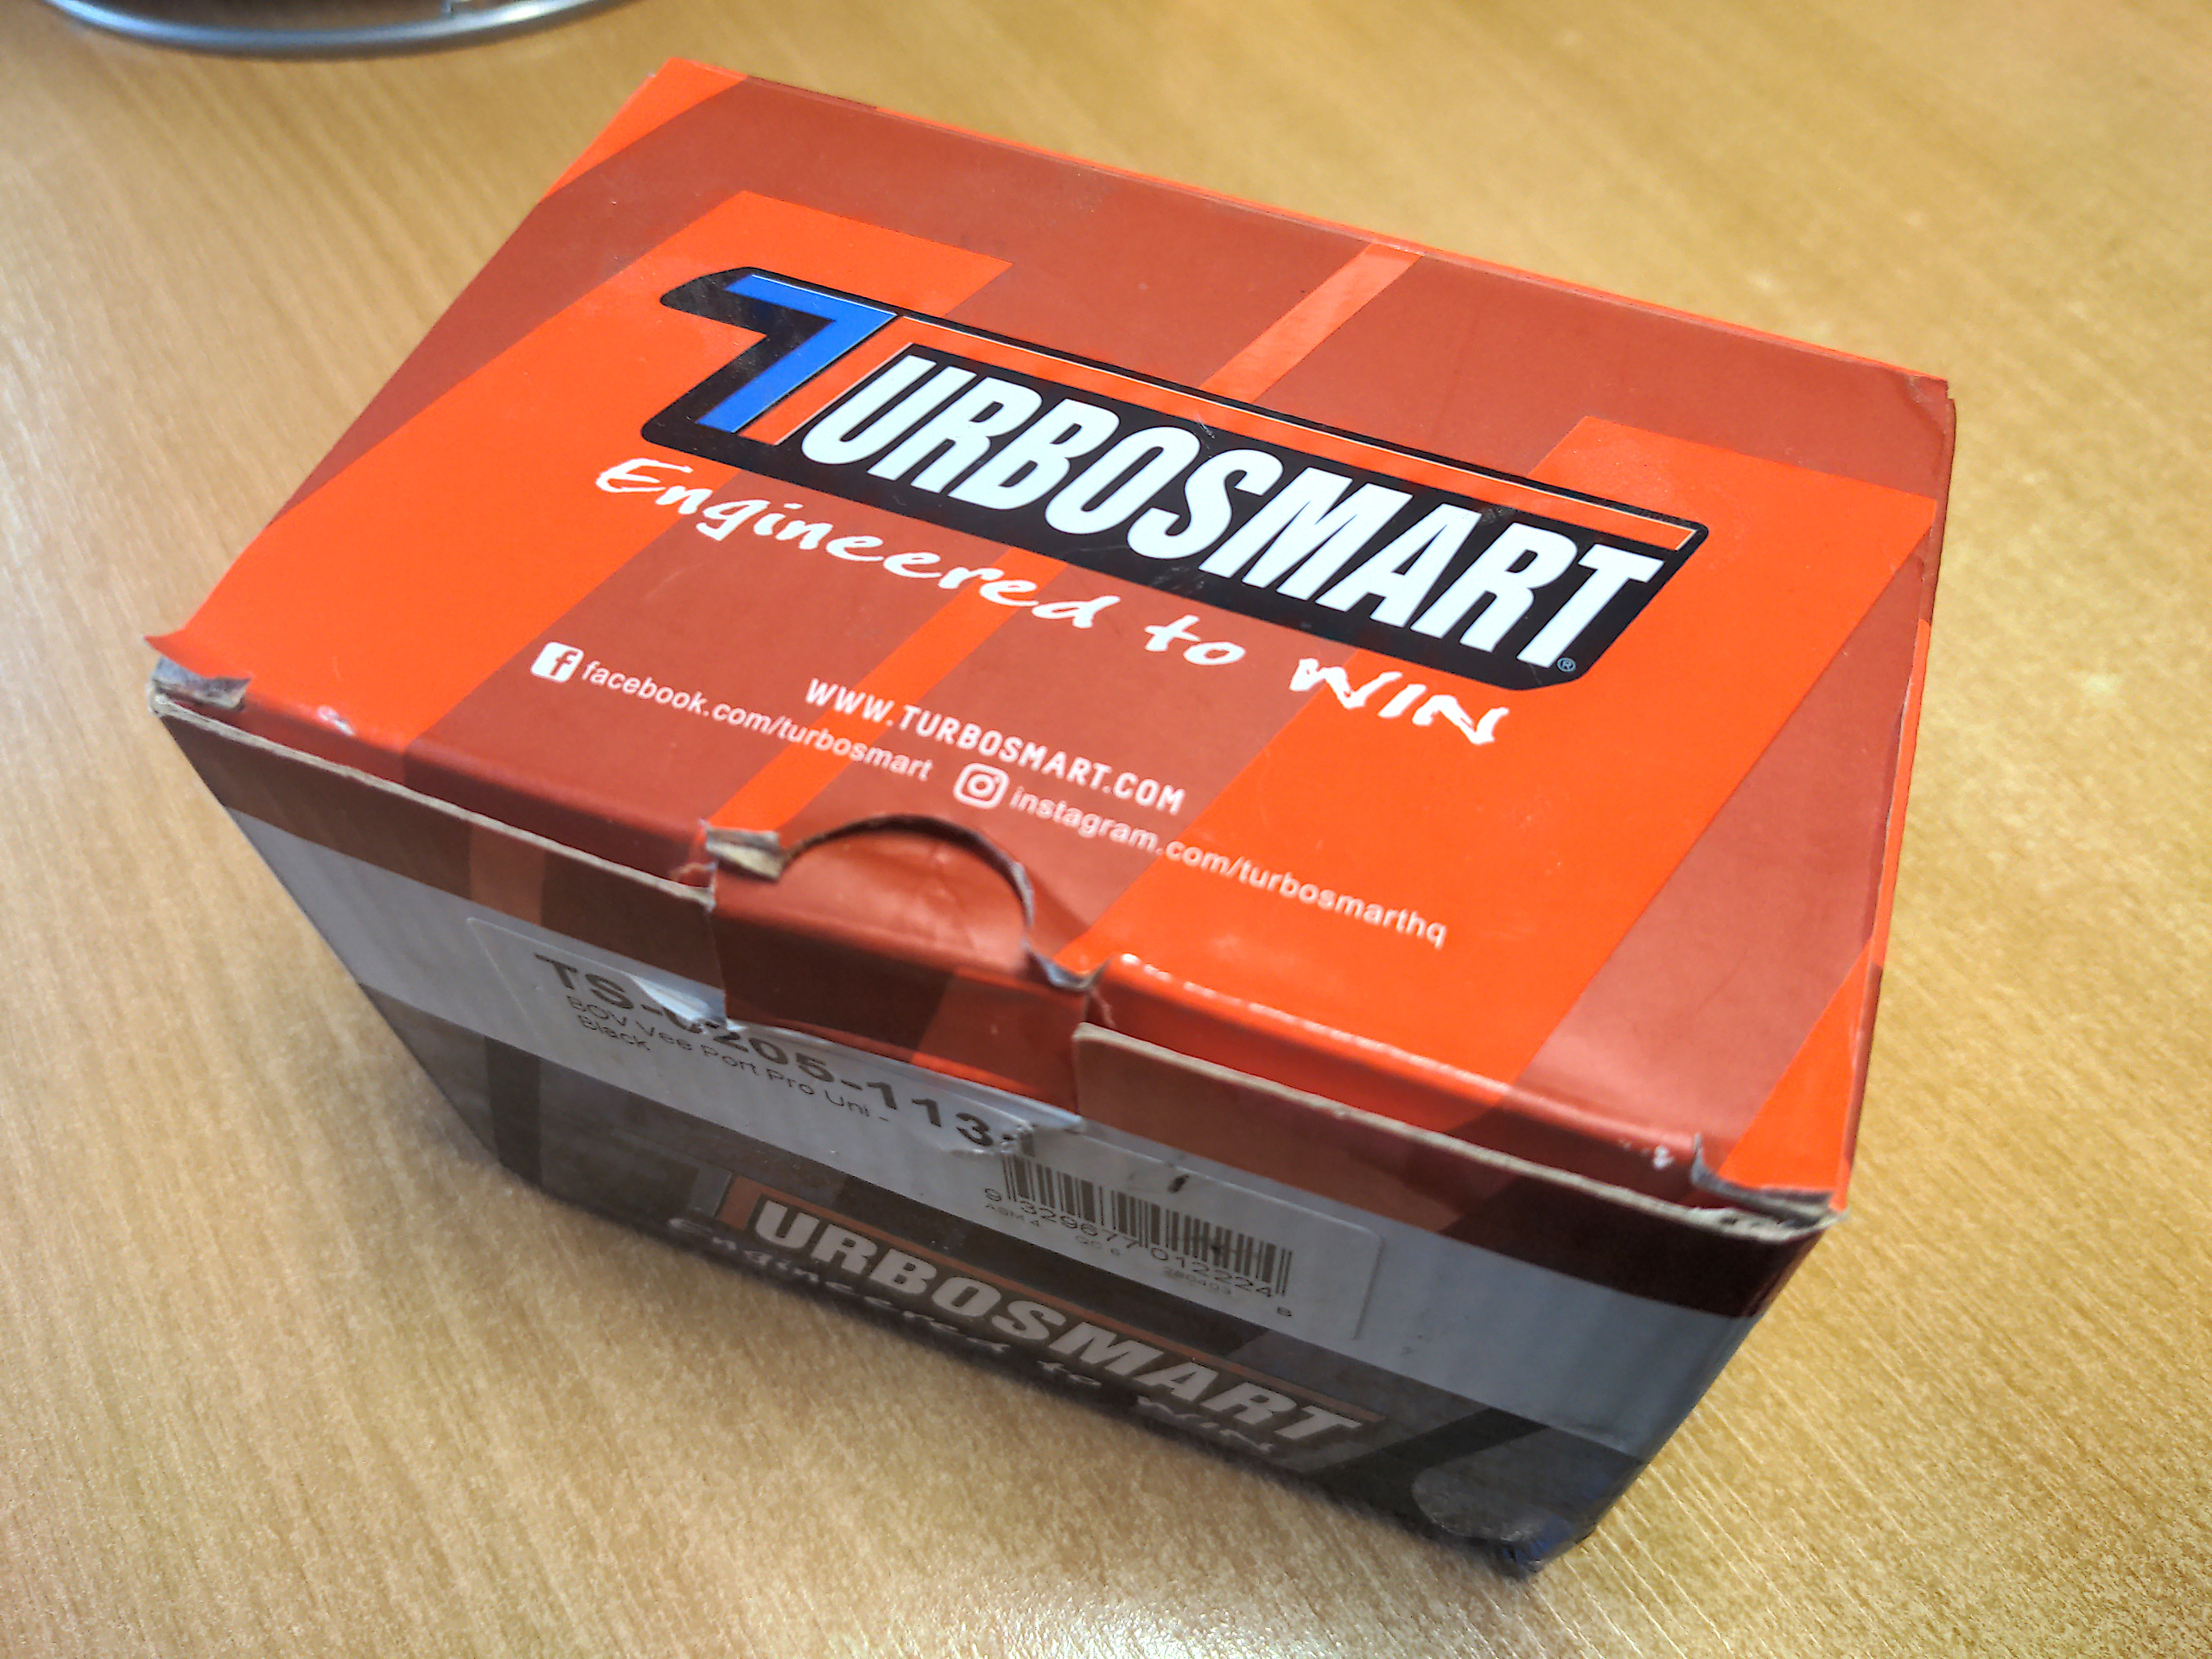
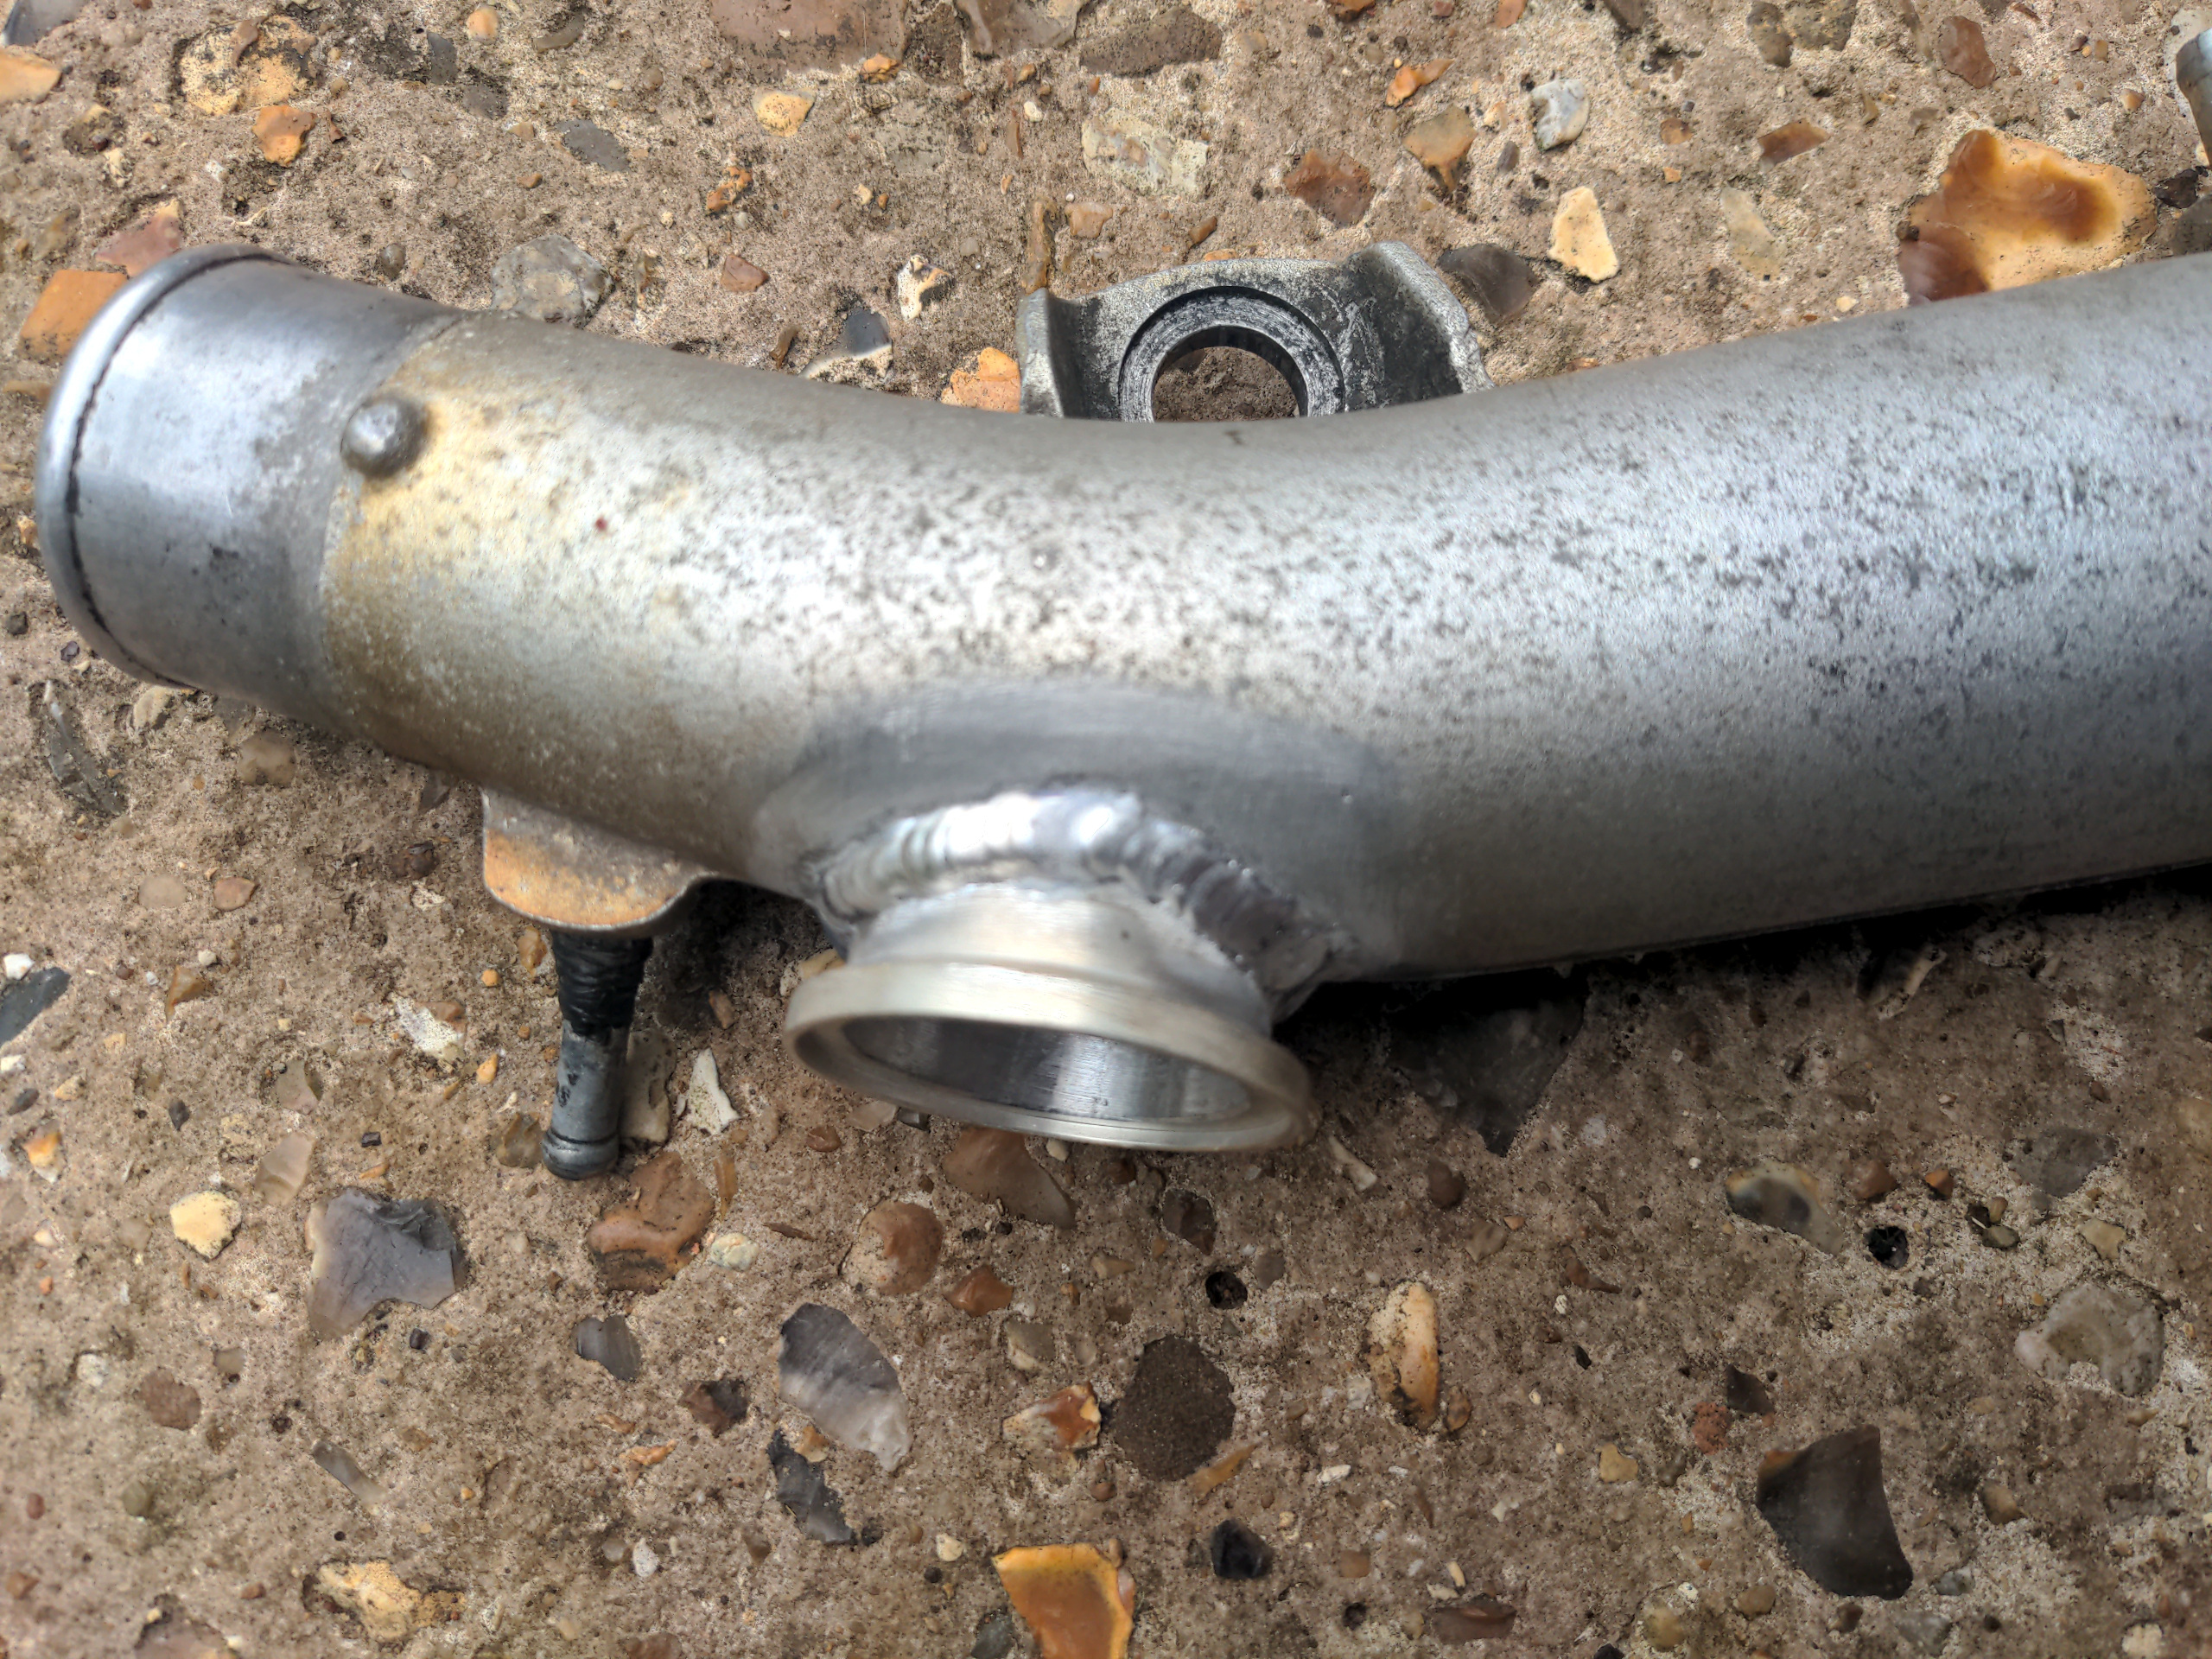
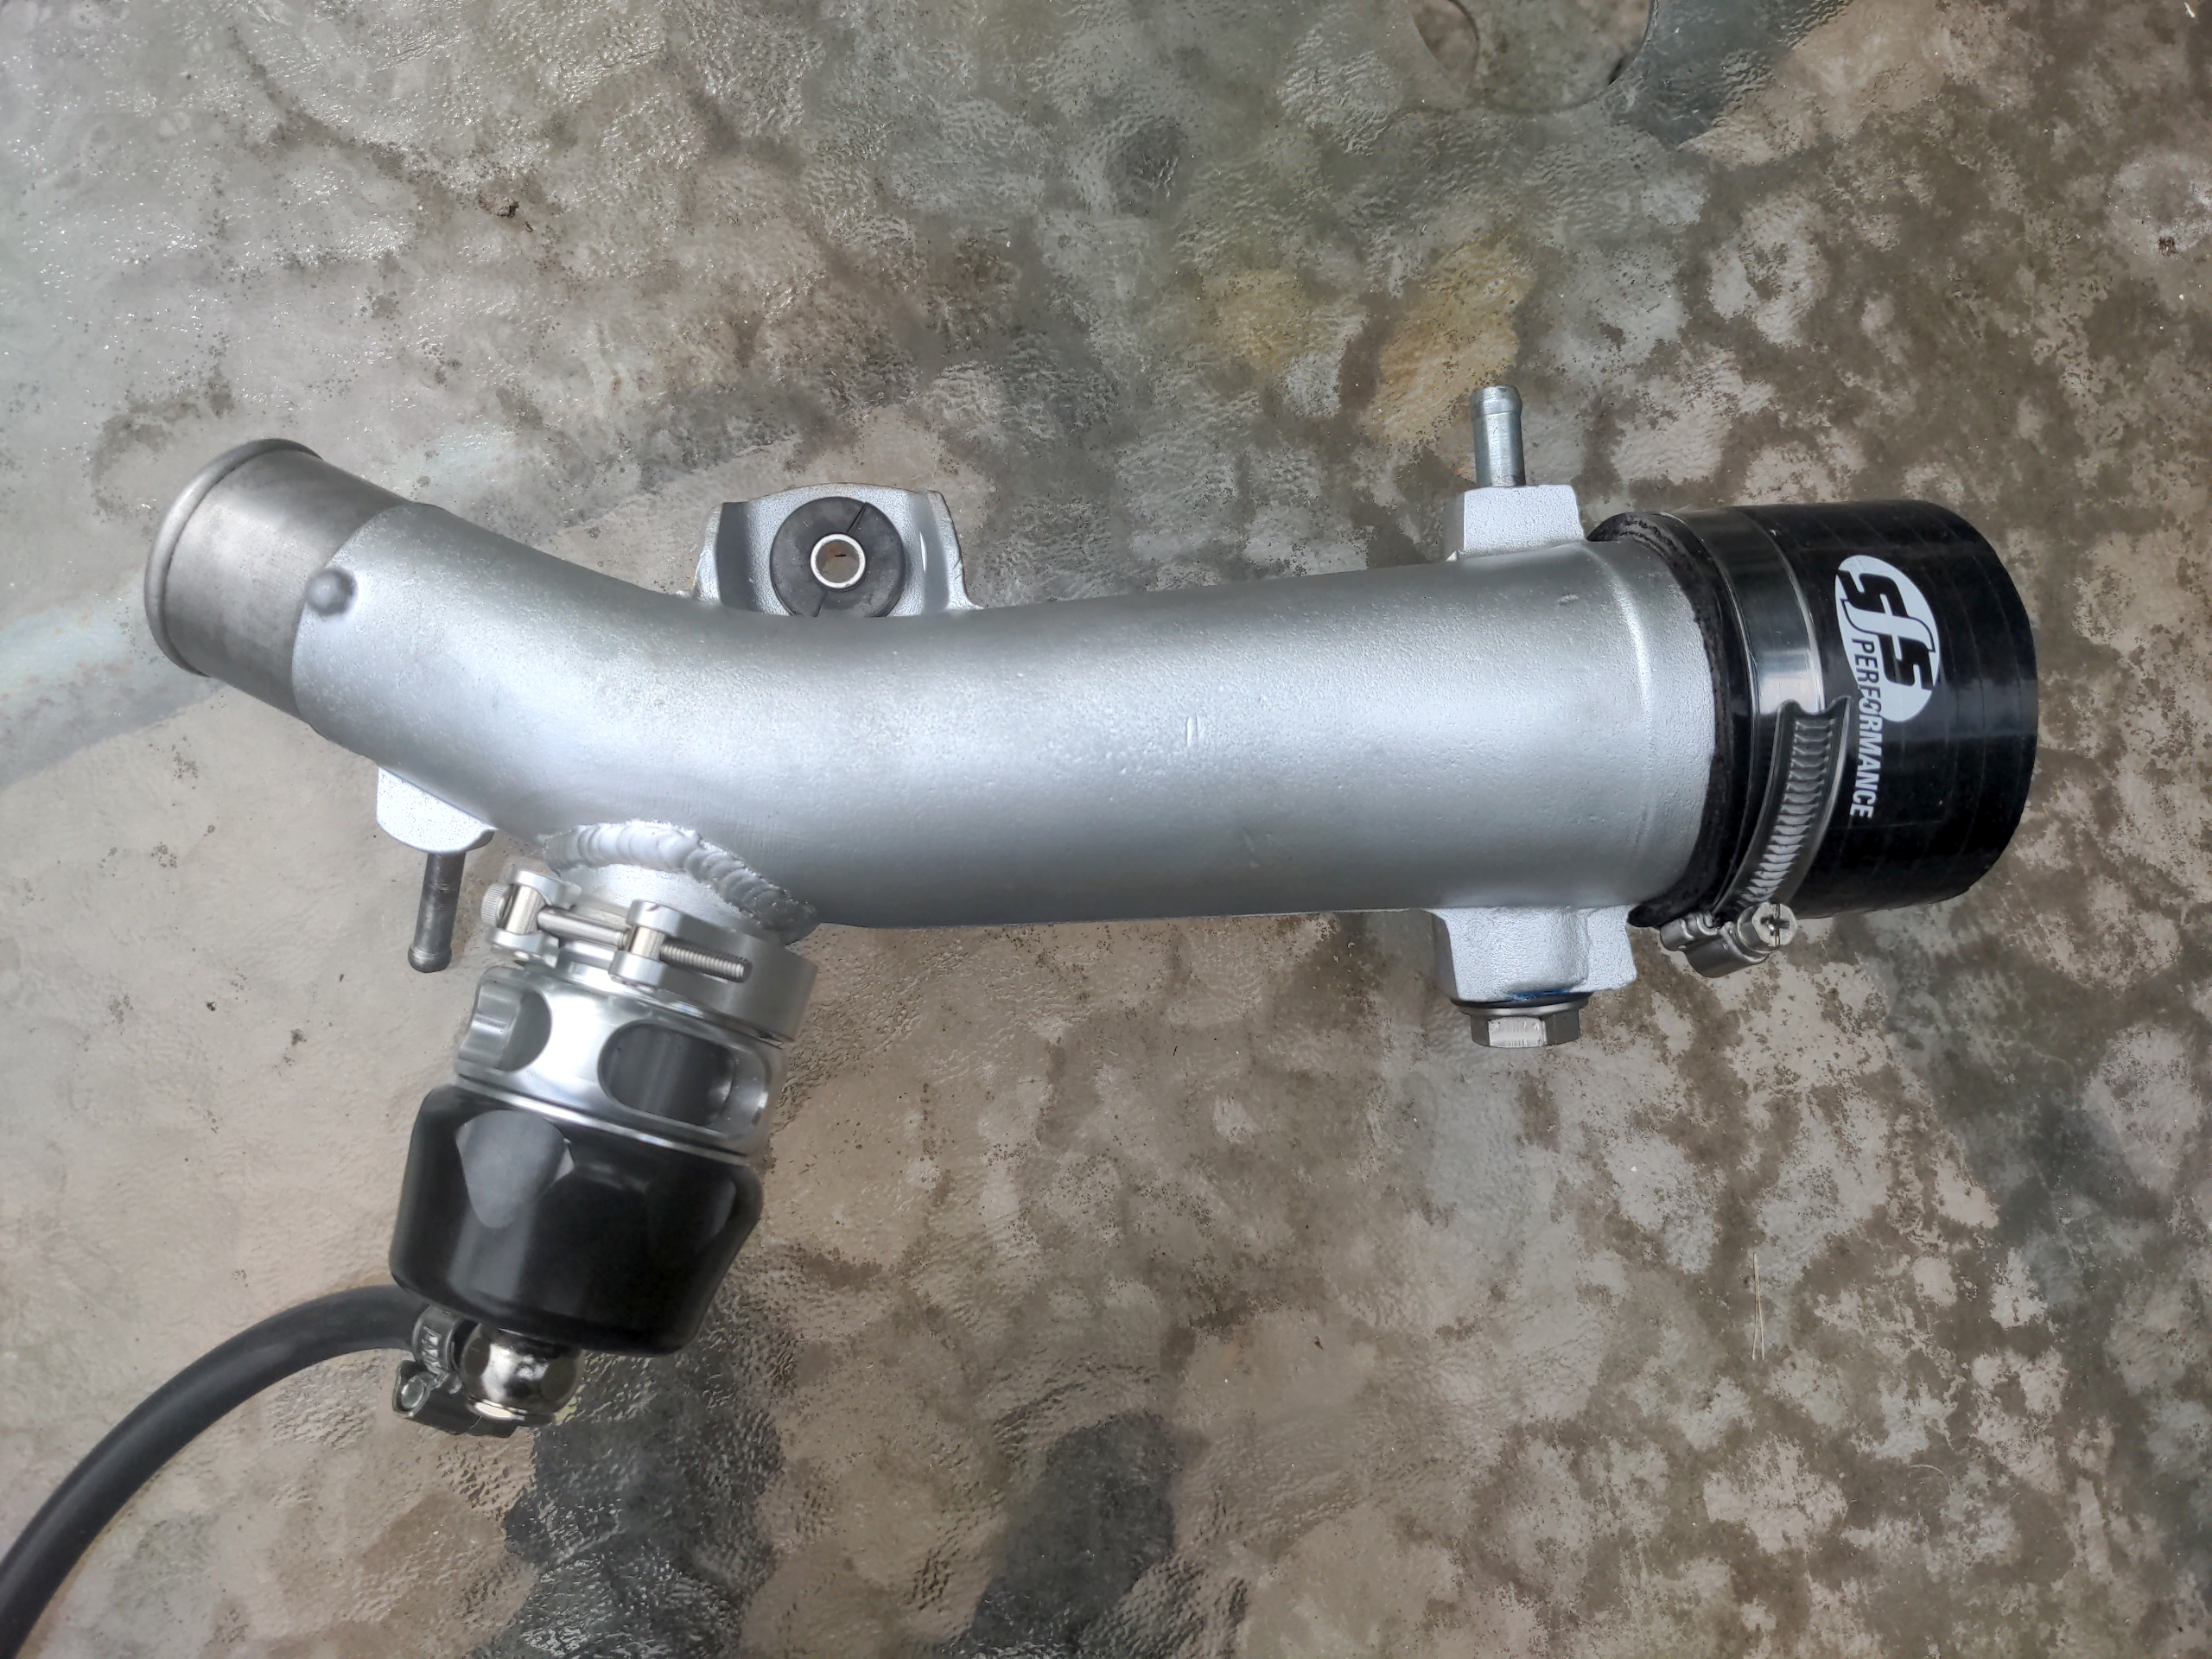
...and replace all of it with a Turbosmart Vee Port Pro instead!! The Turbosmart is V-band-clamped to a weld-on flange, which is compact and looks nice. My friendly local TIG welder took care of welding the flange on.
(I kid about throwing it in the bin; I liked the Bailey BOV too much as a piece of engineering to do that, so I chucked it into one of my "I'll do something with that some day" parts boxes. If you're here from a Web search looking for a Bailey DV26 dump valve for some strange reason, drop me a line! You can have it for the cost of postage.)
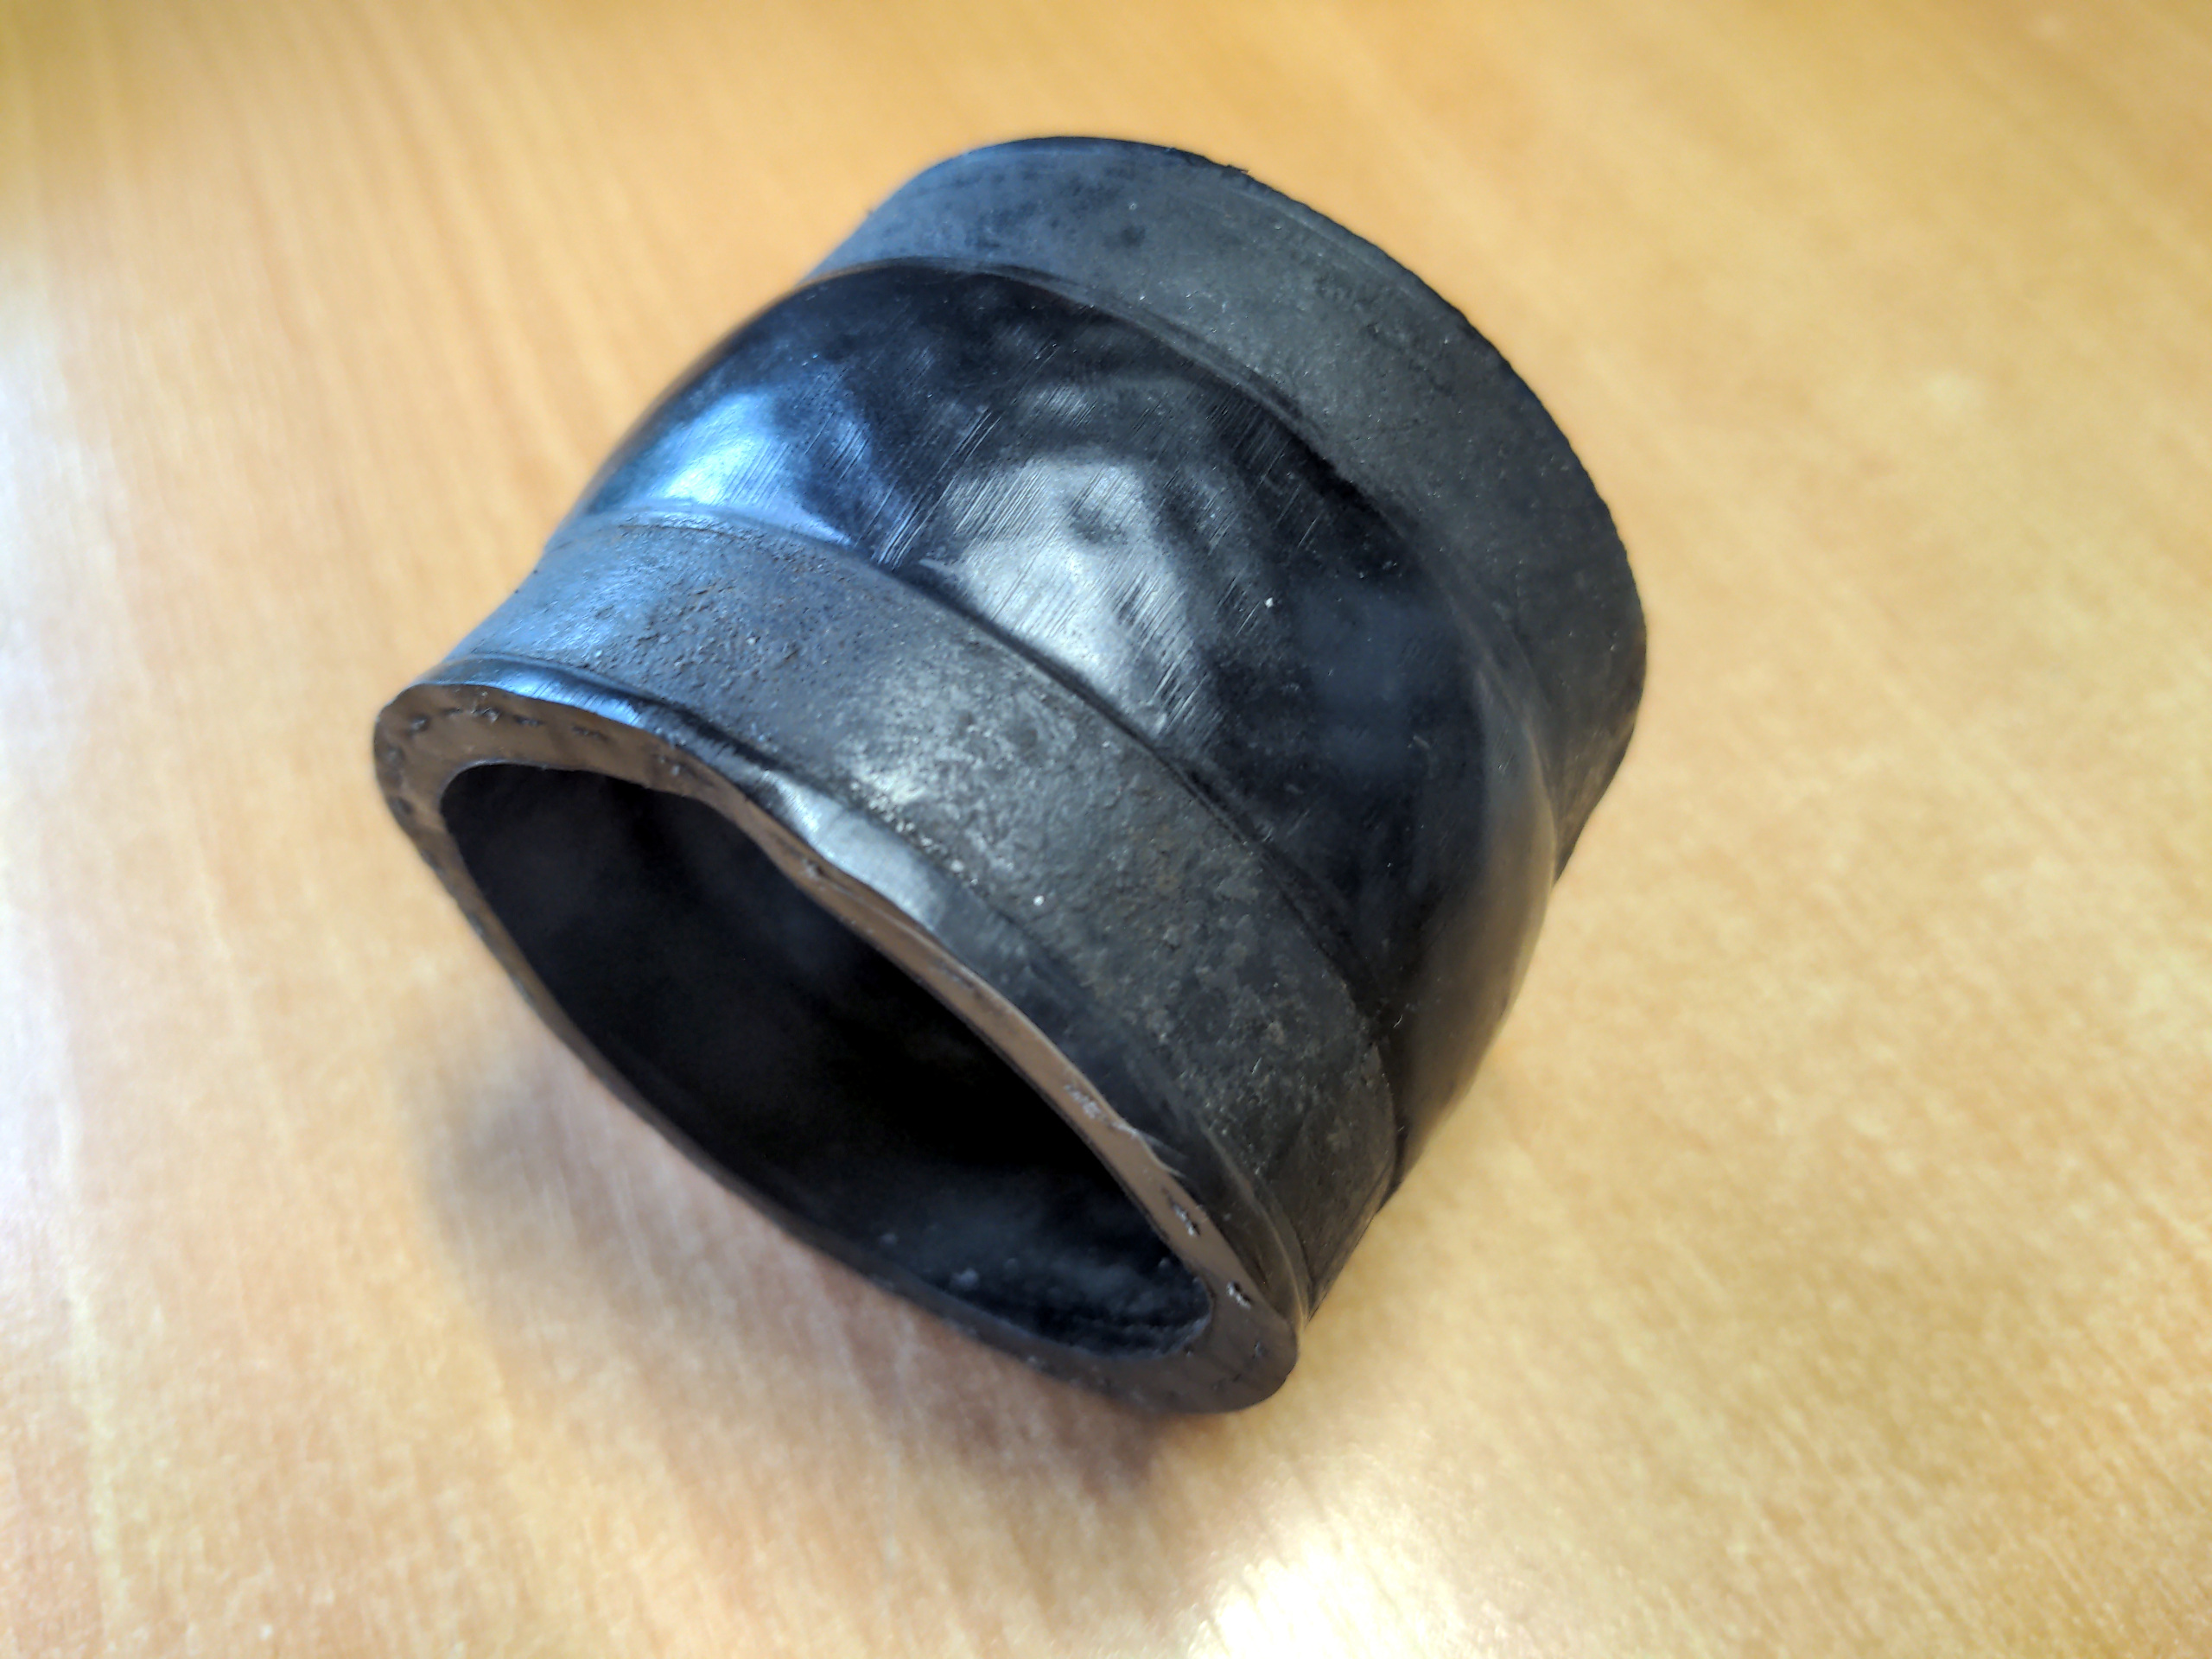
When I stripped the pipe of its components, this mounting rubber fell apart.
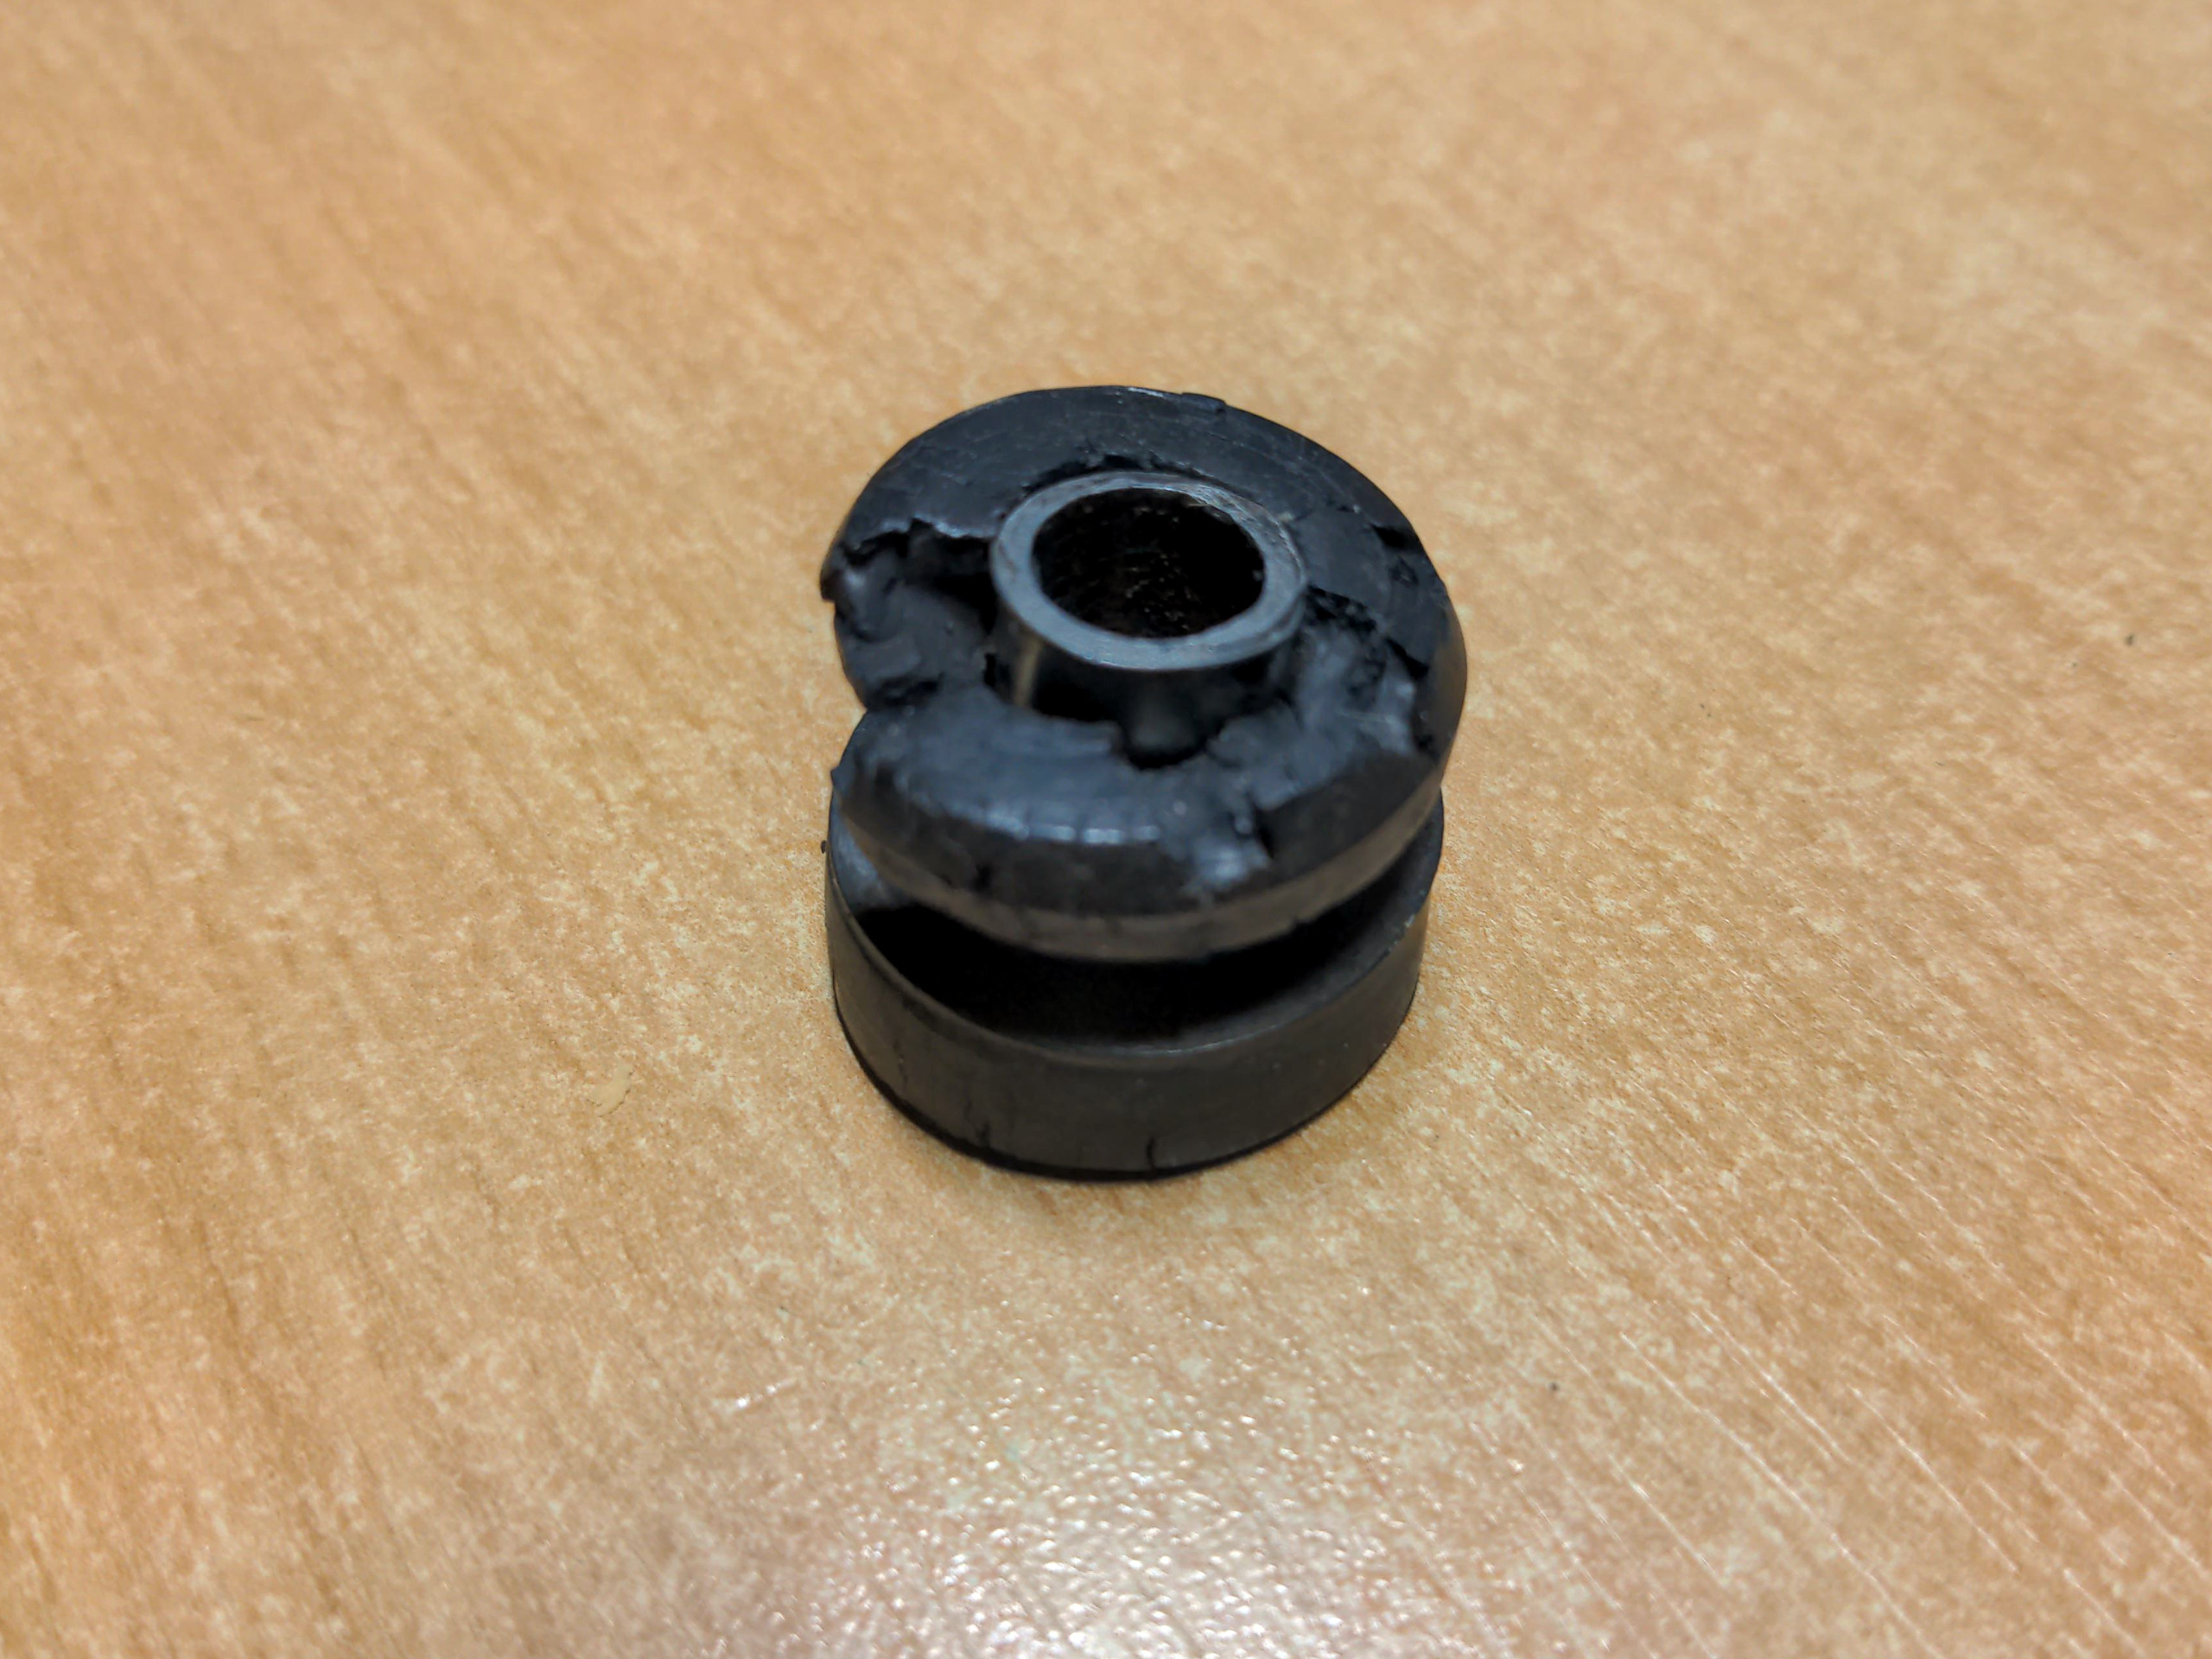
I am not blaming the mounting rubber; I prodded it with a screwdriver to make it move, and it fell apart because it is old. I am sure I could have gotten a less destructive result with a more delicate removal technique, but life is short.
As with almost all GTX-specific parts, these mounting rubbers do not exist anymore. It took an entire evening of eBay searches to work out that you can substitute this with the fuel tank mounting rubber from an early-80s Yamaha TY 250!
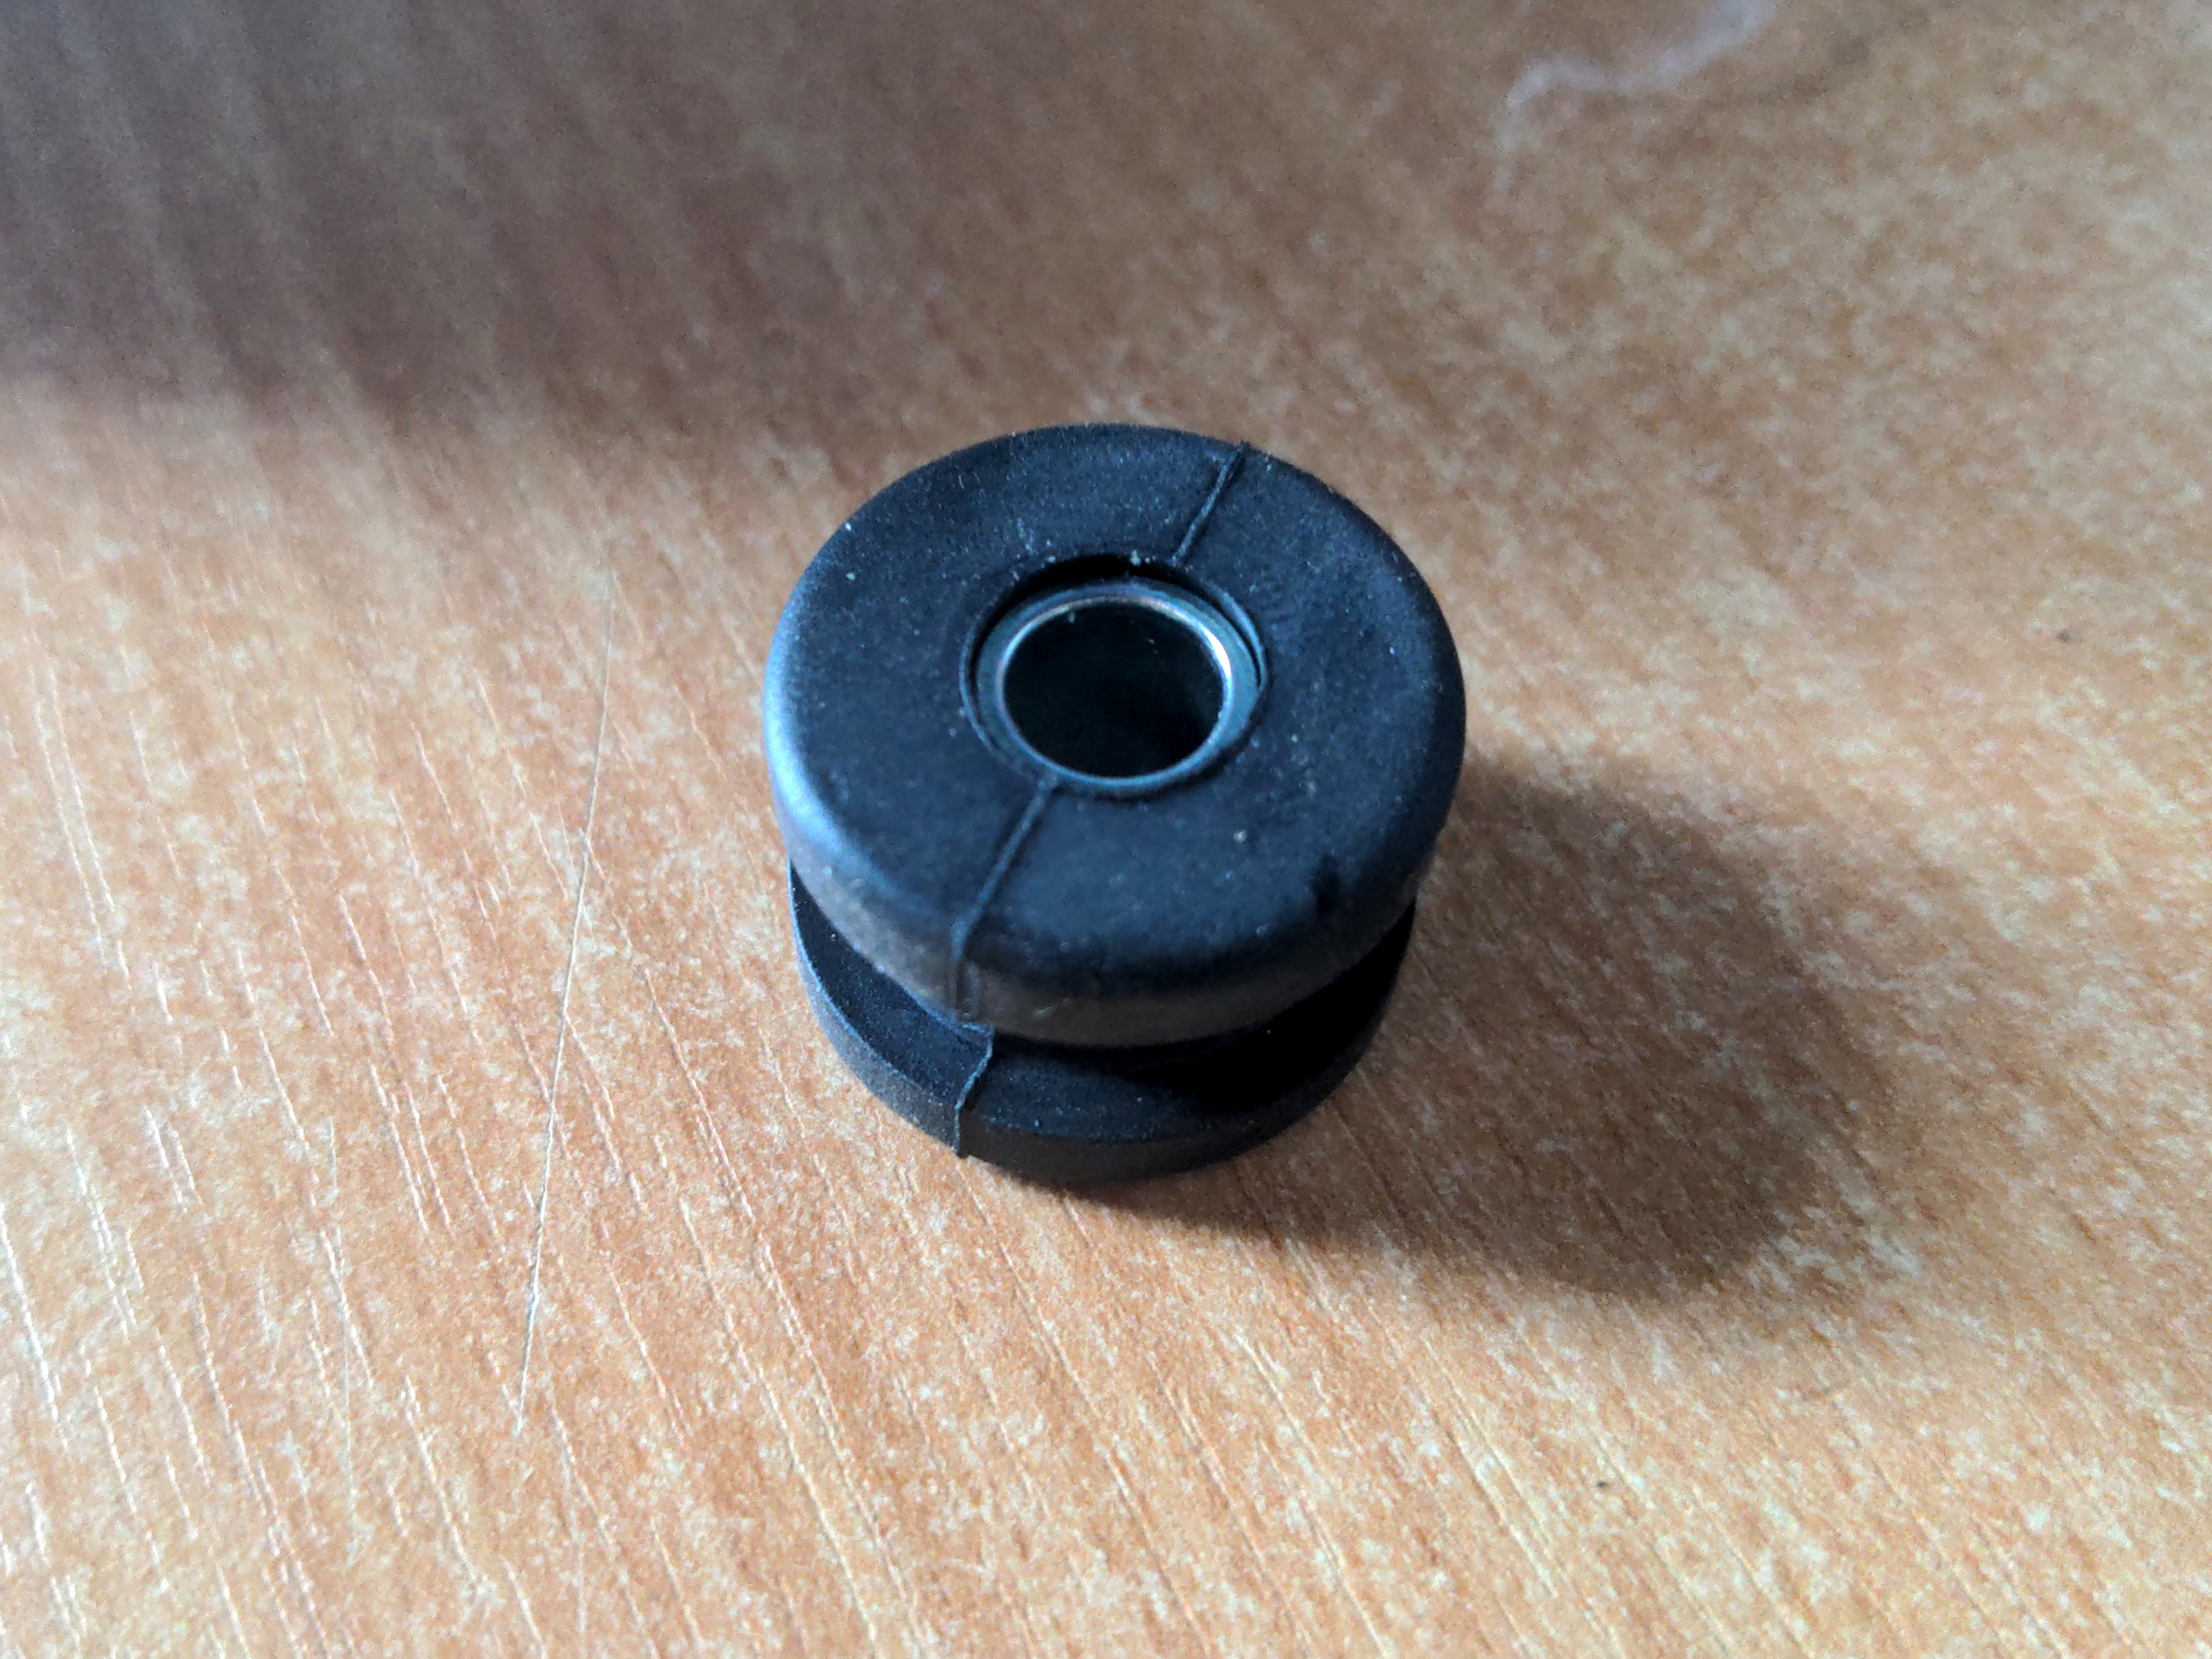
It has exactly the same diameters (plural intended) and it is of the correct shape. It is a little bit shallower, so it may require a small spacer underneath it on the engine side to make it fit right. I'll only find out when the engine goes back together.
The coupler hose from this pipe to the intake manifold was OK, because it coupled two things together adequately.
But, with everything dismantled, it'd be mad not to replace it and its six-hundred-year old Jubilee clips with something newer and tidier.
I learned the trick for cutting flexible reinforced silicone hoses like this: Clamp it tightly to a piece of tube using whatever clamp you plan on using when the hose is on your car, then use the clamp itself as a cutting guide. Obvious, isn't it? I am embarrassed that I didn't think of this myself! I got it from a YouTube video.
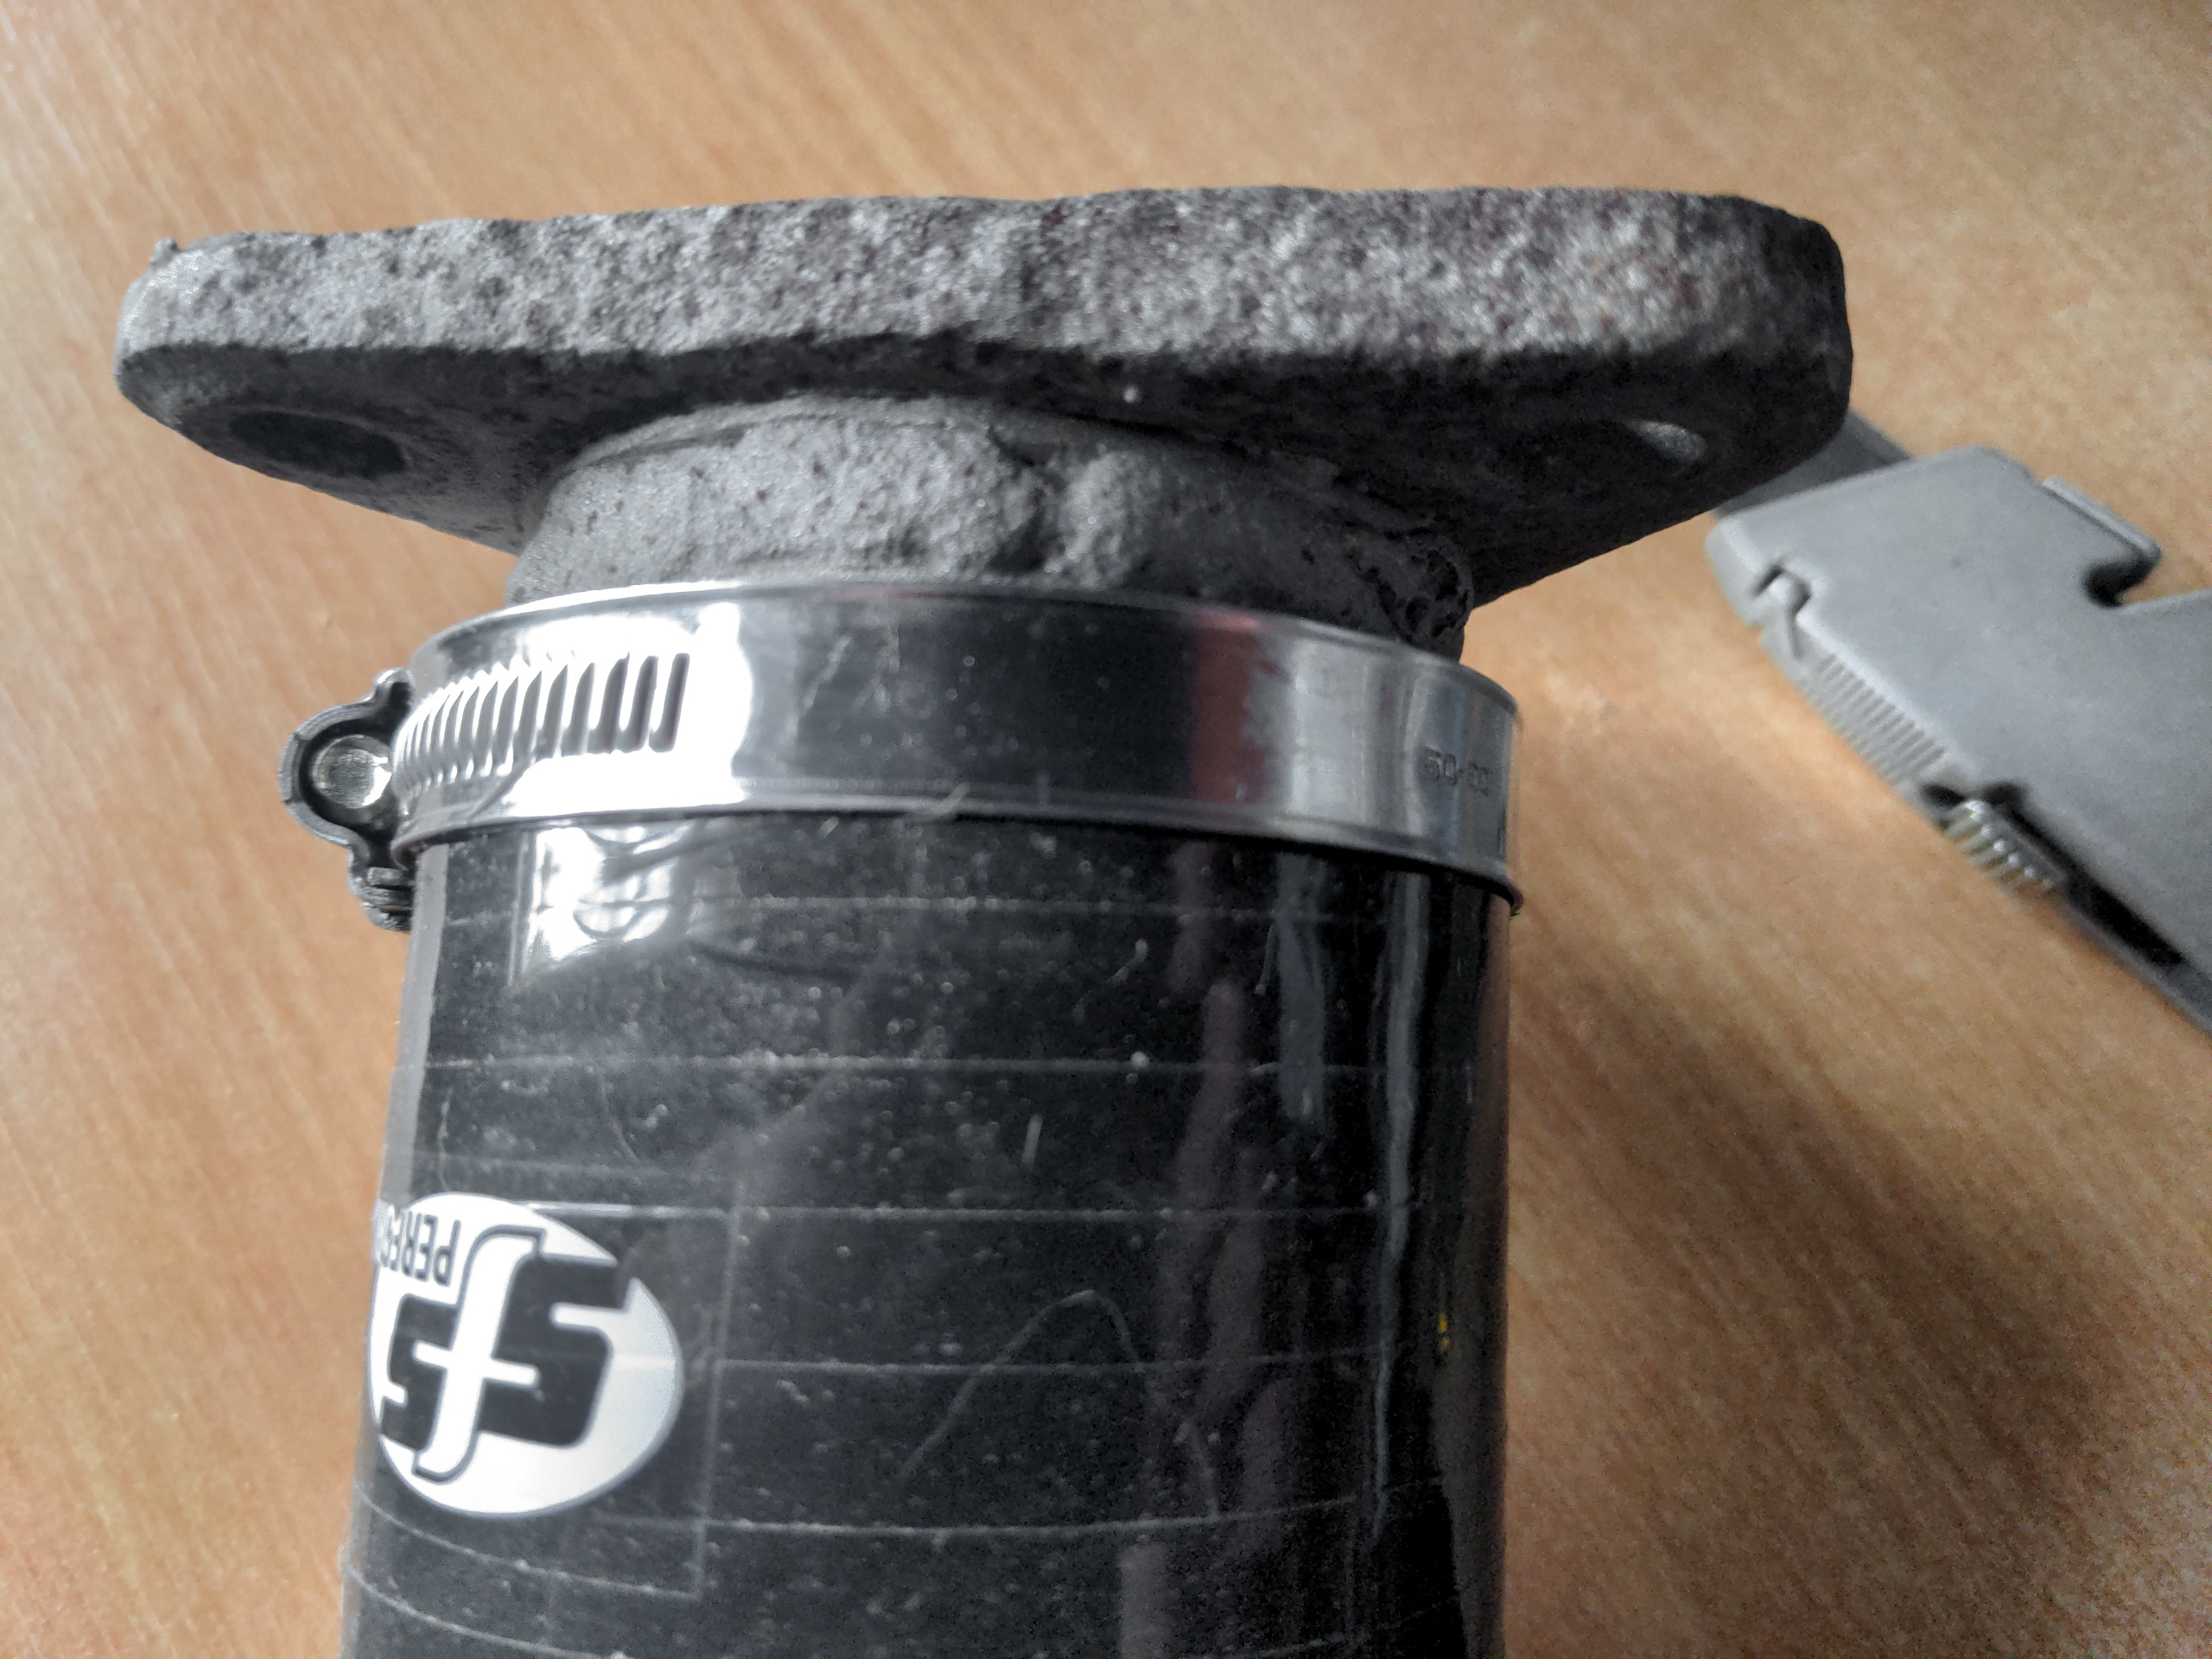
As it happened, the amount of excess I needed to cut off was exactly two Jubilee clips wide. This made it easier to cut perfectly straight. I clamped it to a piece of exhaust tube and and cut off one Jubilee-clip-width top and bottom, so that the SFS Performance logo was exactly centred along the length.
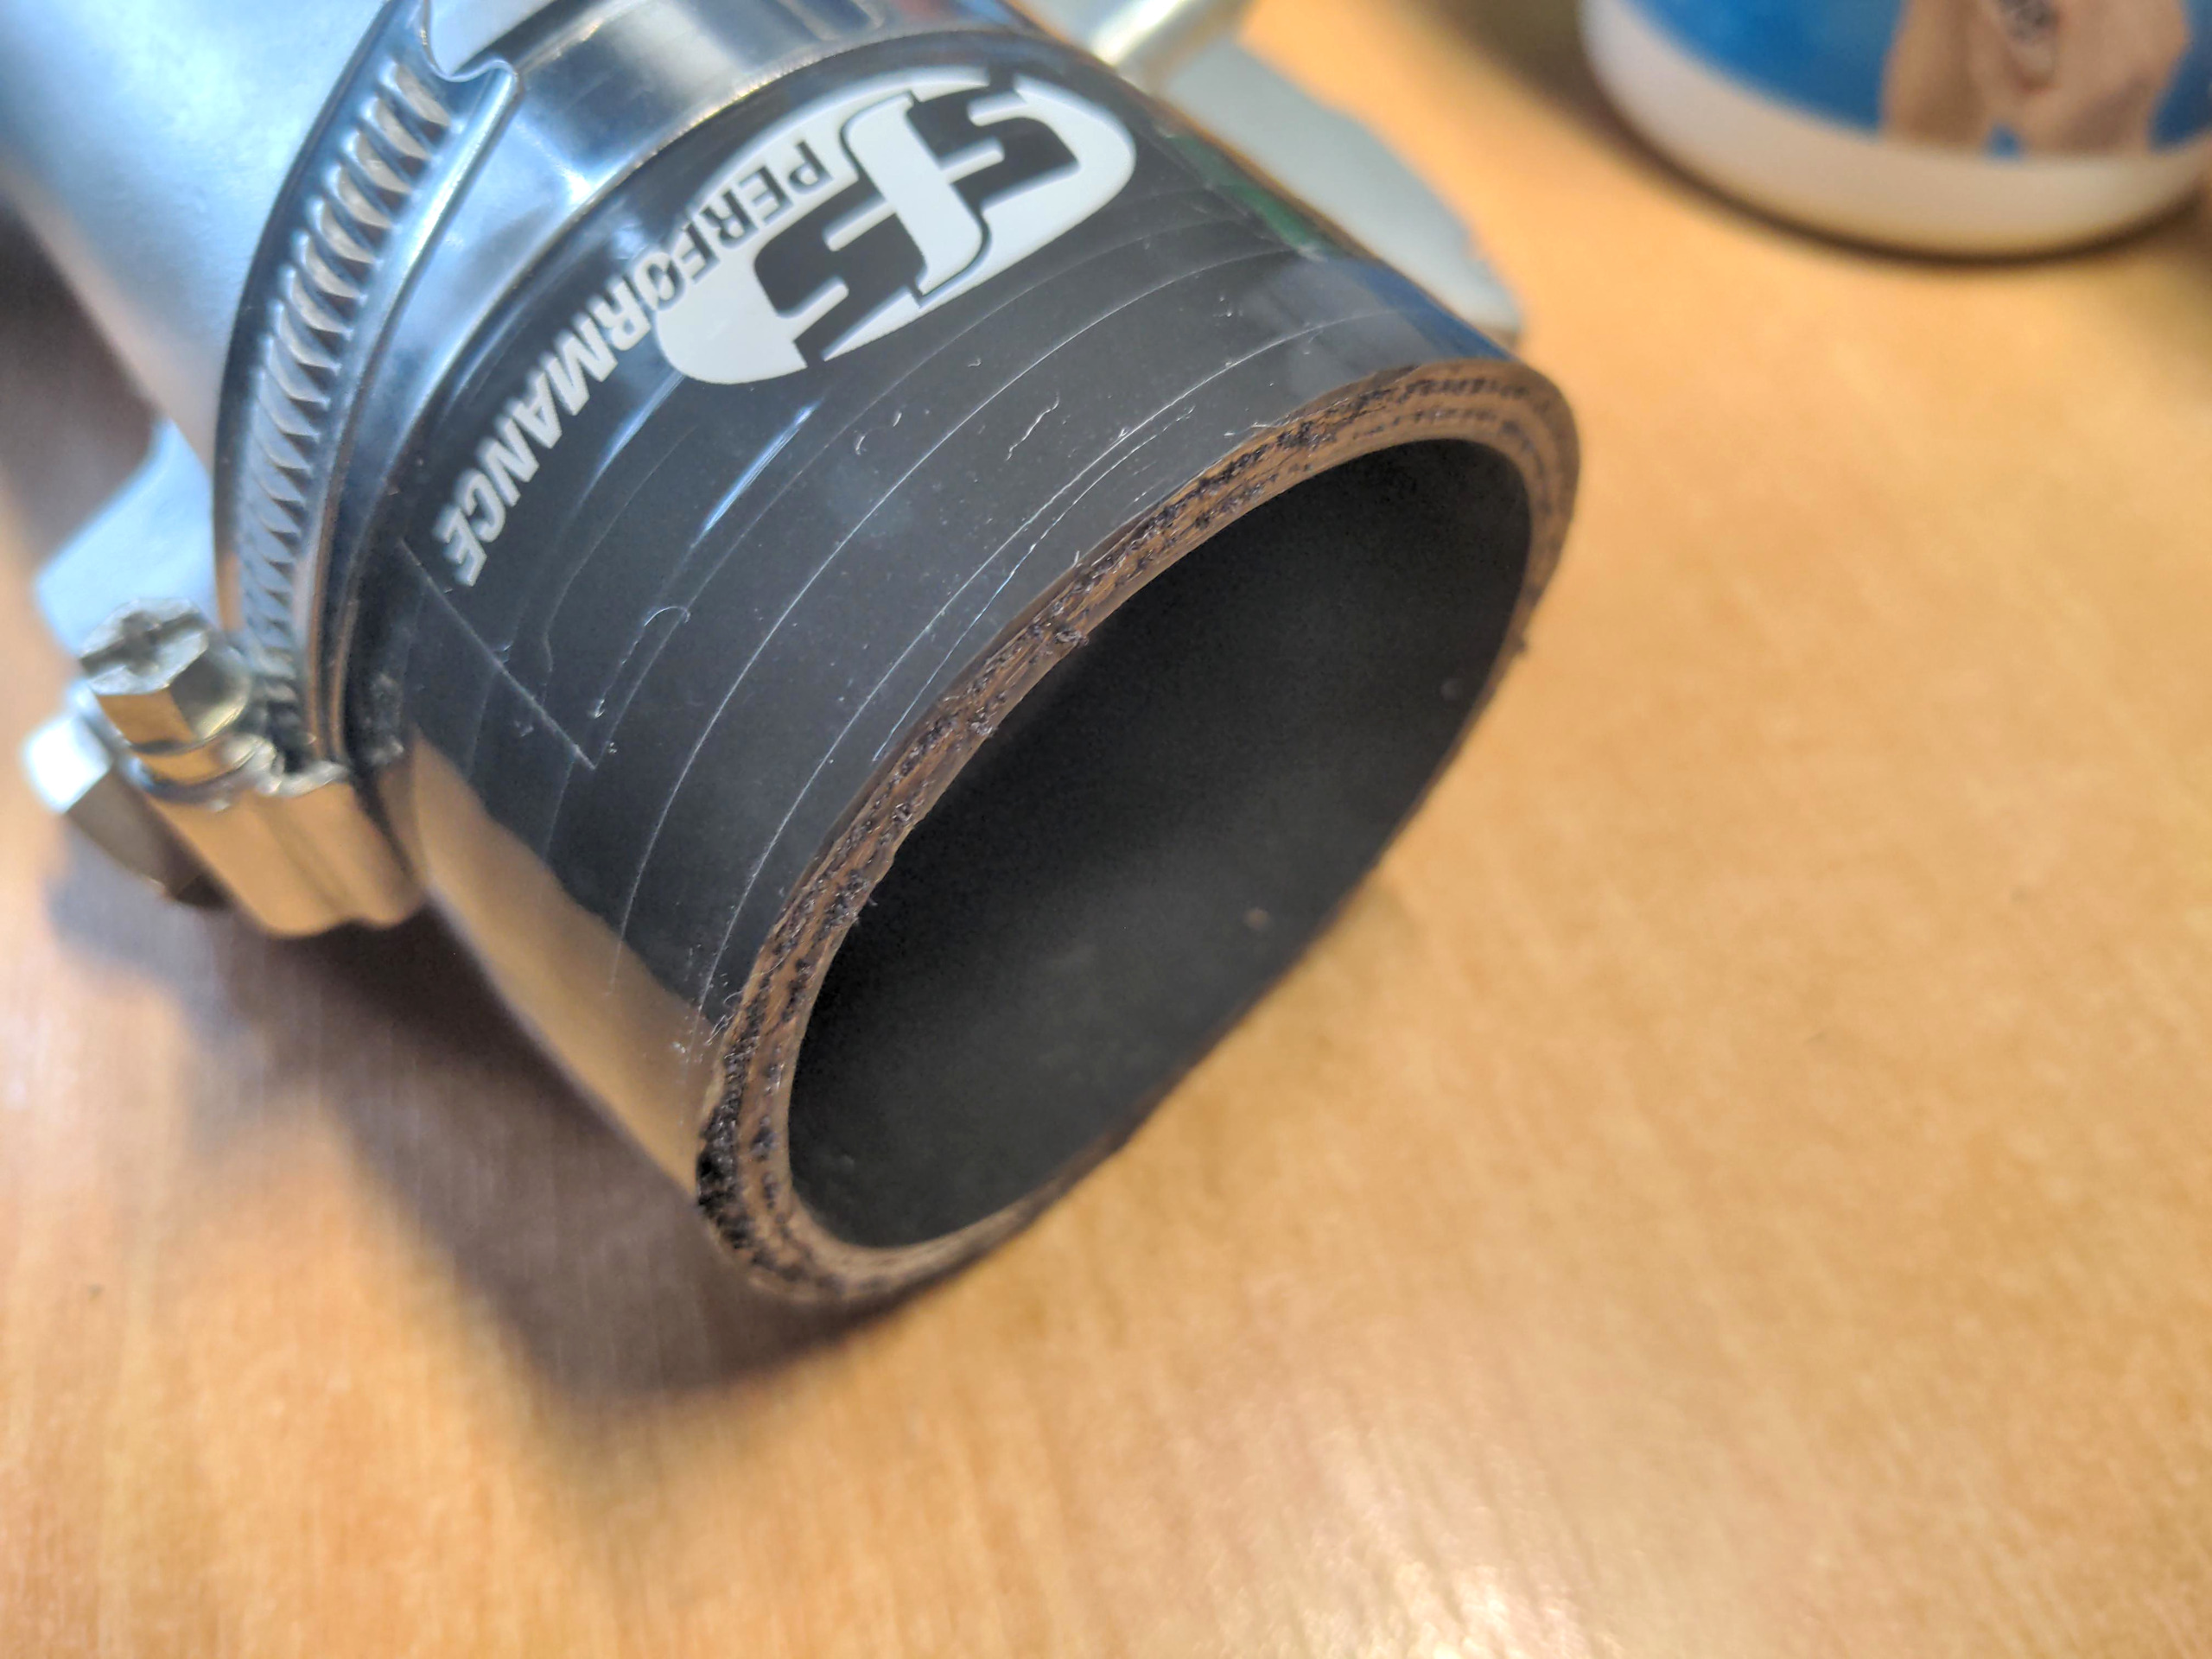
All the new hoses on this engine will be black, including this one; as I said, I don't like blue hoses. This has an advantage I did not expect. To tidy up the stray white polyester reinforcing fibres that are left from cutting a hose like this, I could burn off the ends with a cigarette lighter and then paint over them with a black permanent marker pen. It looks tidy, though nobody will notice how nice I think this looks.
The intake pipe was old, and had spent 36 years in an engine bay that never got much love. It needed a clean, and a coat of paint.
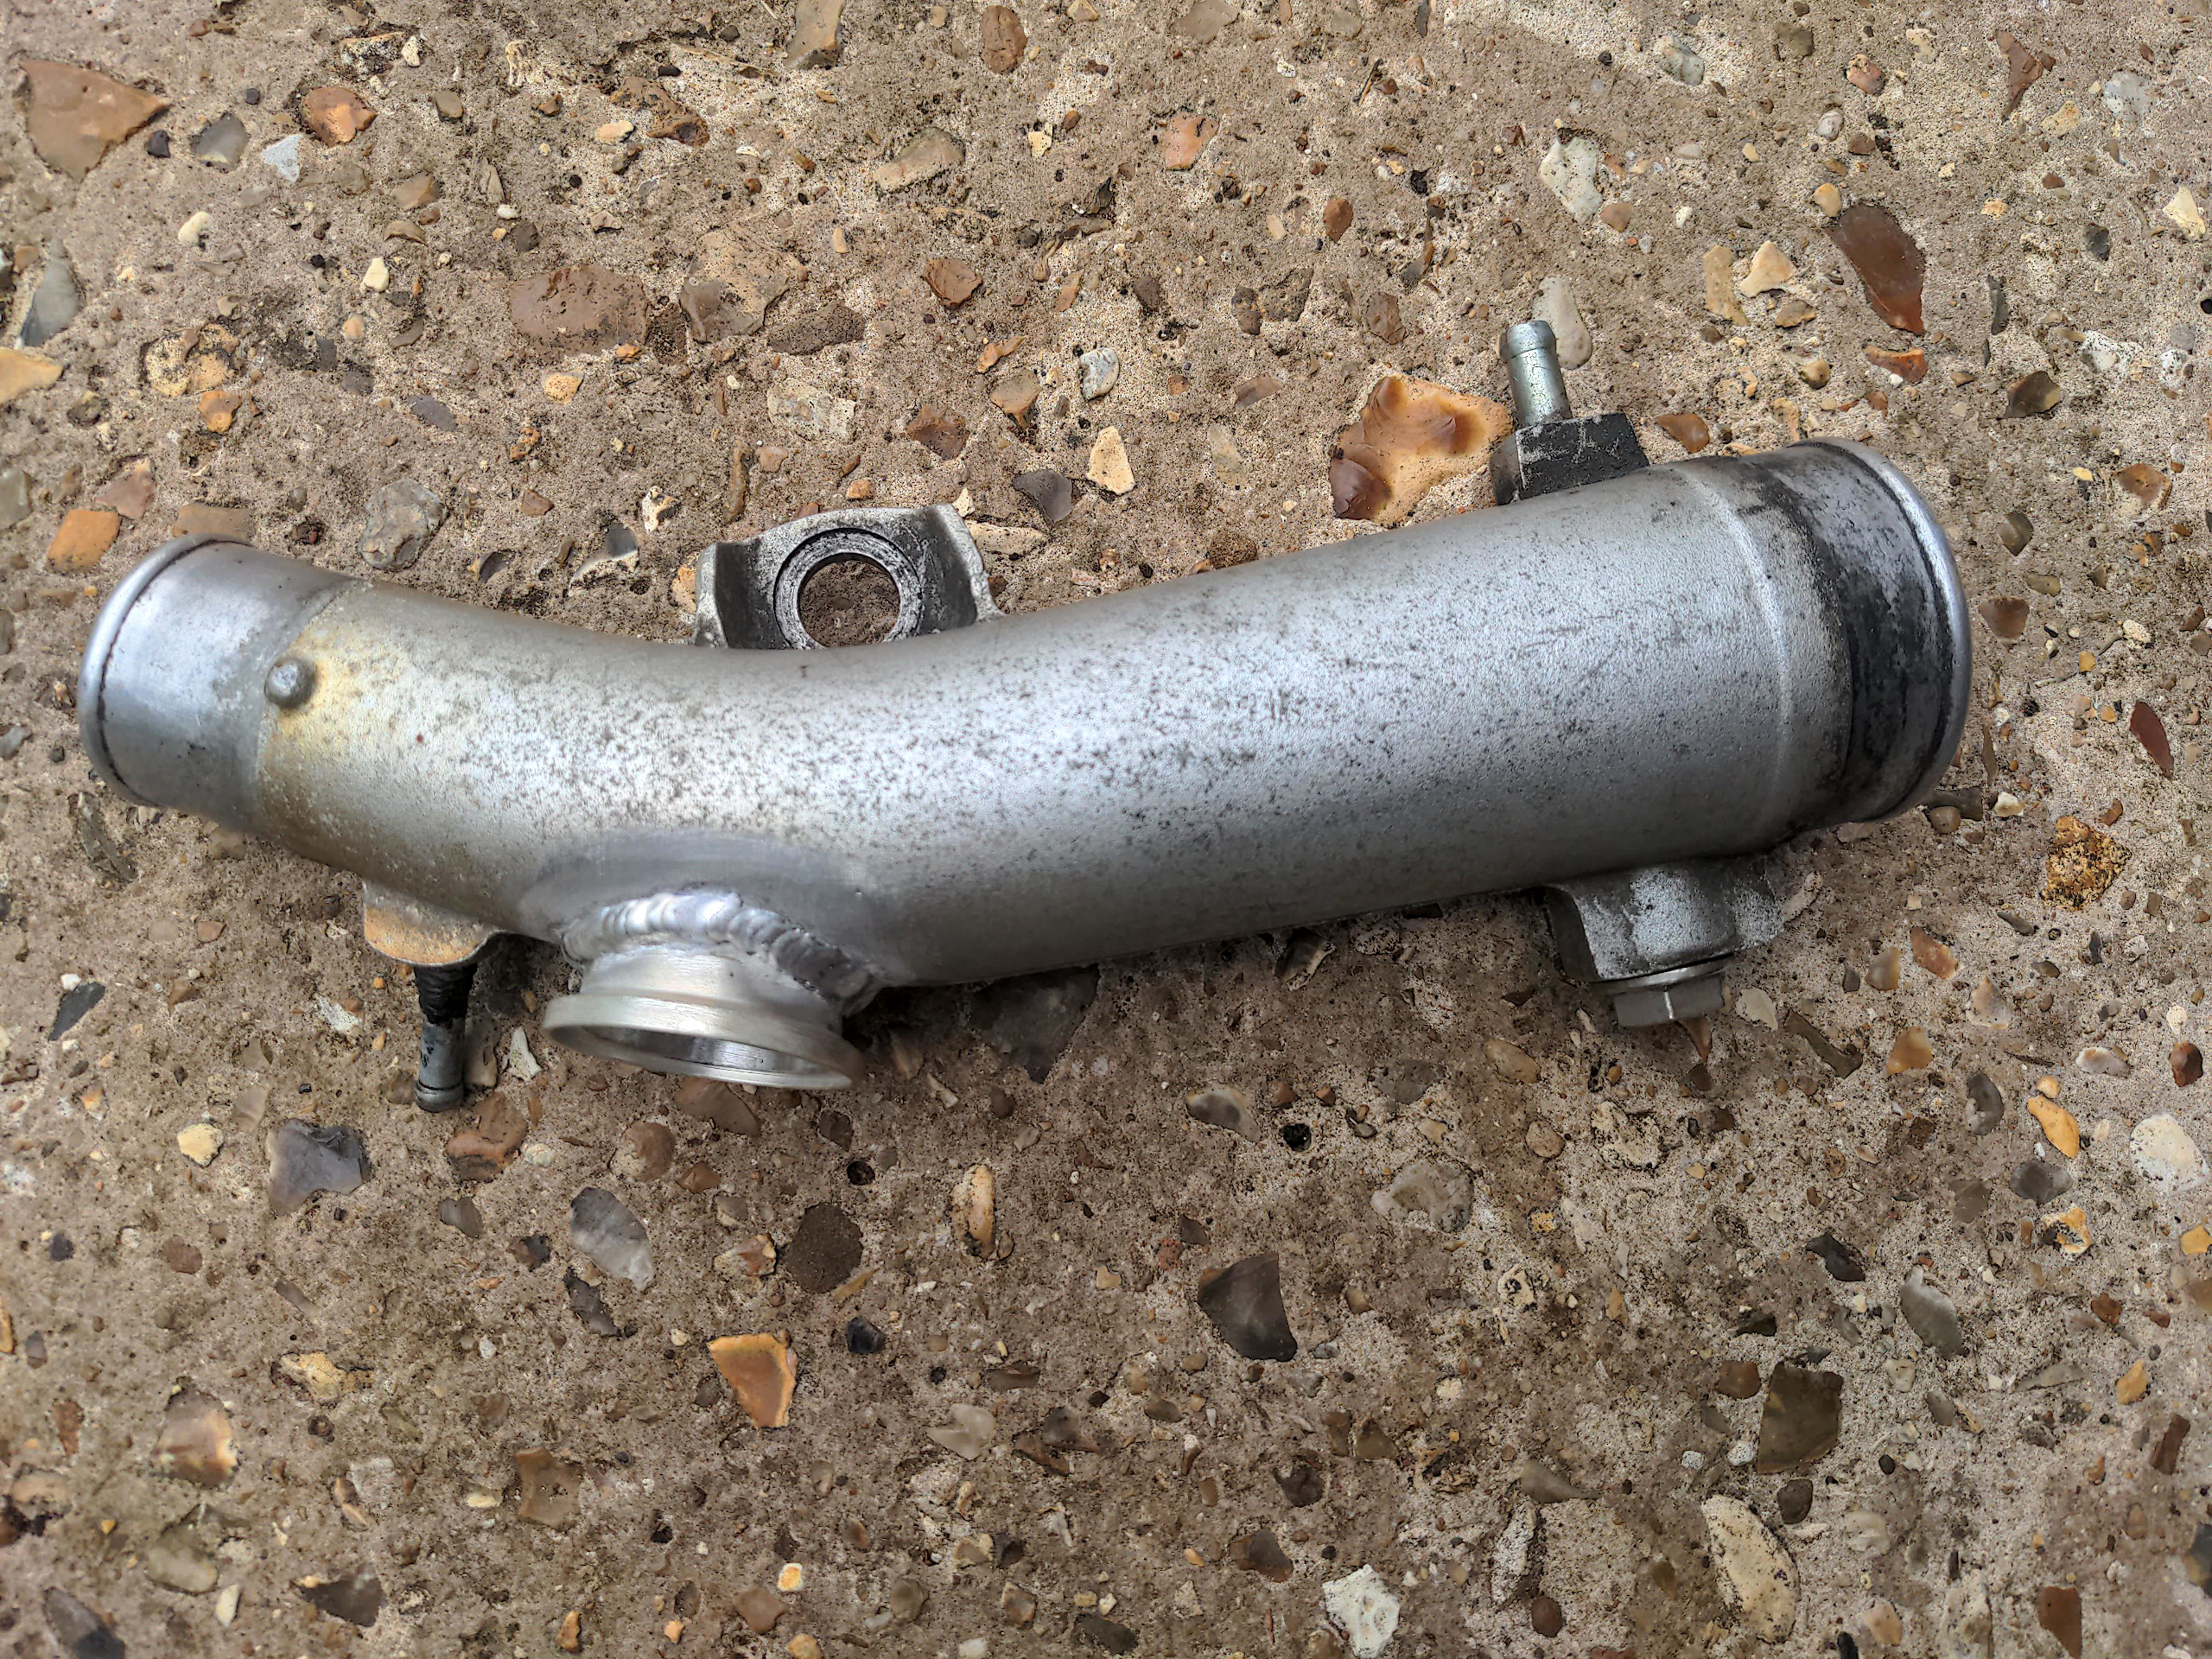
Oven cleaner, Brillo pads and electrical contact cleaner took care of most of the cleaning. I gave it a coat of very-high-temperature silver paint.
The particular VHT paint I used requires baking to cure it. I did not stick it in the oven, because of our commitment to sustainability and net zero I didn't want my food to taste of VHT paint for weeks. It was a boiling-hot day, so I improvised a solar oven using a box lined with baking foil and a sheet of glass.
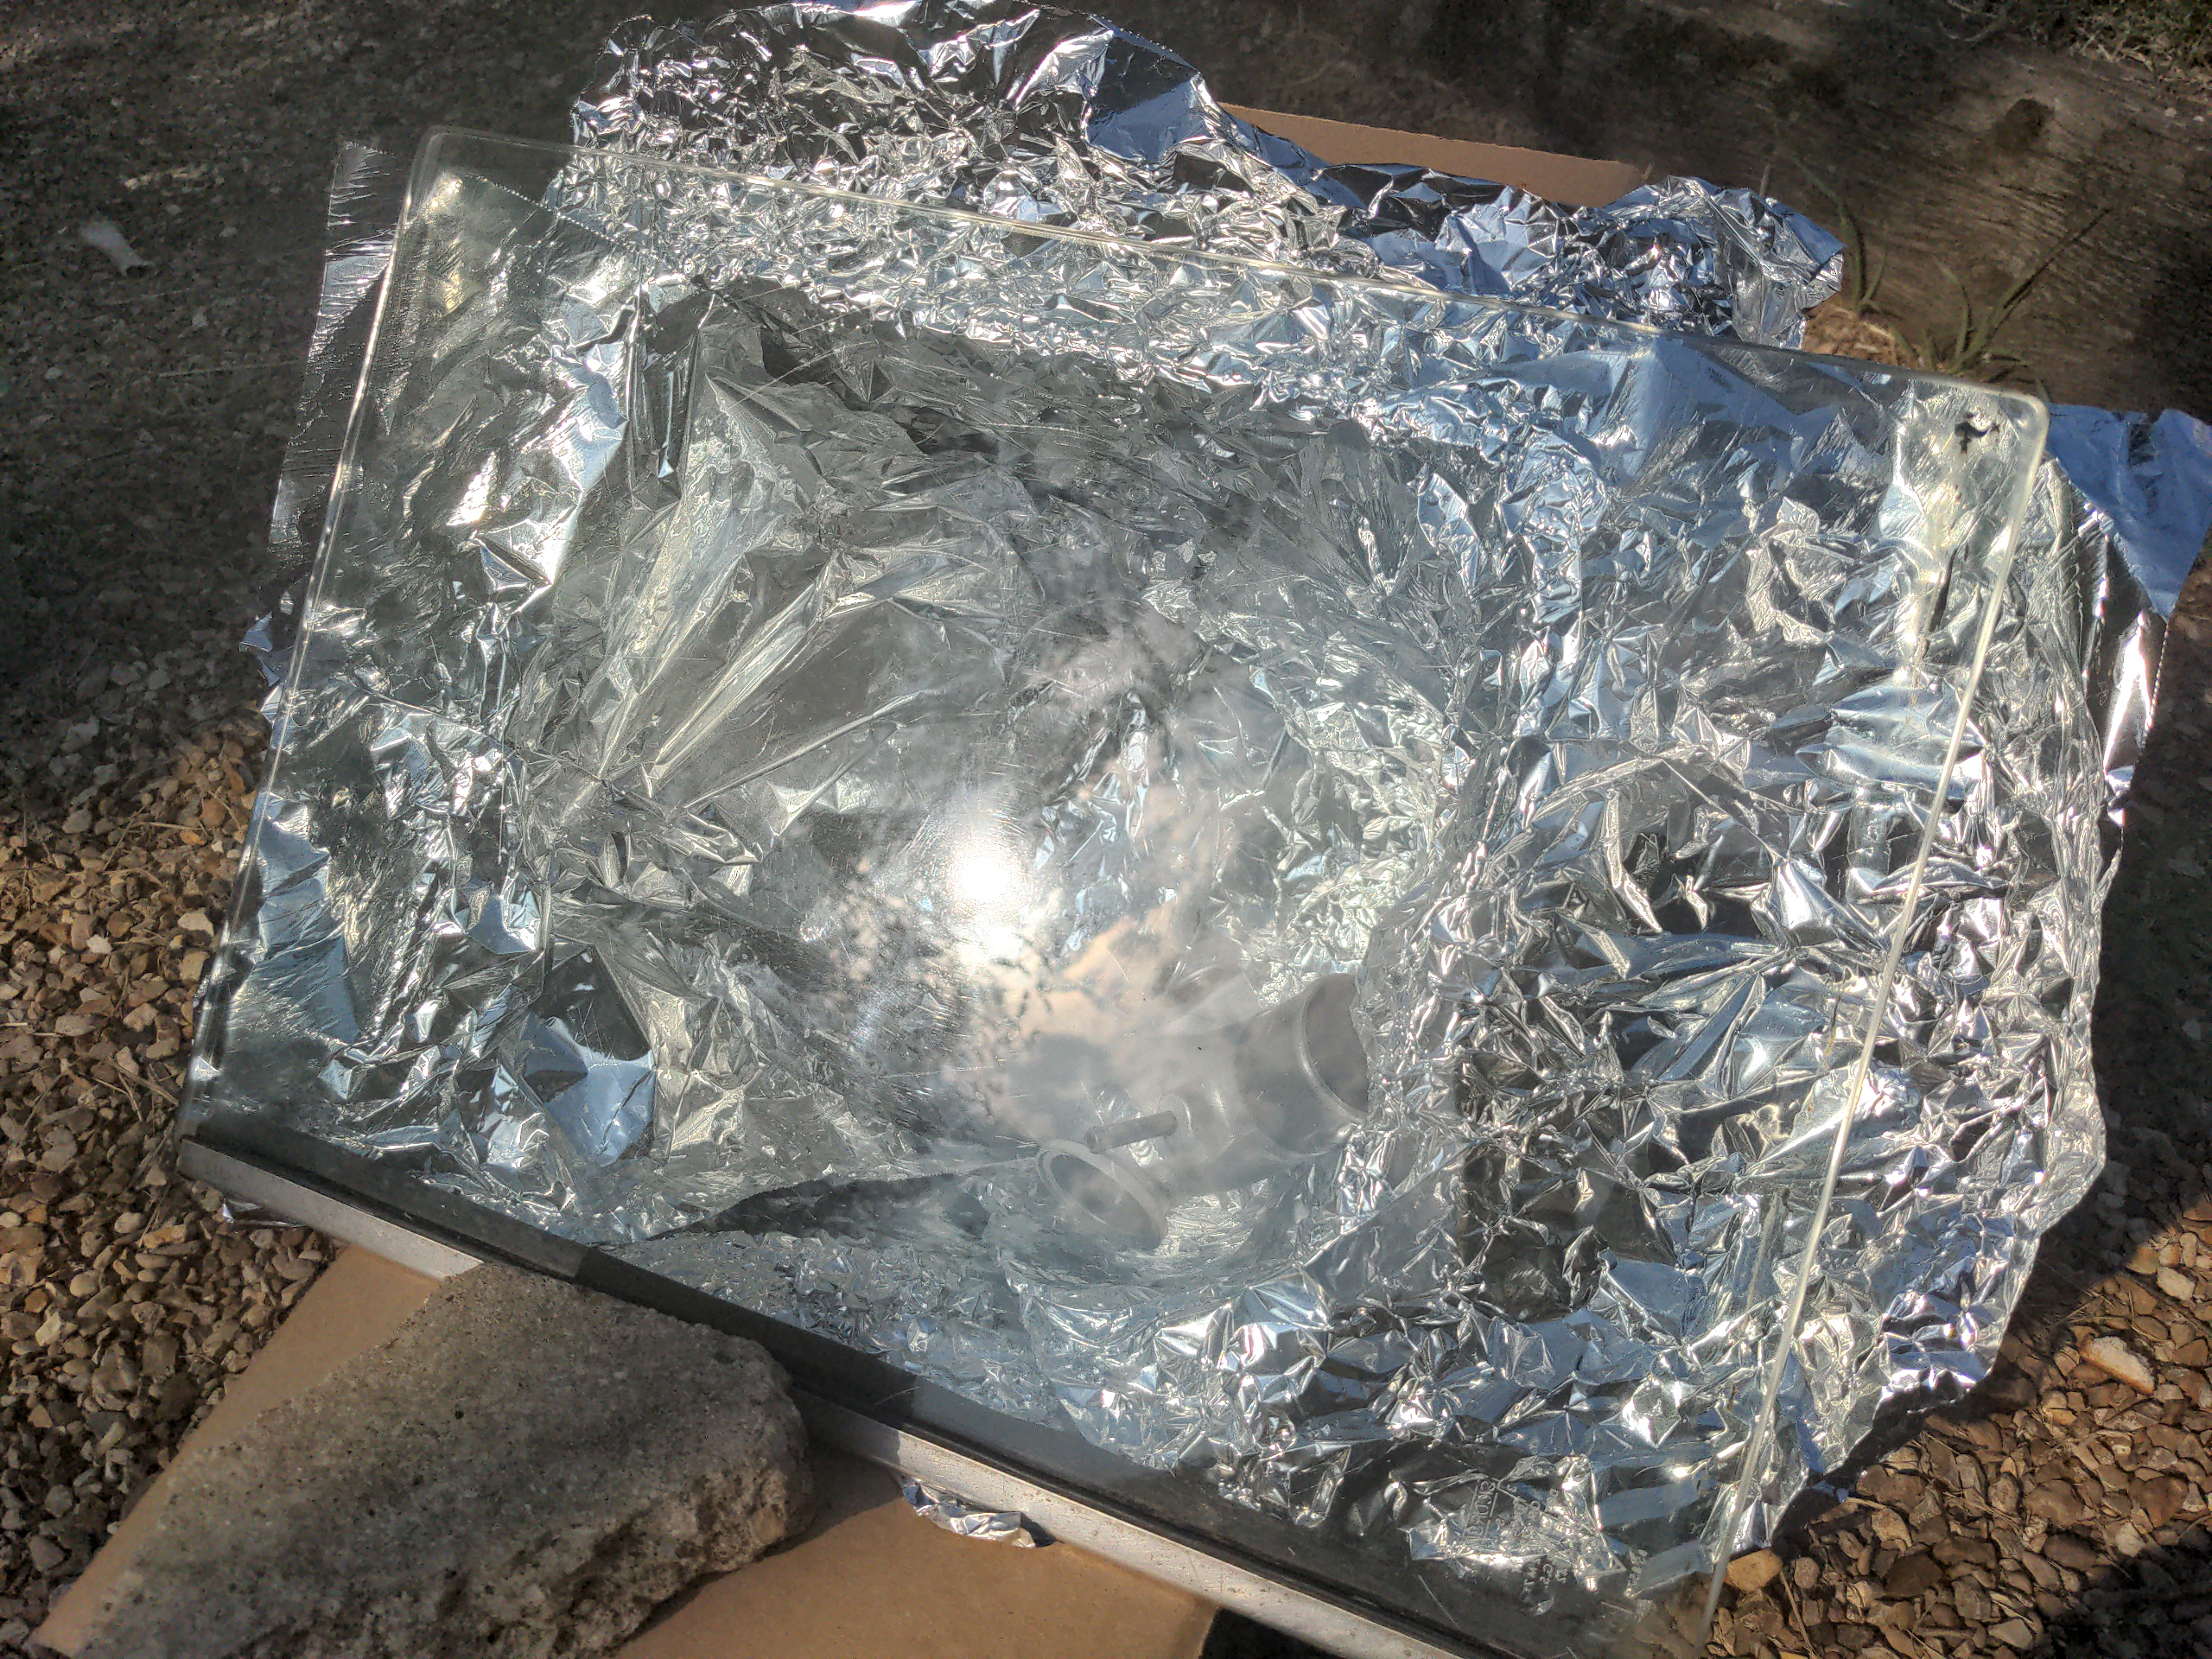
We'll see how well this works, when the paint does or does not fall off. It got very hot in there over the course of a day; the unpainted areas of the part were far too hot to handle without gloves when they came out. I don't know if it reached the 160° C required for the paint to cure fully, or if any temperature short of that would be sufficient. Time will tell.
And that, is that.
It makes more sense now, and it looks a lot nicer. It was probably more effort than it was worth to take something that already worked and make it into something that still worked, but it does not offend me now.
The next part of this series is unwritten. It involves a half-year odyssey to acquire a new turbo. And I still didn't get a new turbo, as such. I will write that part when some other components that do not currently exist come into existence. So that, is a story for soon.
Part numbers from this post:
- M18 blanking plug: Jetex U690200
- Mounting rubber: Yamaha 90480-18290
- Dump valve: Turbosmart TS-0205-1131
- Coupler hose: SFS SFSSCH63BLK