Rationalising the 323 GTX, part 4: making a hole in it
I had an overheating episode in 2020. It was not fun. It lacked so much fun that as part of the 323 GTX rationalisation subproject I wanted to give the 323 GTX some bonnet vents. Actually, I don't think bonnet vents would have saved me in that situation, because it dramatically overheated at low speed, but still, that scared me into doing as much as I could to keep it cool in every situation.
Putting vents into a bonnet requires making holes in the bonnet. Fortunately, I had a spare bonnet for this car. Actually, it's the original bonnet for the car; the reason for my original bonnet being off the car is too long to go into here. The one currently fitted to the car was fucked by an idiot, and that is also something I won't go into here, so the original bonnet was intended to go back on at some point.
Anyway, I am lucky to have a spare bonnet for this. It is probably the only bonnet in the country which is not fitted to a car. It might seem like a strange act of sacrilege to make holes in it, like sticking a sunroof on an E-type but more so. Oh well; originality went out the window a long time ago, and it's not like there's any other owners around to criticise me anyway! :D
So, vents. You're spoilt for choice these days, as old people are obliged to say. Given my insatiable urge to over-solve every problem, I decided to set myself some arbitrary criteria. Otherwise I would just be able to buy whatever vents, make a hole in the bonnet, and glue them in. That would be too easy!
Of course, I wanted something functional; that requires a rear-facing vent and not a scoop. But also, I wanted something that did not look out of place on a 1980s car. The generic vents that you can buy on eBay for a few quid function as well as anything does. But they are all designed for modern cars; often they are copies of vents fitted from the factory to modern cars. They would look strange on the boxy little 323. I also wanted subtle. The 323 GTX is a very subtle car. There are very few giveaways on the exterior that it is a mental turbocharged rally car at heart and not Grandad's shopping hatch, and I wanted to keep it that way.
Instead of subtle, I ended up impulse-purchasing a pair of Ford Sierra RS500 Cosworth vents instead! Woohoo!
Don't worry, these are not genuine RS500 vents! Because I am not insane. There were a couple of genuine ones on eBay with a £300 starting bid. I didn't really want to pay that for something I was not sure would actually work, nor did I want to deprive someone's RS500 or Sierra Cosworth project of its proper vents. My vents are fibreglass copies from this seller on eBay that cost about £65 shipped. Mine have a lip on them to allow them to be fitted easily to not-RS500 bonnets like mine; otherwise, they are very close to the originals.
I liked them. They would not look completely wrong on the 323 GTX, because both the GTX and the RS500 were race cars at heart, born from homologation necessities in the same era.
Anyway, I ordered them, they showed up a few days later and oh no, they are quite big.
They're so big that it wasn't clear they would actually fit anywhere. This is the sort of thing I should have figured out before buying them, like by finding an RS500 and measuring the vents, or asking the seller, but that's not how I work. If I was better at thinking through the consequences before impulse-purchasing stuff I would not own two project cars.
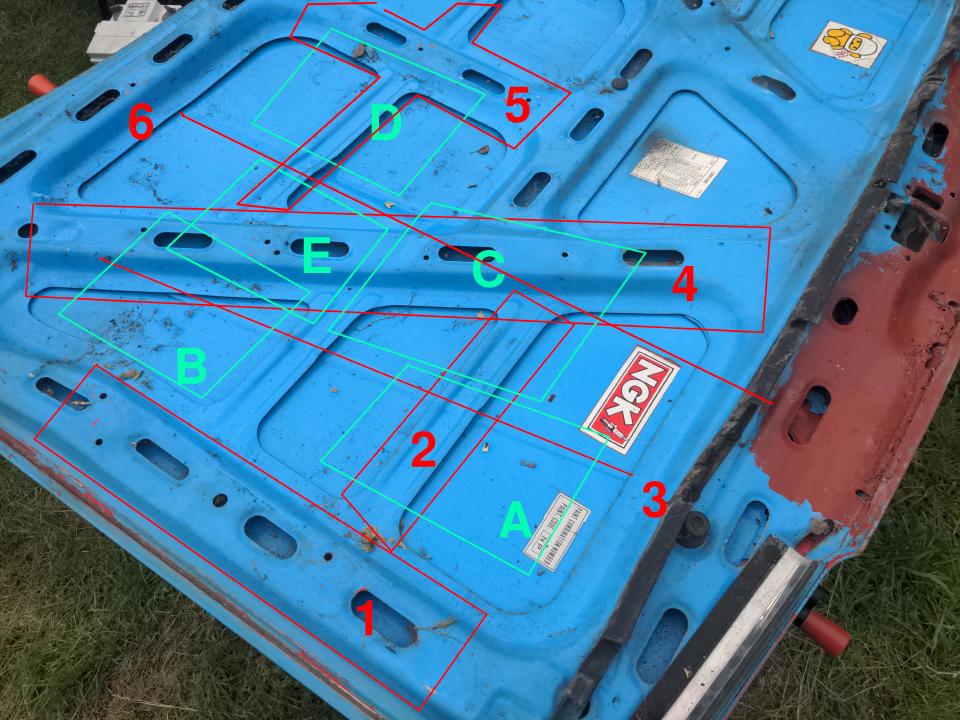
Here's a picture of the inside of the bonnet. Danger zones are annotated in red, potential locations are annotated in green:
Location A was OK, because it only required cutting out the brace at danger zone 2. However, any location for it would require that it would overlap the styling line (small indentation running the length of the bonnet) at 3, which would look weird. Moving it outboard to avoid this line would put it in danger zone 1, and that would be cutting a lot of strength out of the bonnet.
Location B might have been OK, but it had the same problem of either overlapping styling line 3 or going outboard into danger zone 1, and would have meant cutting into danger zone 4, and it would have been a lot of work to translate the strength cut out here somewhere else.
For styling purposes location C might have been fine, but it meant cutting most of the brace in danger zone 4 too. It also overlapped the line of the bonnet bulge at danger zone 6.
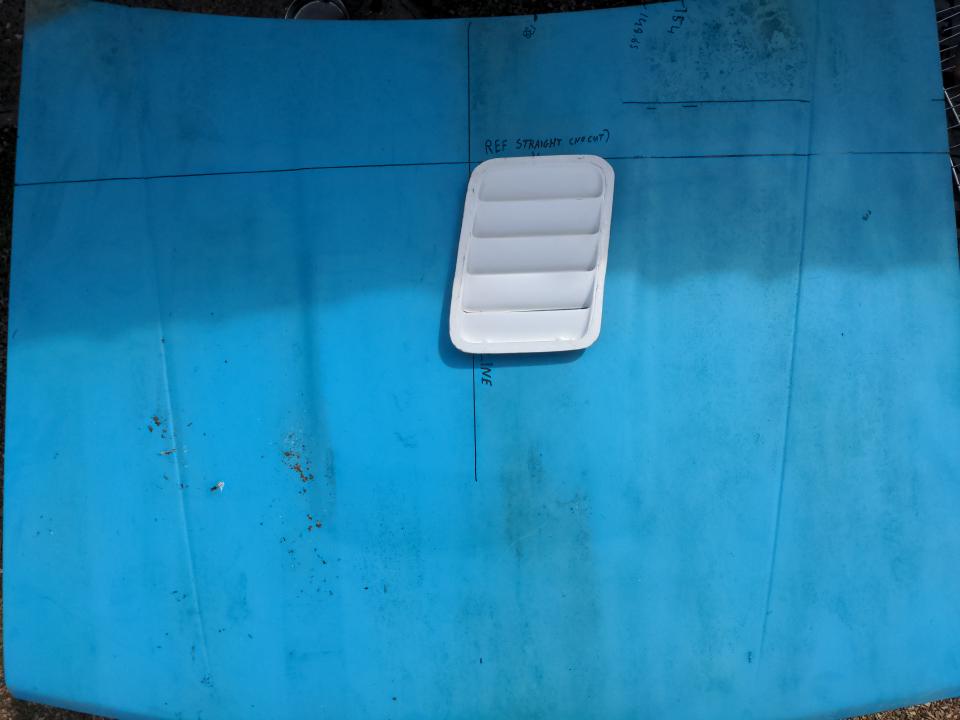
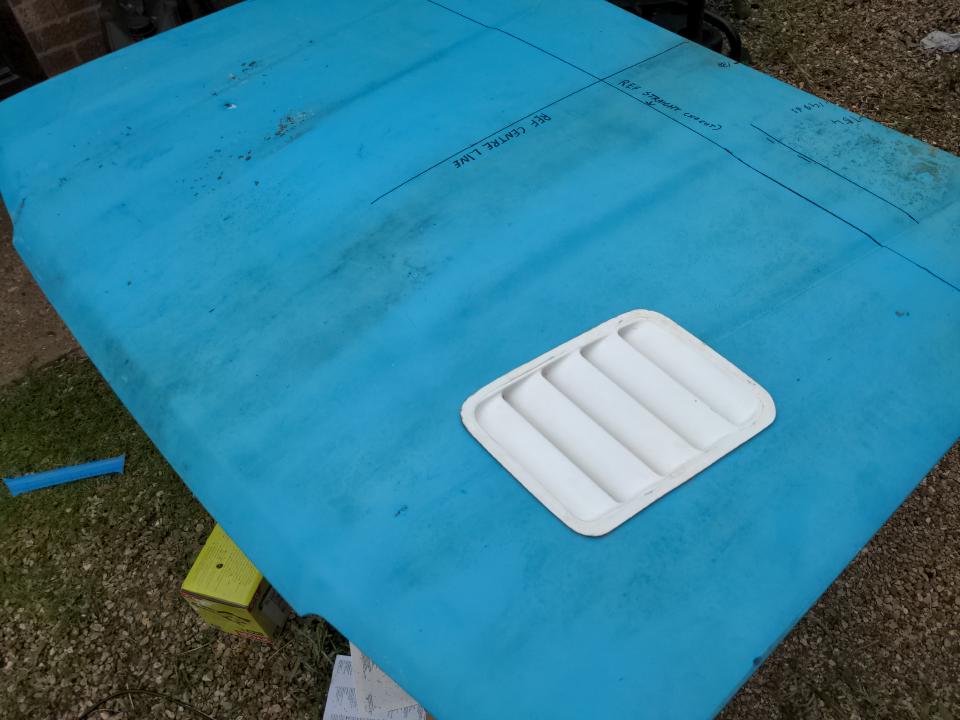
Location D is...a strange one. It would have required cutting out multiple bits of bracing in danger zone 5, but this strength would have been easier to translate elsewhere. I thought it might look a bit weird, so I flipped the bonnet over, plopped the vent on top..
..and decided that yes, this definitely looks weird and I don't like it. It might have worked fine with a vent of some other shape, but this parallelogram shape so close to and overlapping the centre line of the bonnet just doesn't work.
E might have actually been optimal if the bracing was designed differently; it is location C moved far enough back that the bonnet bulge is no longer an issue. But that would have meant cutting the brace in danger zone 4 and the smaller part of 5; again, this strength would be hard to translate elsewhere.
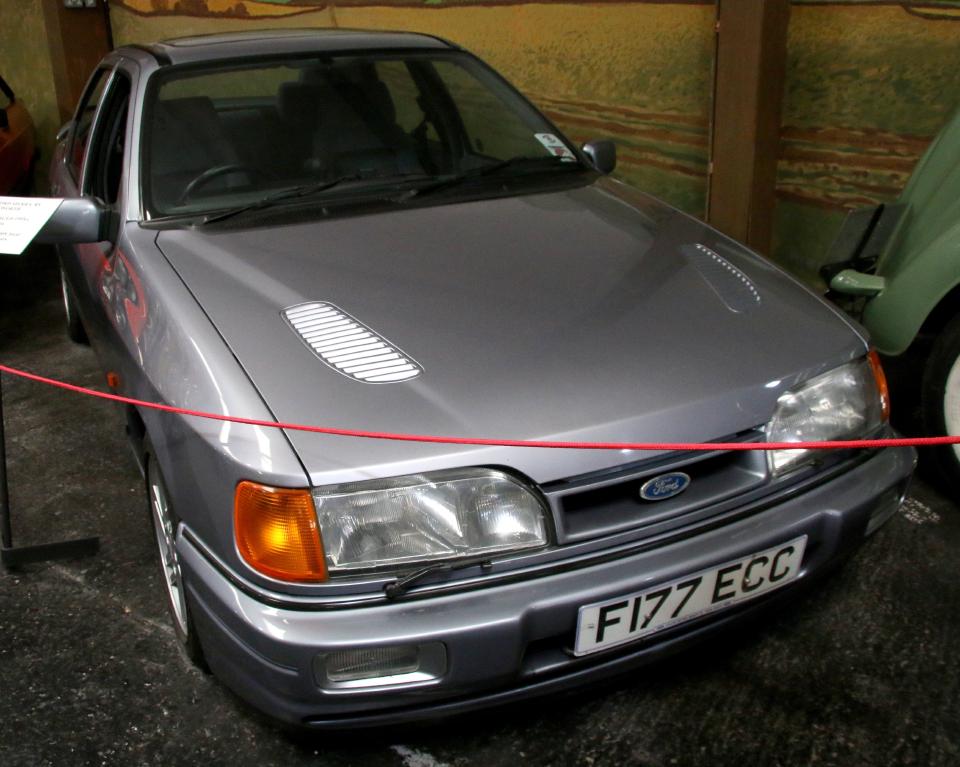
So, after a full day thinking about it, I realised the vent just won't work on this bonnet. At this point anyone else would have just bought a different, smaller vent that'll actually fit. But I'm not the kind to give up, so I decided to look at some photos of cool cars. When doing that, I noticed from this pic of the Sierra Sapphire RS Cosworth...
...that it's actually OK to have a vent being intersected by a styling line. Nobody complained about it on the Sapphire RS Cosworth as far as I know, or even noticed. Thus, location A will probably work fine! Yay!
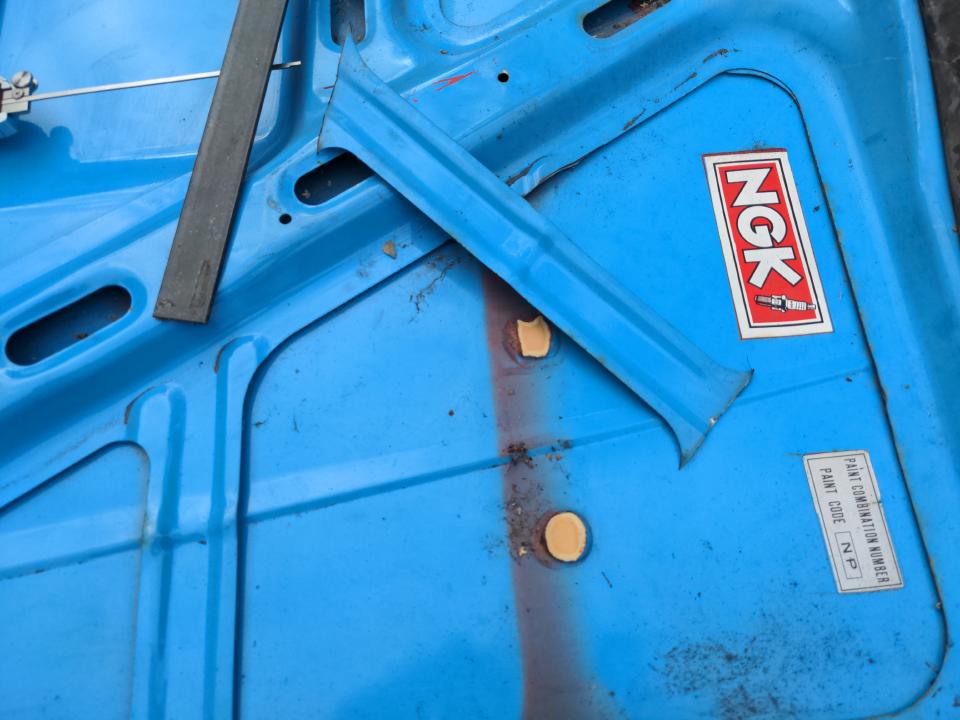
I did a little prayer for courage, cut out some bracing...
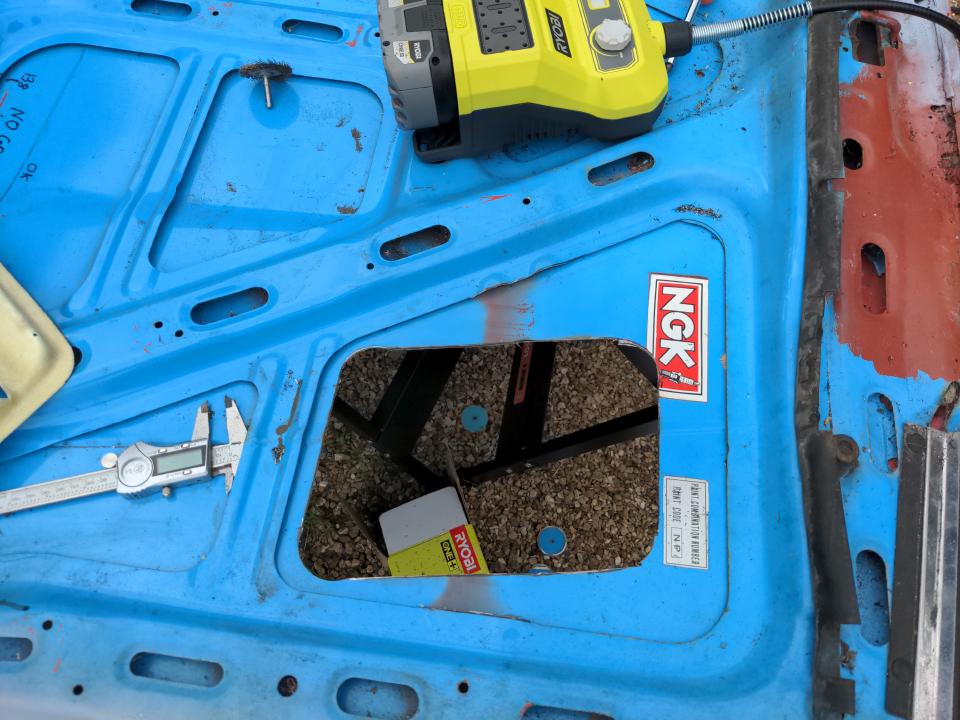
...made a hole...
...and did a dry run of the vent to see if I liked it.
As the kids would say these days, sick fam, and innit. That is to say, I liked it, which is just as well, because that hole is never going to be un-made.
Note it is now the vent. My brother came up with the idea of using a single vent, because that would look cool, and also make it look less like it was trying to be an RS500. I agreed - quite enthusiastically, because as well as looking cool this only meant making one big hole in the bonnet rather than two. That would halve the work, and I like putting in less effort if I can get away with it.
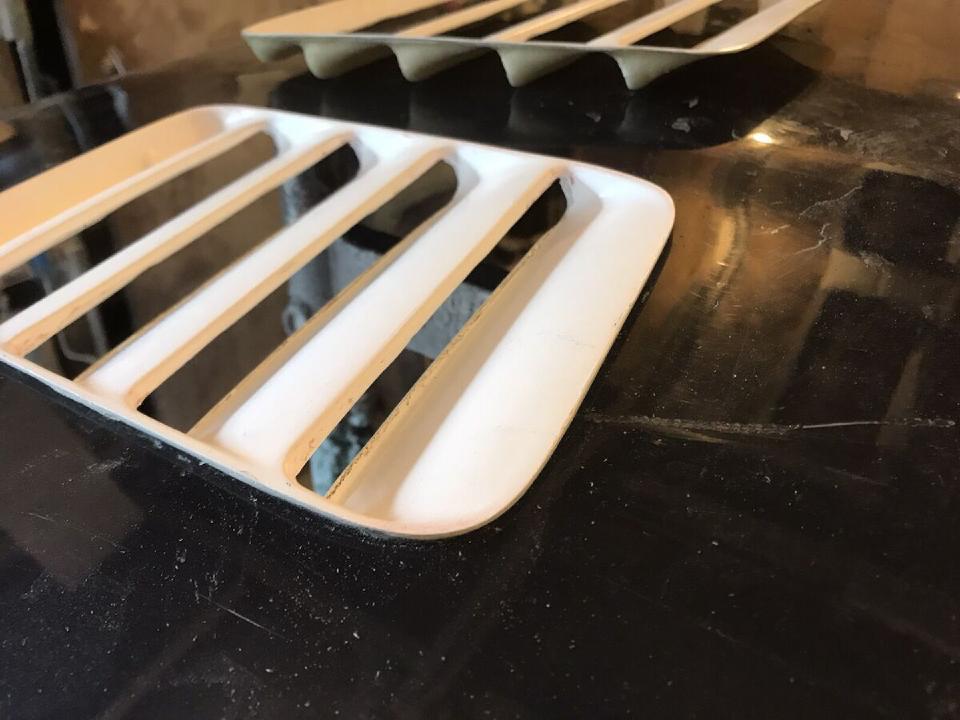
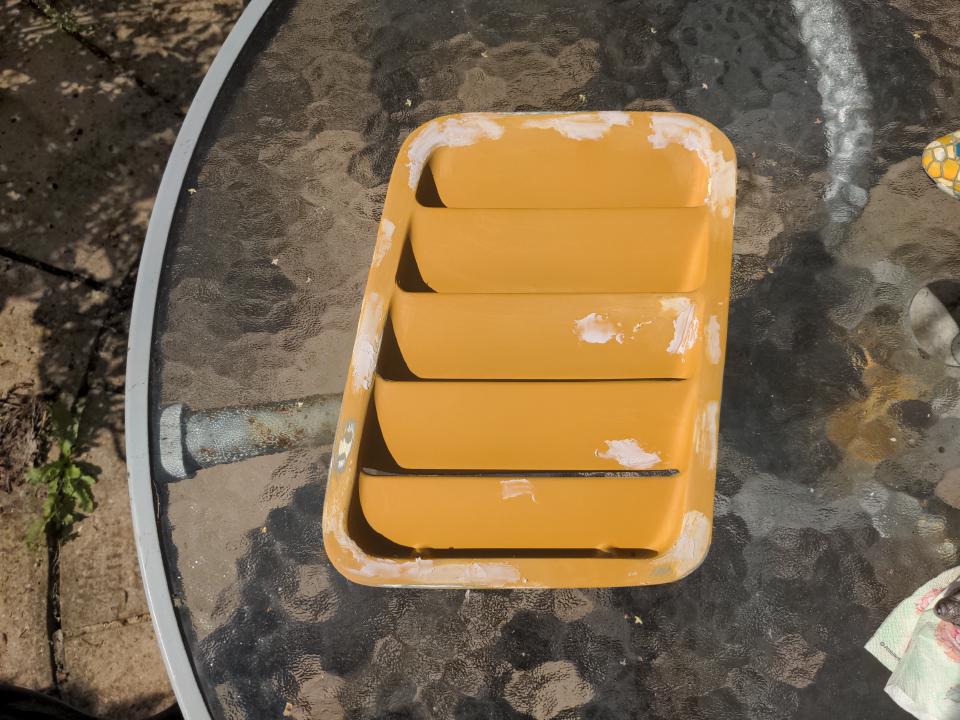
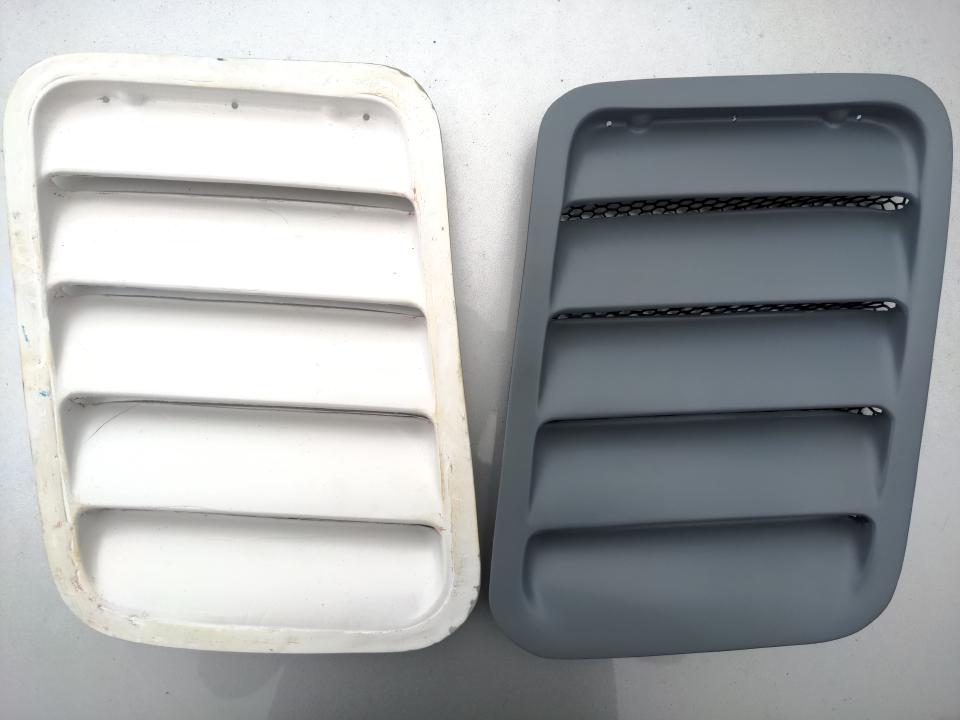
Back to the vents themselves, then. Unlike the ABS vents you can buy for about 30 quid, fibreglass never comes out of a mould perfect. These vents were not perfect, and I did not expect them to be.
I could have left this problem to whoever does the bodywork on my car when it comes back from the engine builder. I did this myself instead.
The process is this:
- apply a very thin skim of knifing putty to any low spots
- sand them back
- apply filler primer
- sand back the filler primer
- find progressively smaller low spots and go back to the first step
- enjoy your beautiful vent!
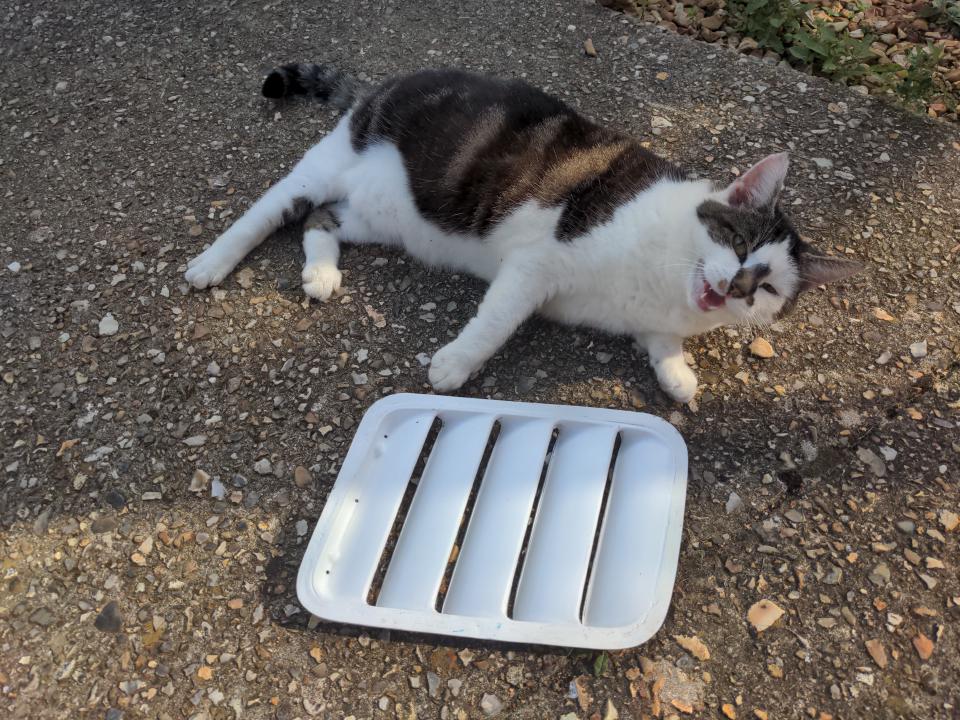
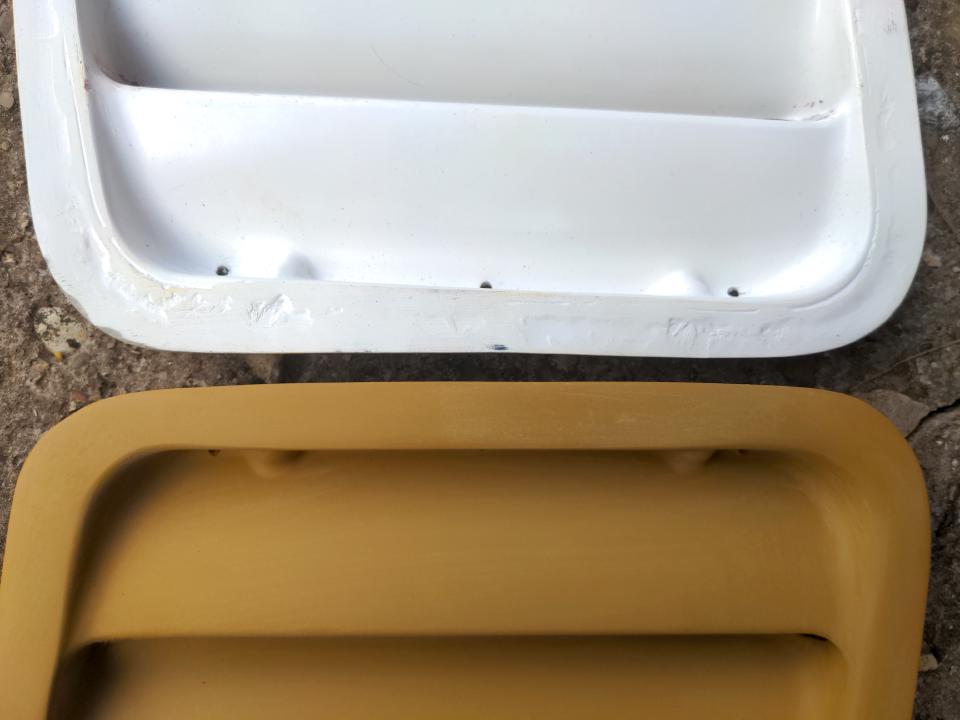
It took forever until I was happy skipping to the last step. Actually it felt like I was making no progress until I put it side-by-side with a fresh-from-the-mould one...
...and realised that at some point I had to stop chasing increasingly small perfections, that I had to consider it good enough, and that I had probably reached that at least one iteration ago. It is Done!
Actually, not done.
So, my vent will turn one big hole into four, smaller, better-looking holes with rather better aerodynamic qualities. Those four holes allow air out of the engine bay, which is good, but also allow things into the engine bay, which is not desirable. Of course, an engine bay is not a sealed environment; I won't bother to make plugs for the vents to prevent water ingress, because if your engine explodes on water ingress it will do so one day whether you have bonnet vents or not. But, it seemed wise to put something in place to stop ingestion of larger particles, such as sparrows.
Also, vent mesh looks nice. So let's do it!
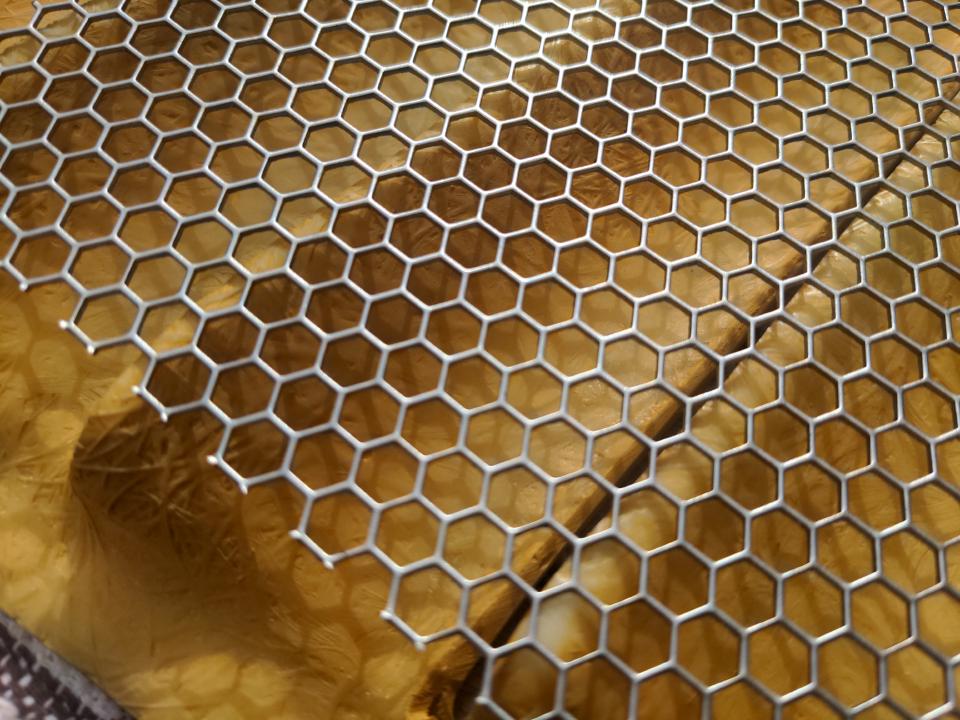
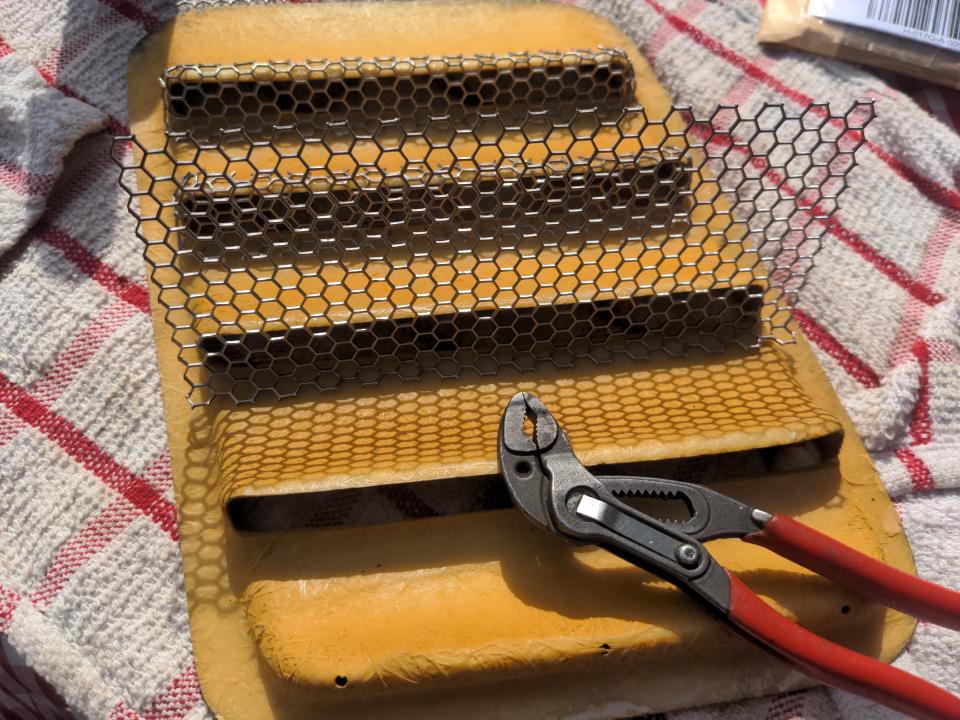
This is steel mesh. It costs about £10 for an A5-sized sheet. I like mild steel because it's easier to work than stainless steel and it survives being bent repeatedly in different directions rather better than aluminium does. The latter is a good characteristic for this application, given that I did not really know what I was doing and might have to un-bend and re-bend the material quite often.
The first one took about two and a half hours, from memory. The others took somewhat less because I almost knew what I was doing at that point.
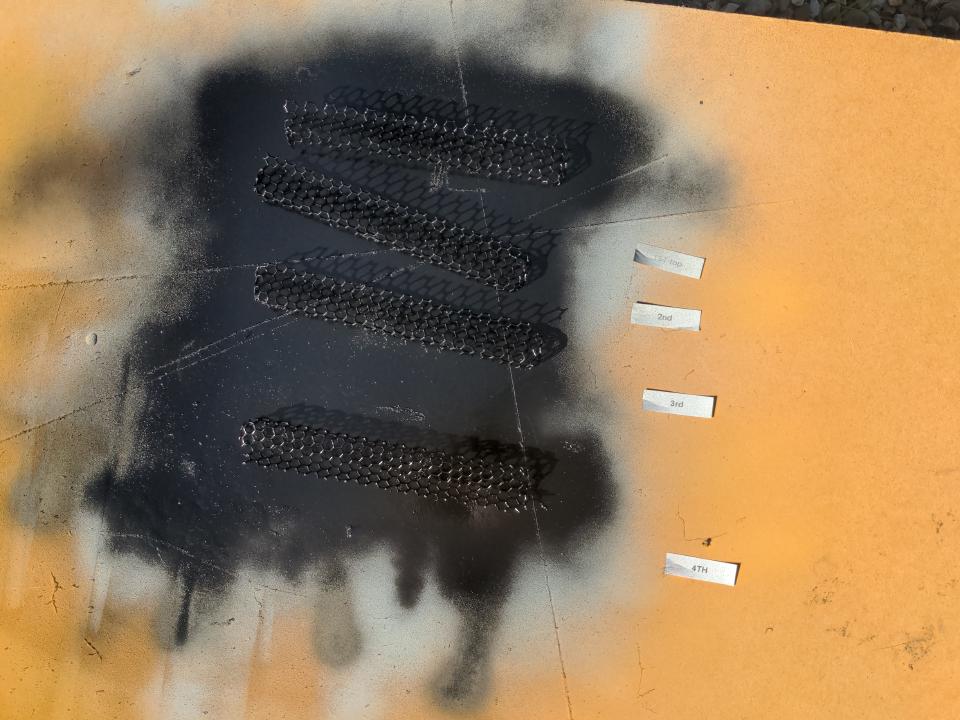
I painted these immediately after forming them to shape. If it seems like a strange decision to paint them now, bear in mind it may be many months until this vent gets its final coat of paint; I did not want it to gain corrosion in storage. And it is much easier to ensure that it has a thorough coat of paint now than it would be after it was glued in.
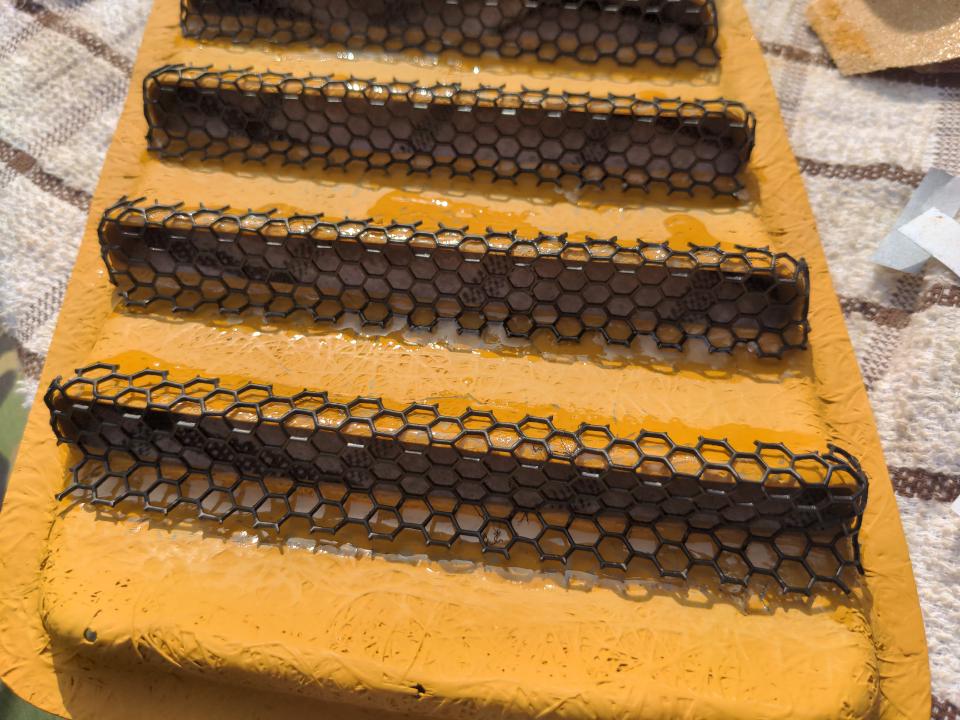
I glued these in with two part epoxy. I learned - maybe re-learned - two things. One is that two-part epoxy is horrifically messy. Another is that I shouldn't be using it on a boiling-hot summer day, because it sets basically instantly. These two things combined are hilarious.
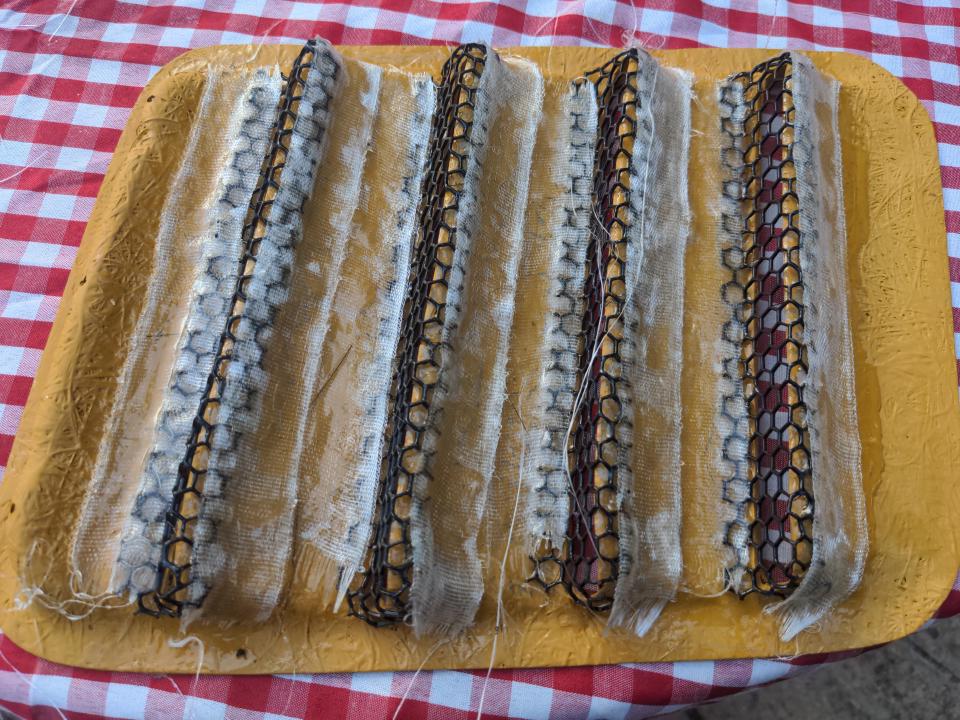
At some point I had the idea, and I do not know where it came from, that I should add fibreglass strips to ensure that the mesh was held on firmly.
It was a terrible idea. First because epoxy - even far less epoxy than I used - would have sufficed to hold them in place, and it was completely unnecessary. Second, because there wasn't really anything for the strips to grip to (because the mesh has holes, duh), so when it was dry it peeled right off. So this just left me a mess to tidy up afterwards (which took another day). On the upside it reminded me to never work with fibreglass fabric! It itches like buggery.
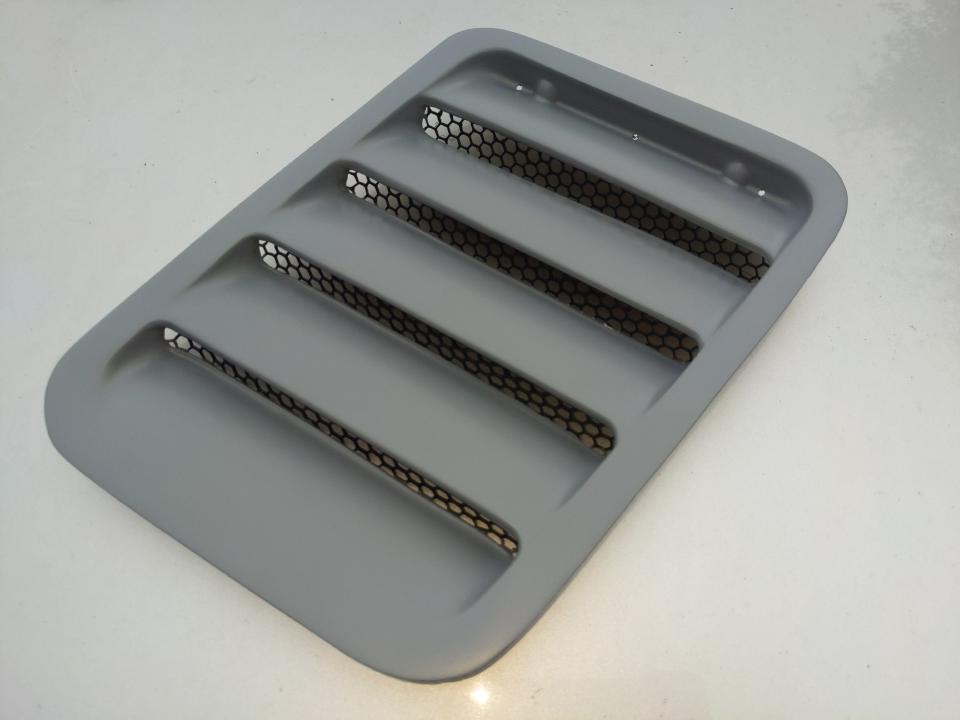
Anyway, with that all done, and the mesh glued in, and a final coat of grey primer...
...I'd say it looks AWESOME. And that is even more striking compared to a vent that came straight from the mould.
And that, is making a short story long, and is also how I lost about seven weekends.
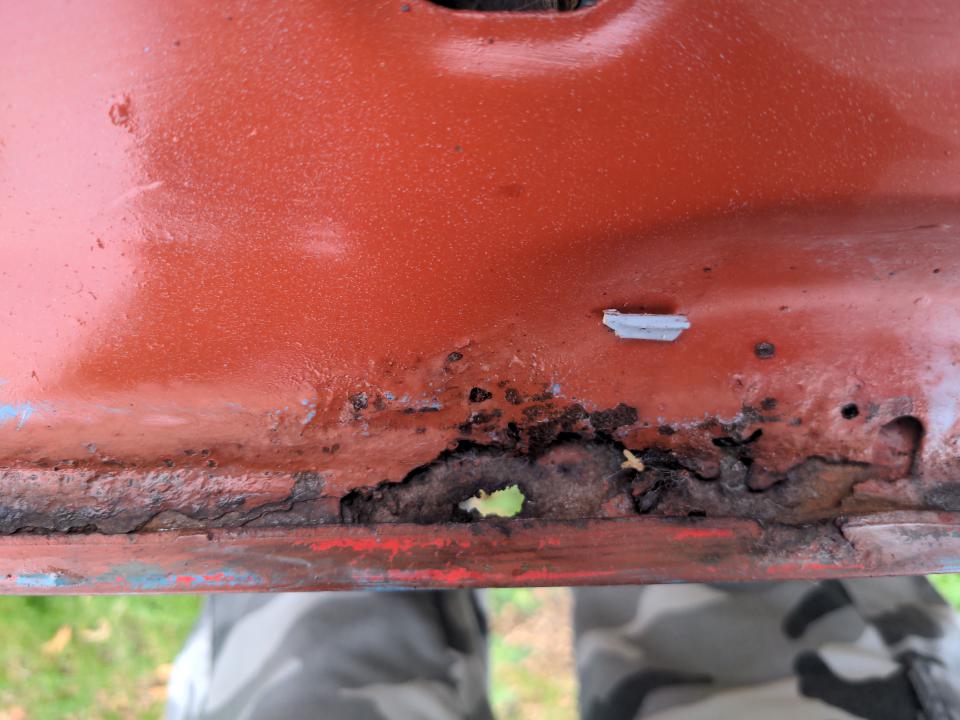
The next part should have been easy. I wanted to get the rest of the bonnet prepped for paint as well. In the earlier pictures the eagle-eyed among you may have noticed an area on the front lip of the bonnet which was coated in red oxide primer. I was aware of this as an area that needed some tidy-ups; the red oxide was applied eons ago to stop rust from progressing. And so I poked around this area with various tools...
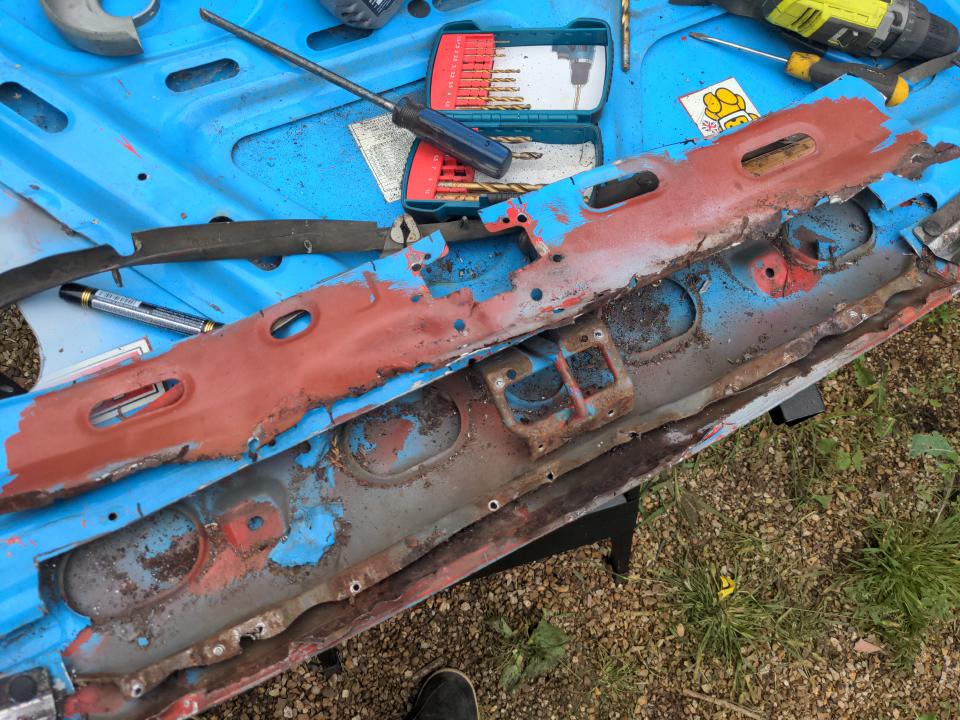
...and if this was a YouTube video or my internal monologue, there would be a scream sound effect playing about now. It turned out that much of the front lip of the bonnet was rotten and that the rot had gone all the way through to the outer skin. So as always, things escalated...
...and the rest has become another sub-sub project. As always happens with shit old cars, every job you do generates at least one more job to do. Onwards!
