Calibrating a no-name Amazon digital spirit level
If your digital level looks like this...
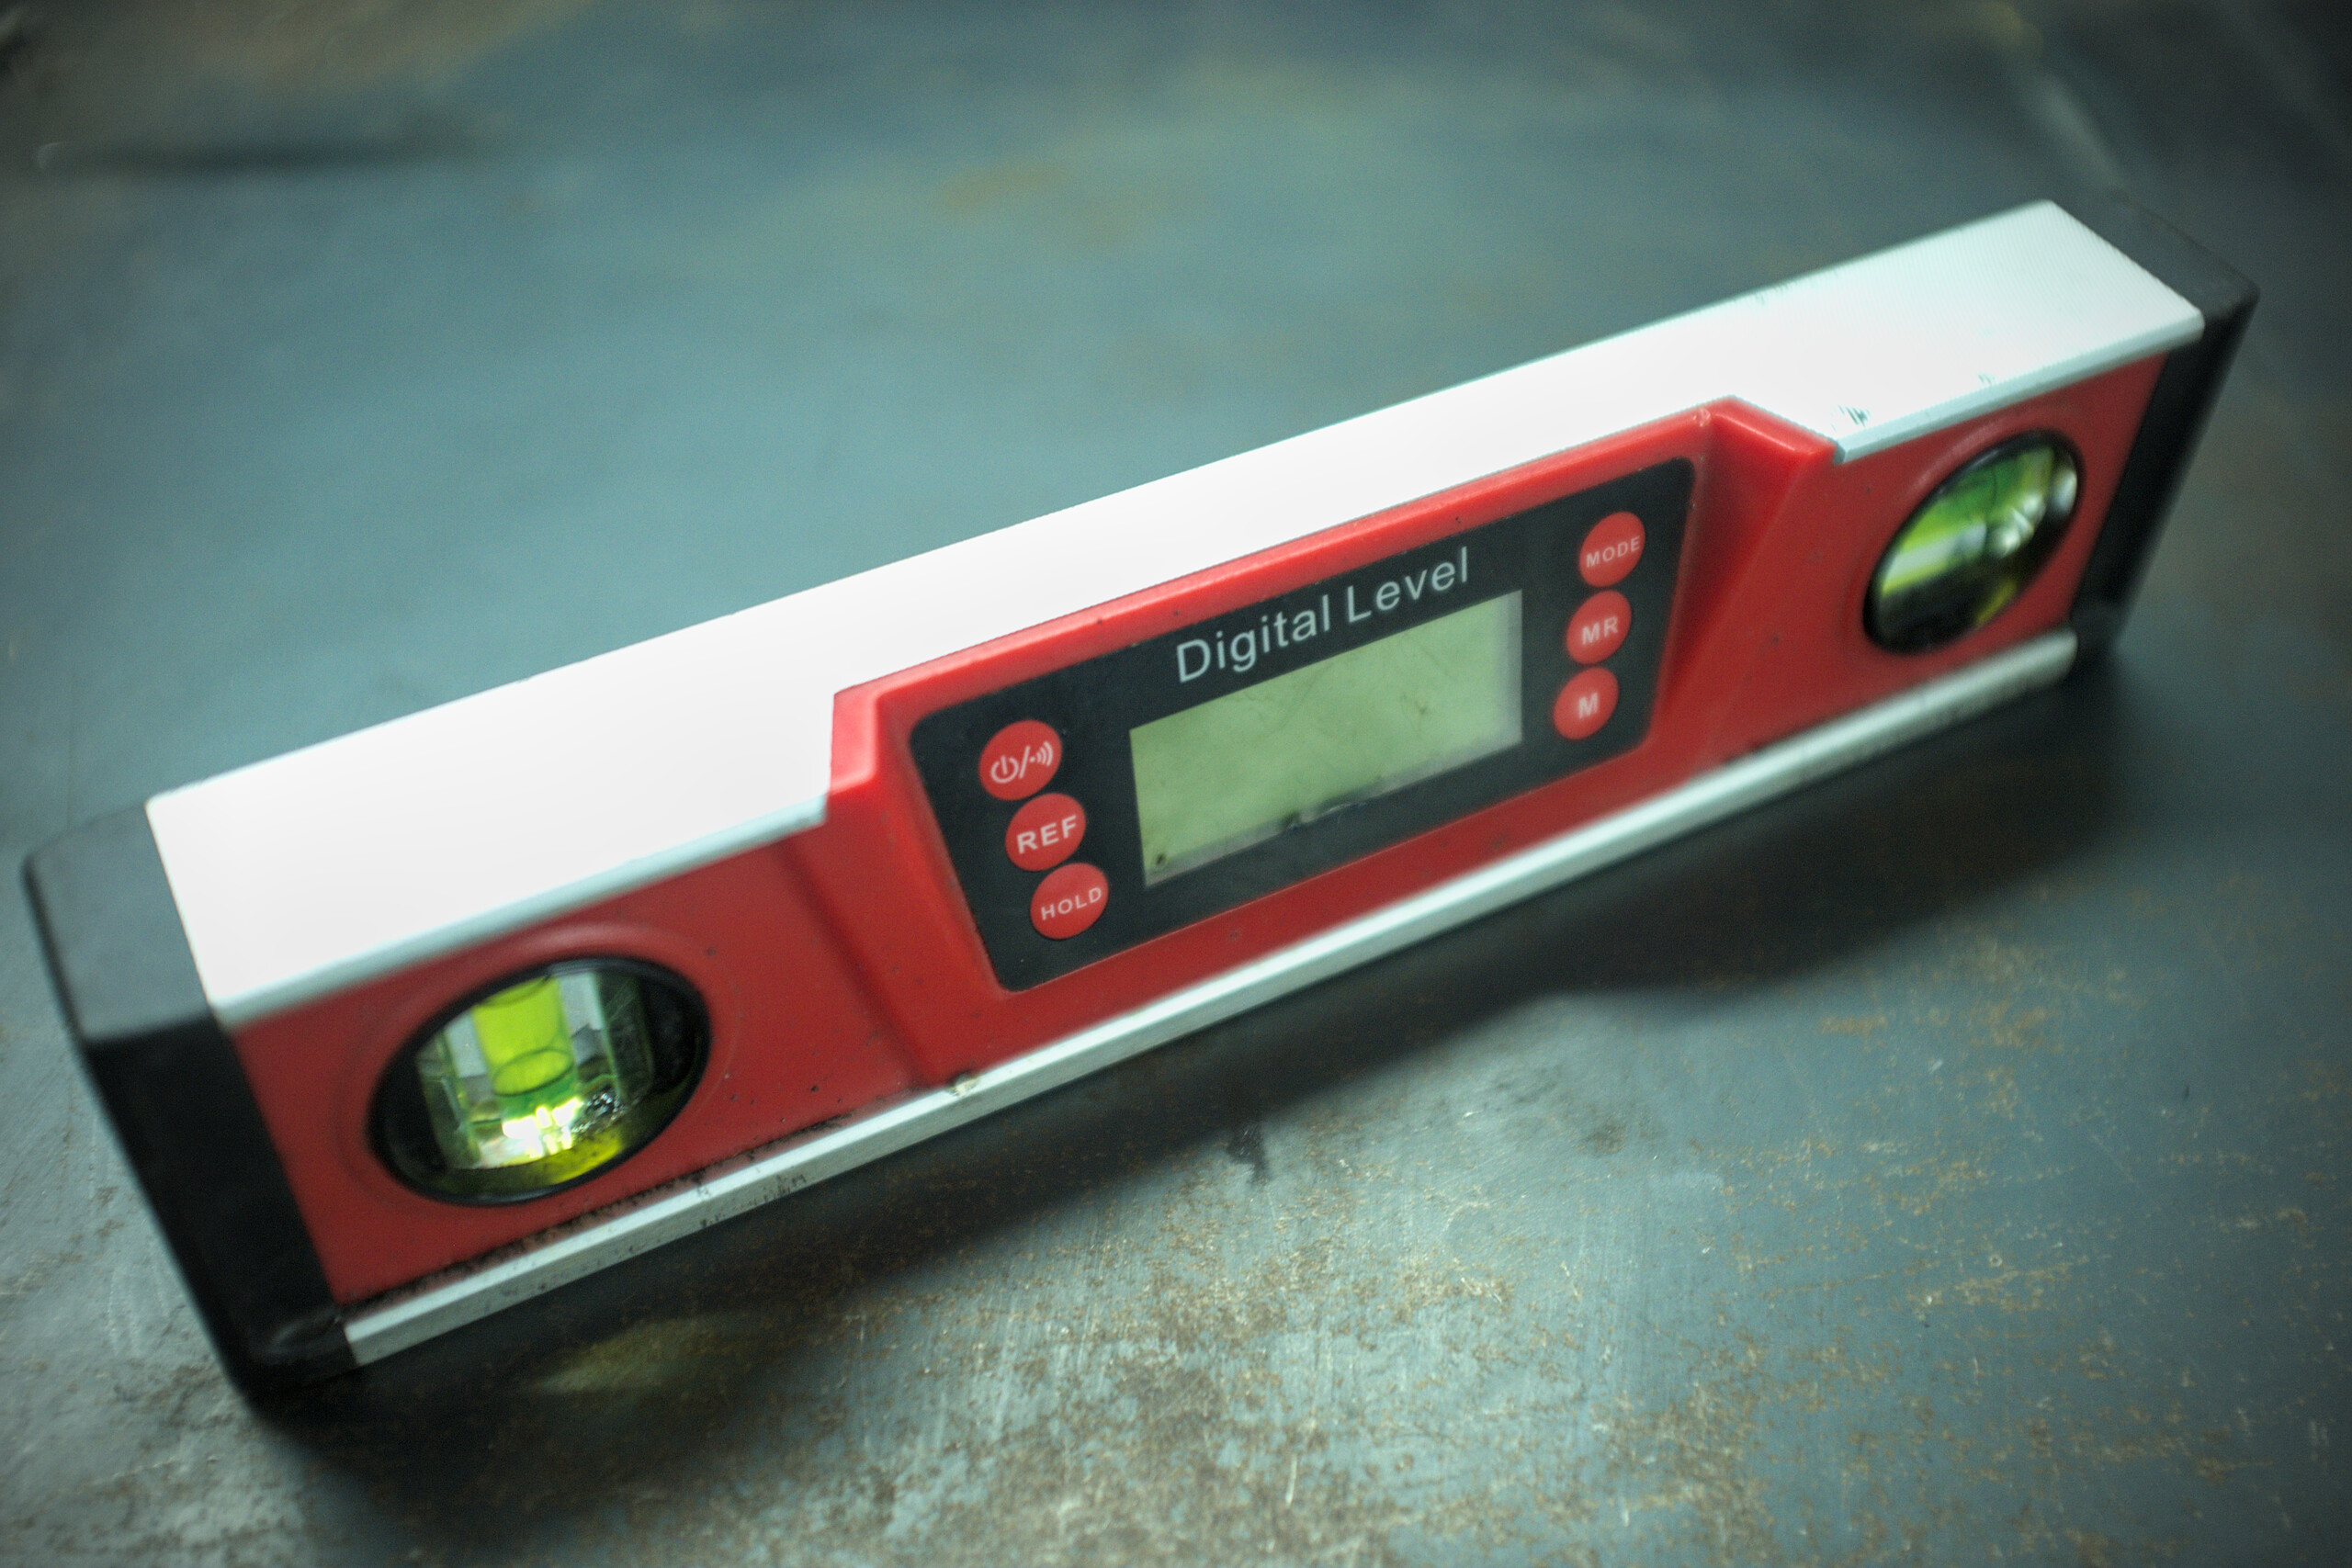
...then I can show you how to calibrate it. If it looks mostly like this but isn't covered in a thin film of angle grinder dust, I can also show you how to calibrate it, because it's the same thing. (Mine is pretty grim; this is after I cleaned it.)
Here's the short version:
- Power off your level, if it isn't already powered off.
- Place your level on a reasonably flat surface; your desk will do.
- Press and hold the
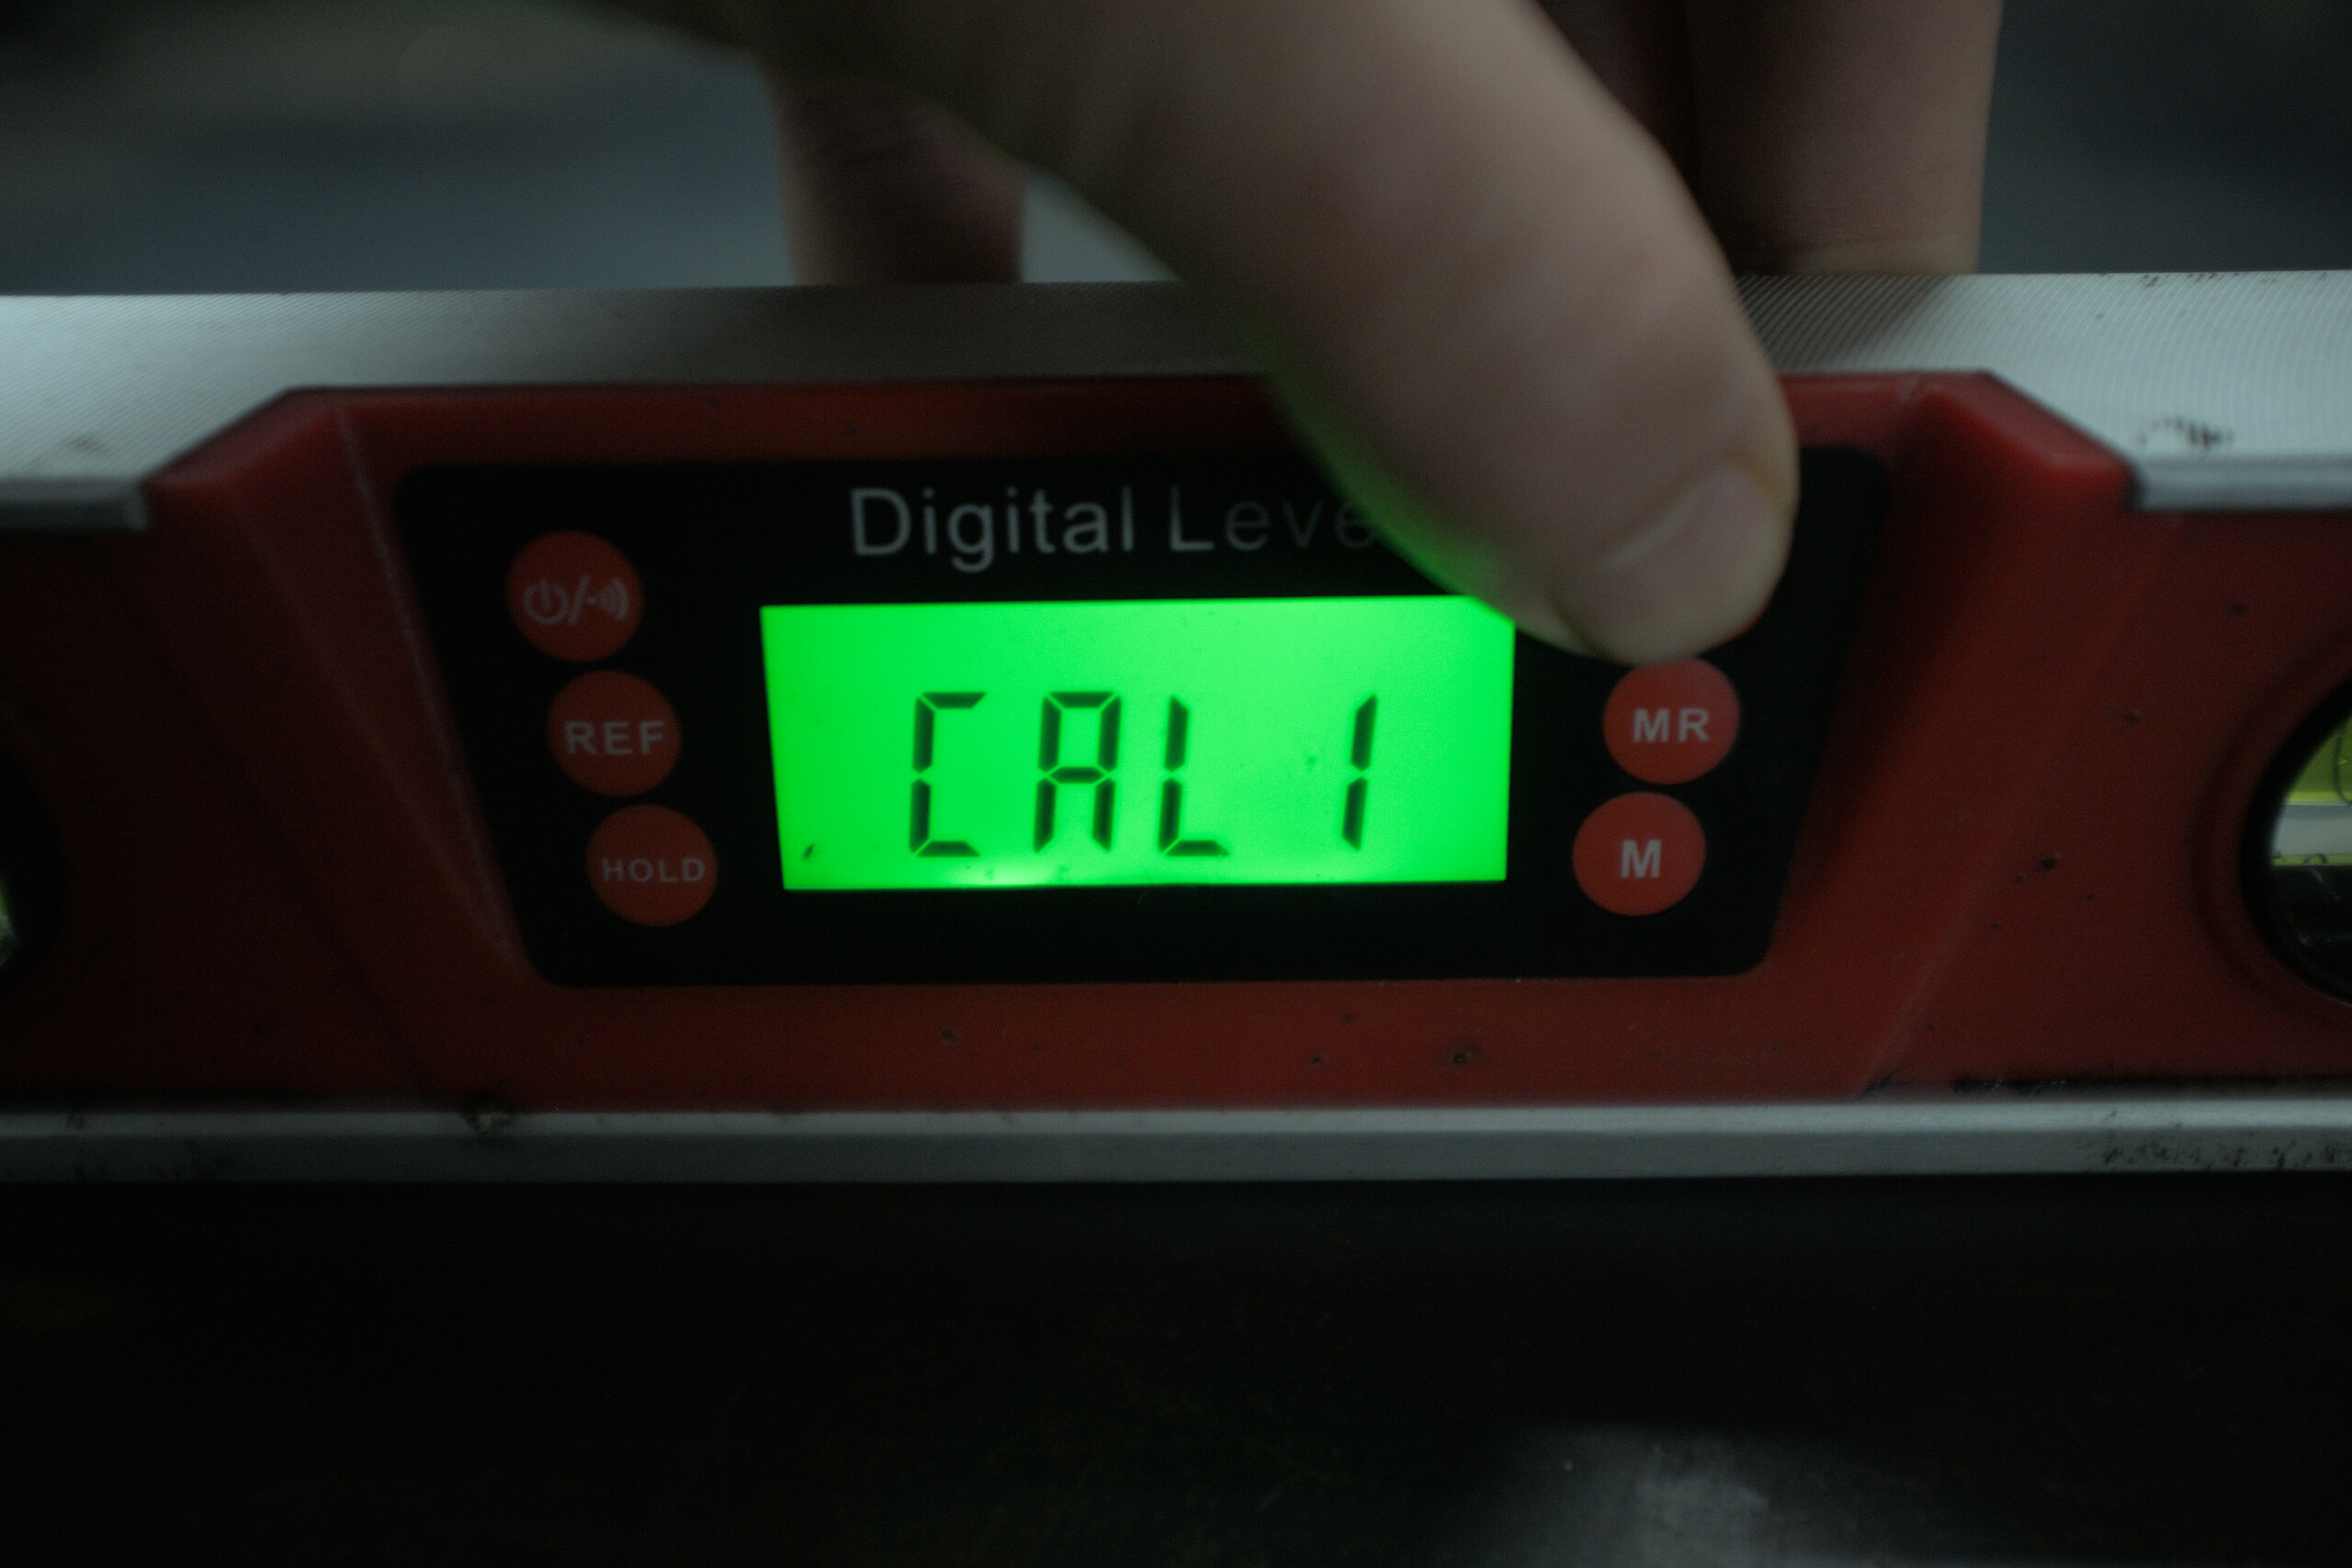
MODEbutton, then push the power button (while still holding MODE), then release both. - Press and release the
MODEbutton once;CAL1will show on the display. - Rotate the level 180° through its horizontal centre (keeping it the right way up).
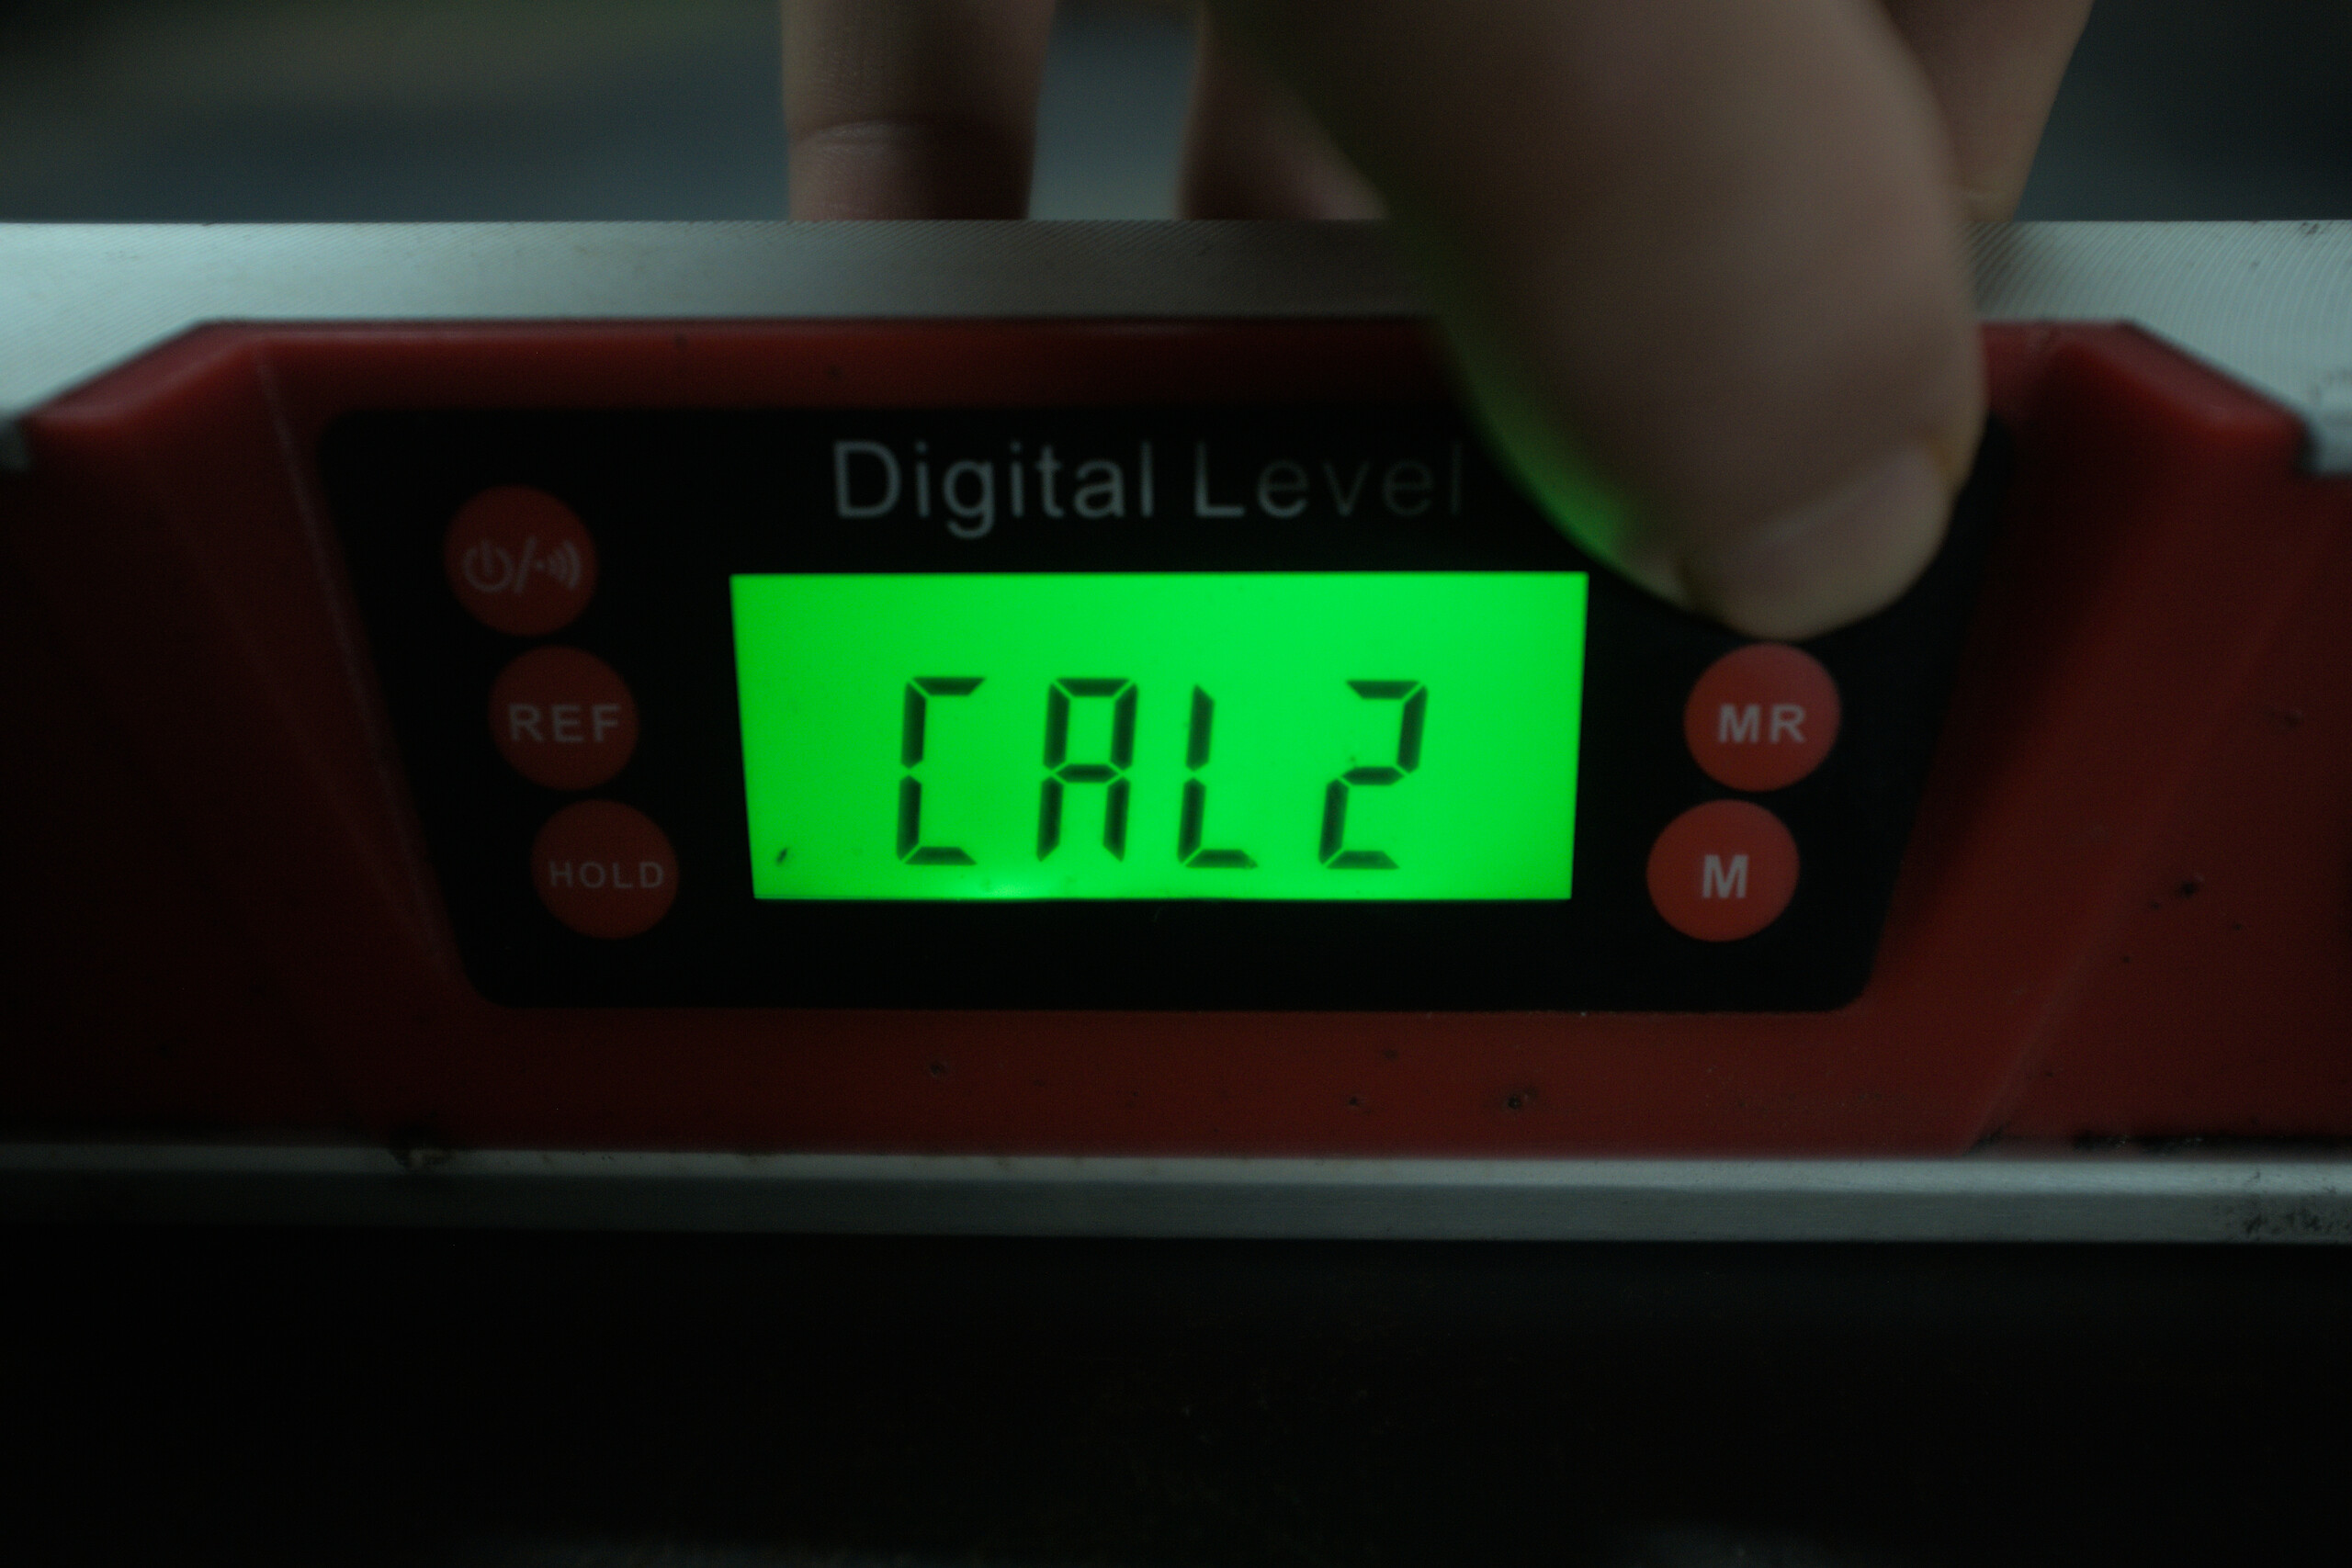
- Press and release the
MODEbutton again;CAL2will show on the display. - You're calibrated!
The longer version
...and with that out the way, I can ramble on forever without getting in anyone's way. If you made it this far it's because you like me, and I like you because you're great.
My digital spirit level was like £25 from Amazon. It's cool! It's easy to read from a distance because of its big illuminated display, and it is much more precise than a non-digital spirit level's bubble. It was critical to re-engineering my Rover P5 subframe to accept an LS1 engine.
It does, however, drift out of calibration over time, for reasons I don't pretend to understand. This is normal; that is why every digital level will have a calibration mode. Mine was about half a degree wrong when I calibrated it today.
Be aware that for a lot of jobs it won't matter if it is miscalibrated! It only matters if you need to construct something level relative to Earth's centre of gravity. A workbench would be a good example of when it matters. So would a building. Putting new pieces of metal into my front subframe was a good example of where calibration doesn't matter. I wasn't interested in making those things level compared to our planet; I wanted them level with the rest of the subframe. That's what the "REF" button is for; set up some thing as a reference, and all angle measurements will be relative to that thereafter.
As it happened, I later did need to get something level relative to Earth much later (it was installing a sign). By the time I needed it, I had lost the tiny paper manual for my level, and as with all weird Amazon ALLCAPS non-brands I wasn't able to find a manual for it online either. So I didn't know how to calibrate it! But with the faith that it must have a calibration mode, I could guess what it might be, based on how other levels with a more obvious calibration mode work. And I did! So here it is.
Turn your level OFF
Calibration is done during power-on, so it'll have to be powered off first.
Find something flat-ish and place your level on it
Whatever surface you choose does not have to be completely flat. That would be a chicken-egg problem! It only has to be nearly flat, and smooth enough that the level can sit on it without wobbling. If you are reading this from a computer, you probably have a desk, and that will certainly be OK.
At this point I recommend placing a ruler on your surface, and placing your level against that. Just trust me; you'll see why later. It can be any completely straight object with an unambiguous end. I use a ruler because that was the obvious thing to use. You can use the straight edge of your desk if you like. Whatever you use for your edge, keep it in the same place on your surface for all of the steps!

Hold MODE and the power button at the same time
Press MODE first, and hold it down while pressing the power button.
When you power it on, your level should show CAL on the display.
Release both buttons.

Your level is now in calibration mode.
Press MODE once
Pressing and releasing MODE will take the first reference measurement. After you have pressed it, CAL1 will show on the display.
Rotate your level through 180 degrees
Turn it around so it is facing away from you but still the right way up:

This is why I suggested setting up a reference straight edge earlier, and keeping it there; it means you can be sure that you are putting it in exactly the same place on your surface. Your surface might not be at exactly the same incline at different points of the surface; any difference between them will reflect in inaccurate calibration.
Similarly, you want to be sure that you are rotating it through exactly 180 degrees. If you don't, and your surface has a tiny front-to-rear tilt, that will be reflected in inaccurate calibration too.
Using a reference to ensure you're putting it in exactly the same place on your desk (or other surface) will make little practical difference compared to eyeballing it, but there's no reason to not chase as much accuracy as you possibly can.
Press MODE again
This will take the second reference measurement, and CAL2 will show on the display.
You are now calibrated!
What if you have a no-name digital level, but yours doesn't look quite like mine?
If you have a CAL button, this replaces the MODE button in everything I said above.
Otherwise if you do not have the same button arrangement as me,
and MODE doesn't work,
some variation of the above procedure will almost certainly work with one of the buttons.
I think, but do not know, that all of the cheap ones will use similar circuit boards,
and might all be made in the same factory for all I know.
So it is extremely likely pressing some button while powering on will enter calibration mode,
and probably the same button will be used to take the reference measurements.
Try all of them!
How do I know if my level is incorrectly calibrated?
First, believe the bubble; your bubble cannot be wrong if there weren't drastic errors in manufacturing which you just don't see these days.
Second, you can use exactly the same reasoning that the level uses to calibrate itself based on two measurements to determine whether your level is properly calibrated. Consider: this calibration procedure works by taking an angle measurement. Whatever this angle measures, a perfectly calibrated level rotated through 180° should read exactly the same in the other direction. If your surface is completely flat, it should read completely flat after being rotated along its length. If it is sloped 1°; to the left, it should read as being sloped 1° to the right after being rotated along its length. Any difference between the two is the amount of miscalibration, and that difference will be stored in the level's memory to be added to measurements thereafter.
So if you need to find out if your level is miscalibrated, just put it on a surface, read the measurement, turn it around and read the measurement. They should be the same degree measurement (but in different directions), and if the difference between the two is unacceptable for your purposes you will need to calibrate it. Simple!