The desk chair post, part 3
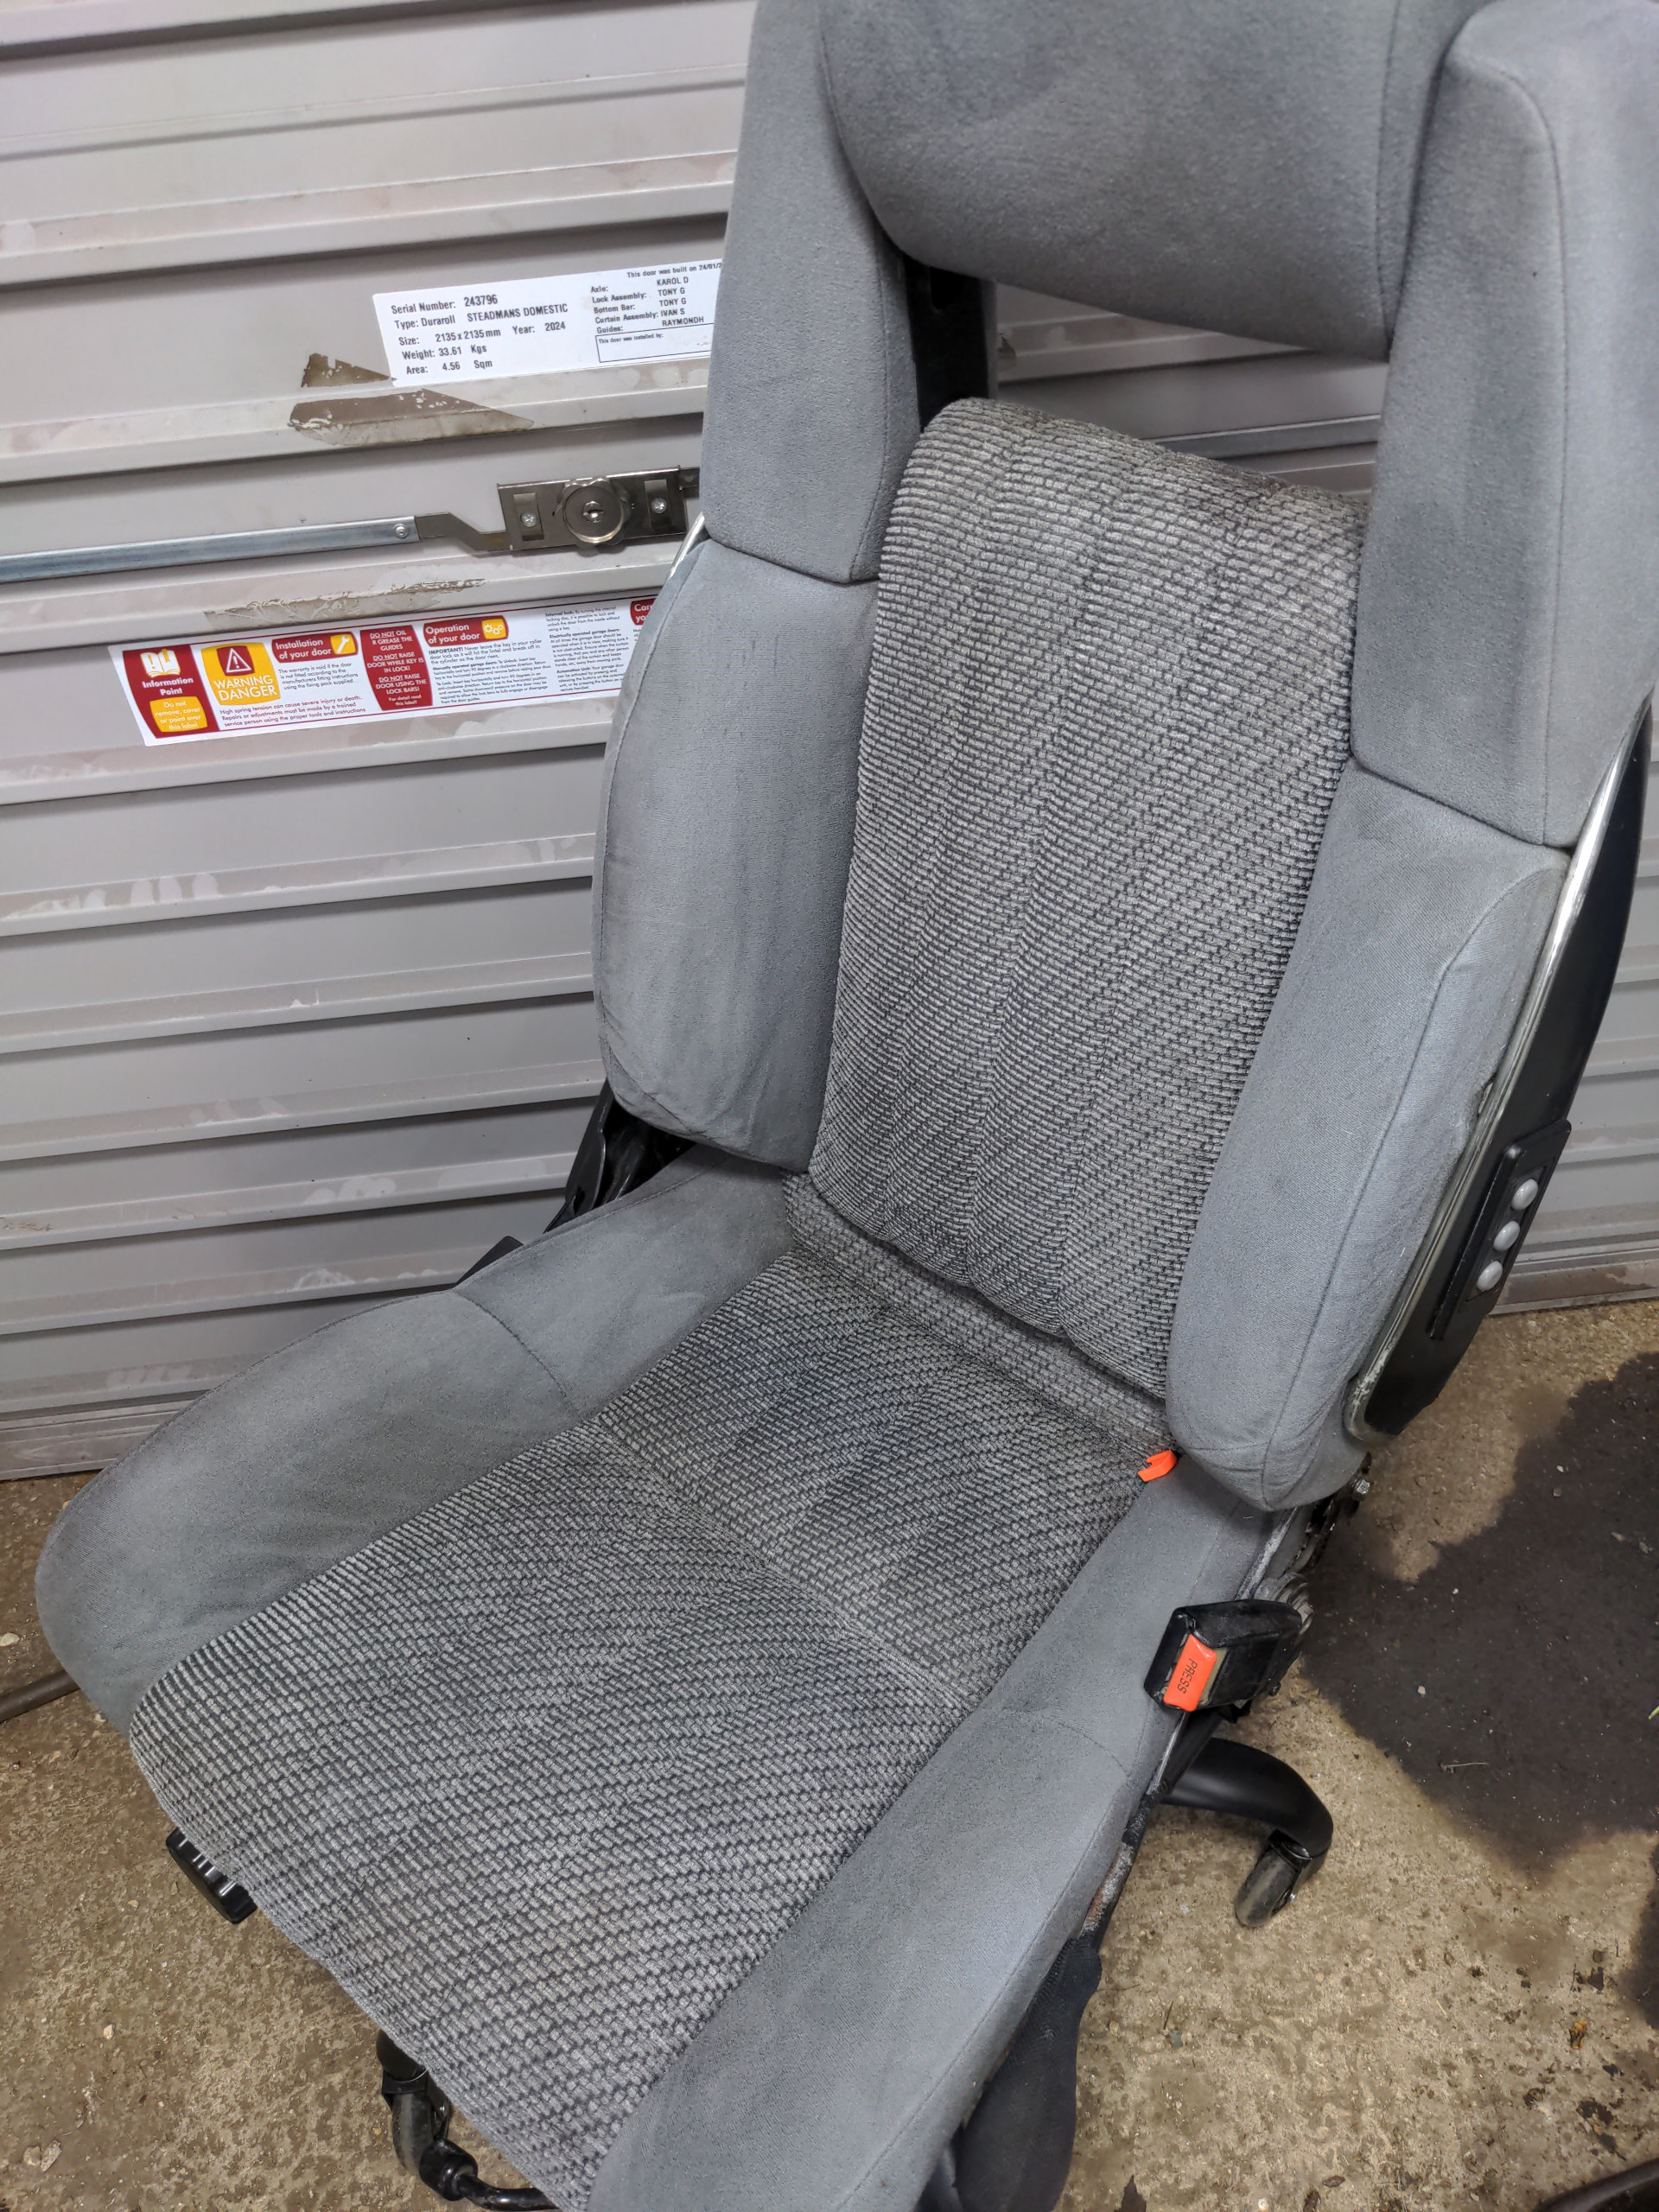
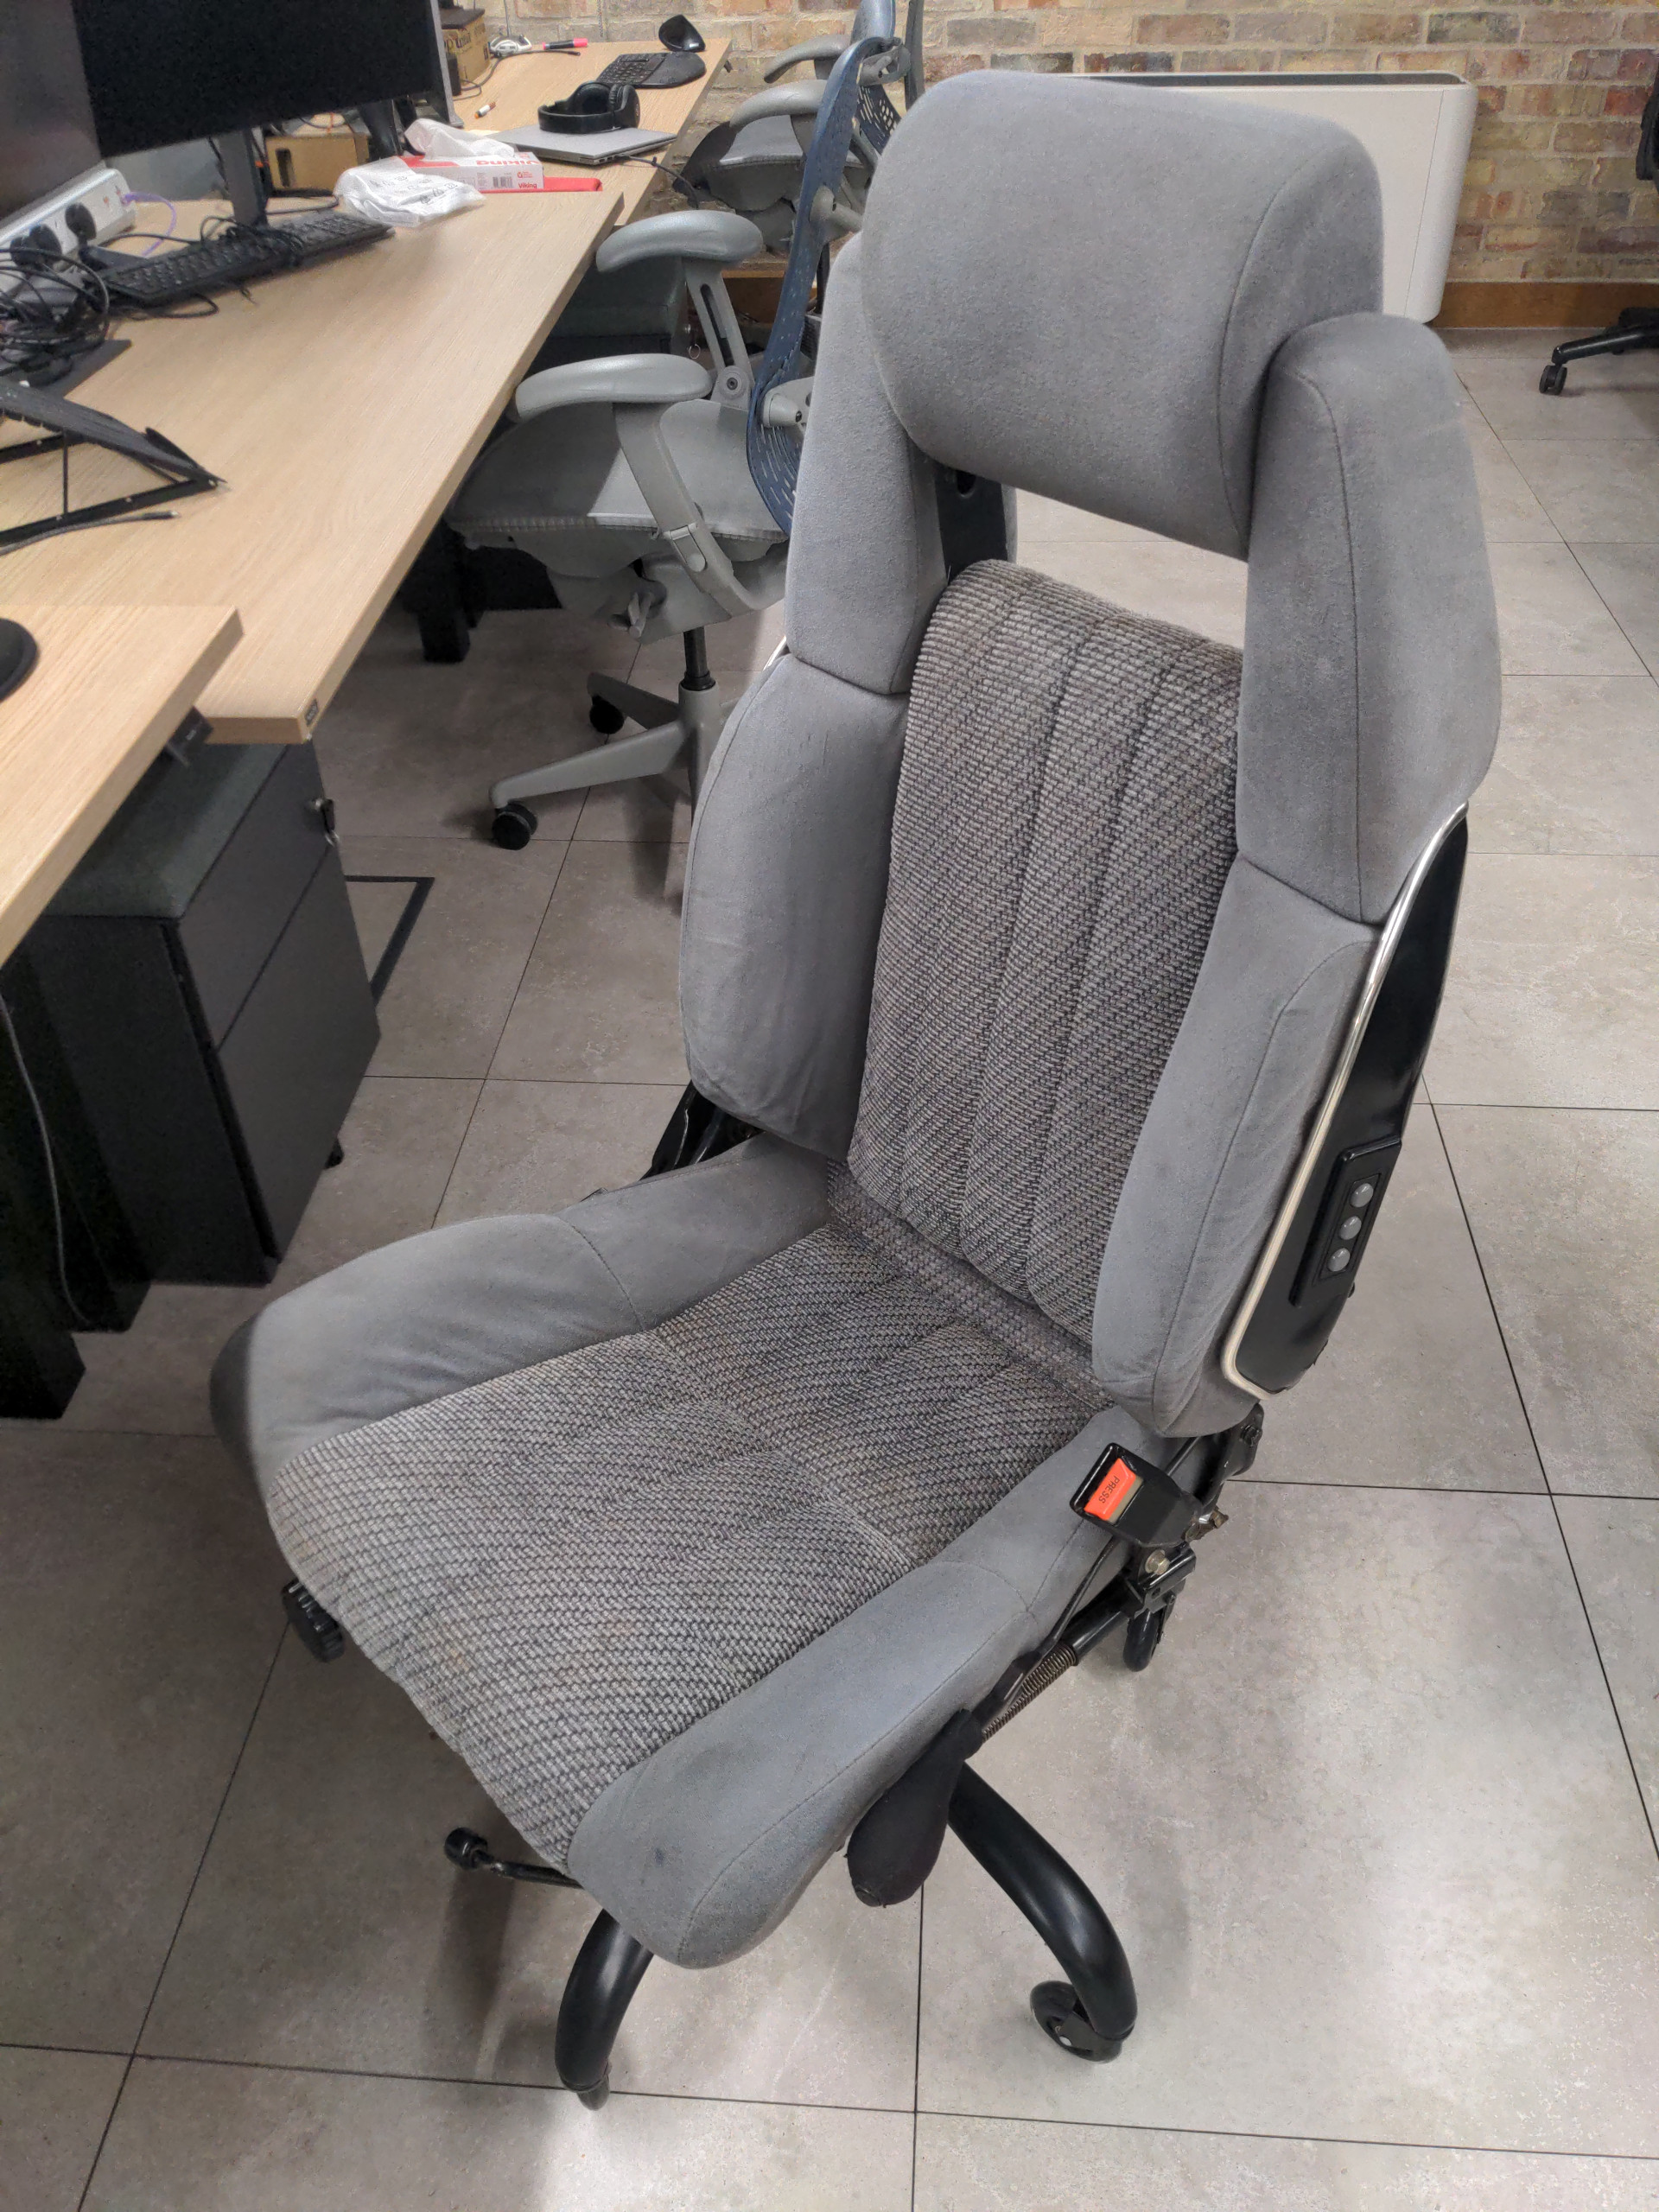
This is the driver's seat from a 1985 Toyota Supra.
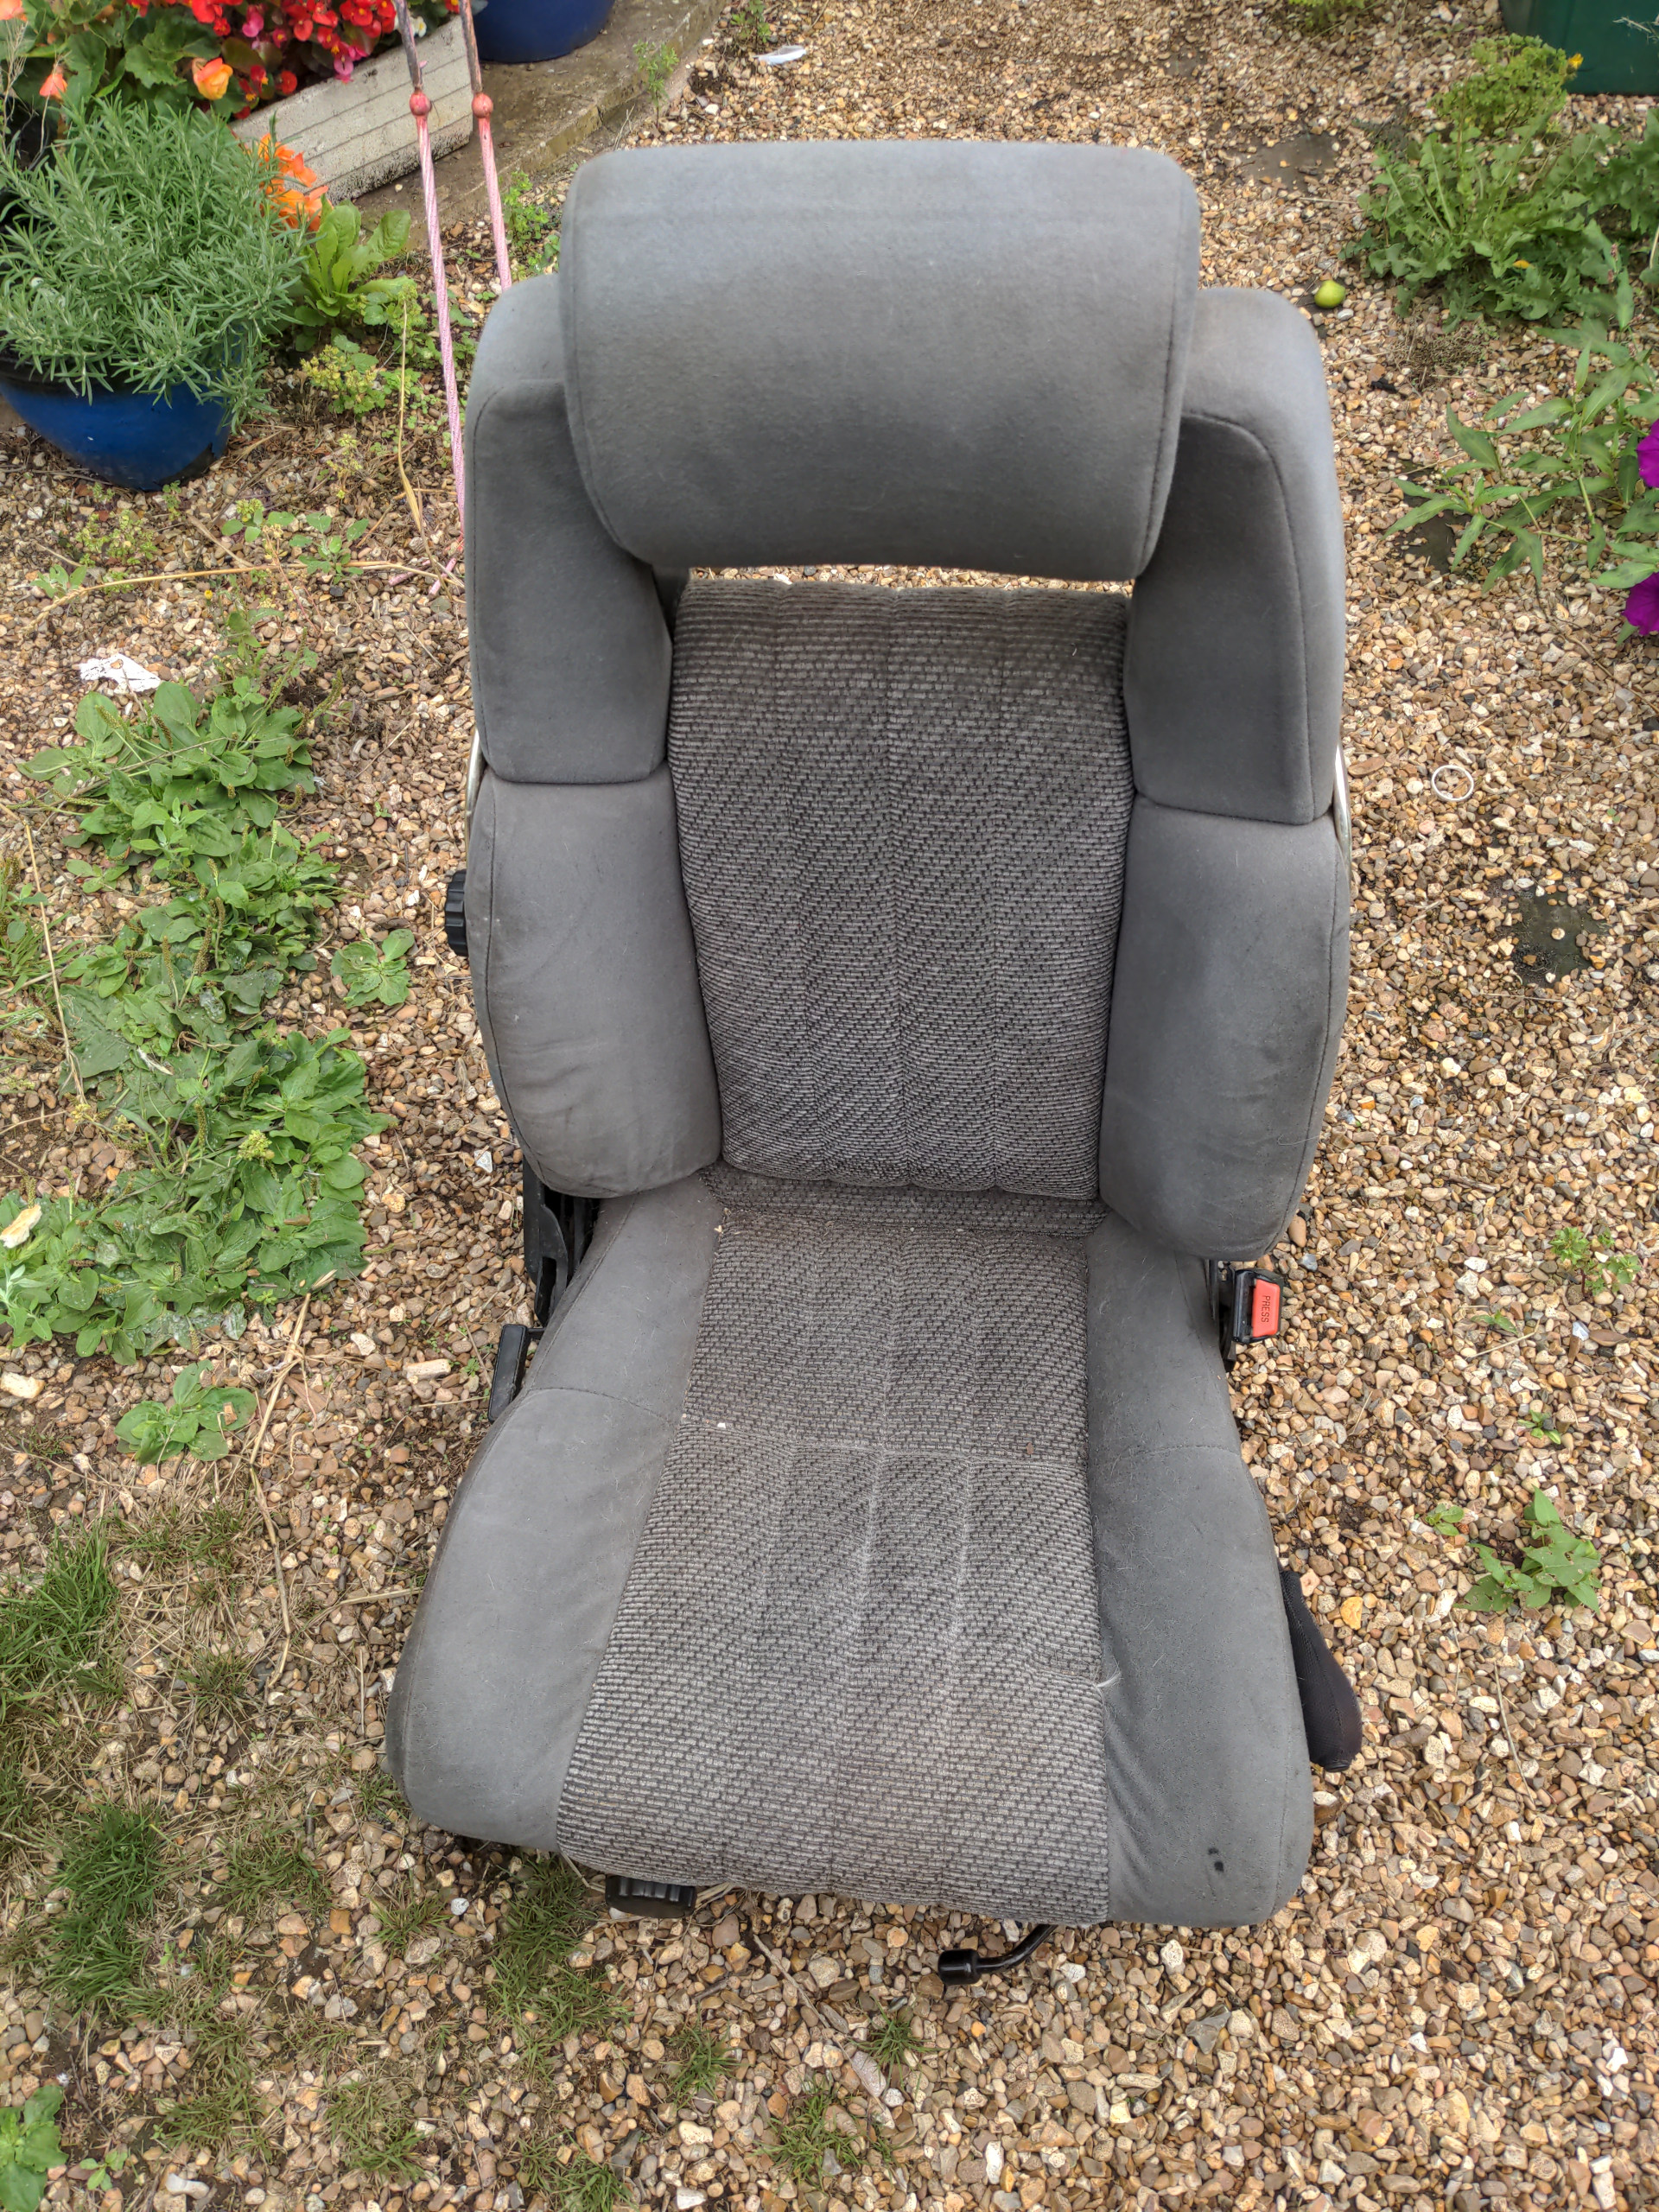
I acquired two of them in almost perfect condition apart from a layer of storage dust. They came out of my mum's Supra when it was stripped for parts in the late 1990s. The seats were saved for a project, but that project ended up using different seats. Then they did not go into my mum's SJ410 (they're too big and it got Smart Roadster seats instead), and in the meantime they were kept in warm dry storage.
These seats are as comfortable as it is possible to be, because they are seats from a 1980s sports car. They're also fully adjustable. You get the standard adjustments like back tilt, headrest height/tilt (with a very satisfying clicky mechanism on the latter), and knee height. But you also get side bolster tightness adjustment; you can make it grip your sides more or less depending on your size and comfort. And then there is the absolute party trick, which is this squeezy inflator bulb.
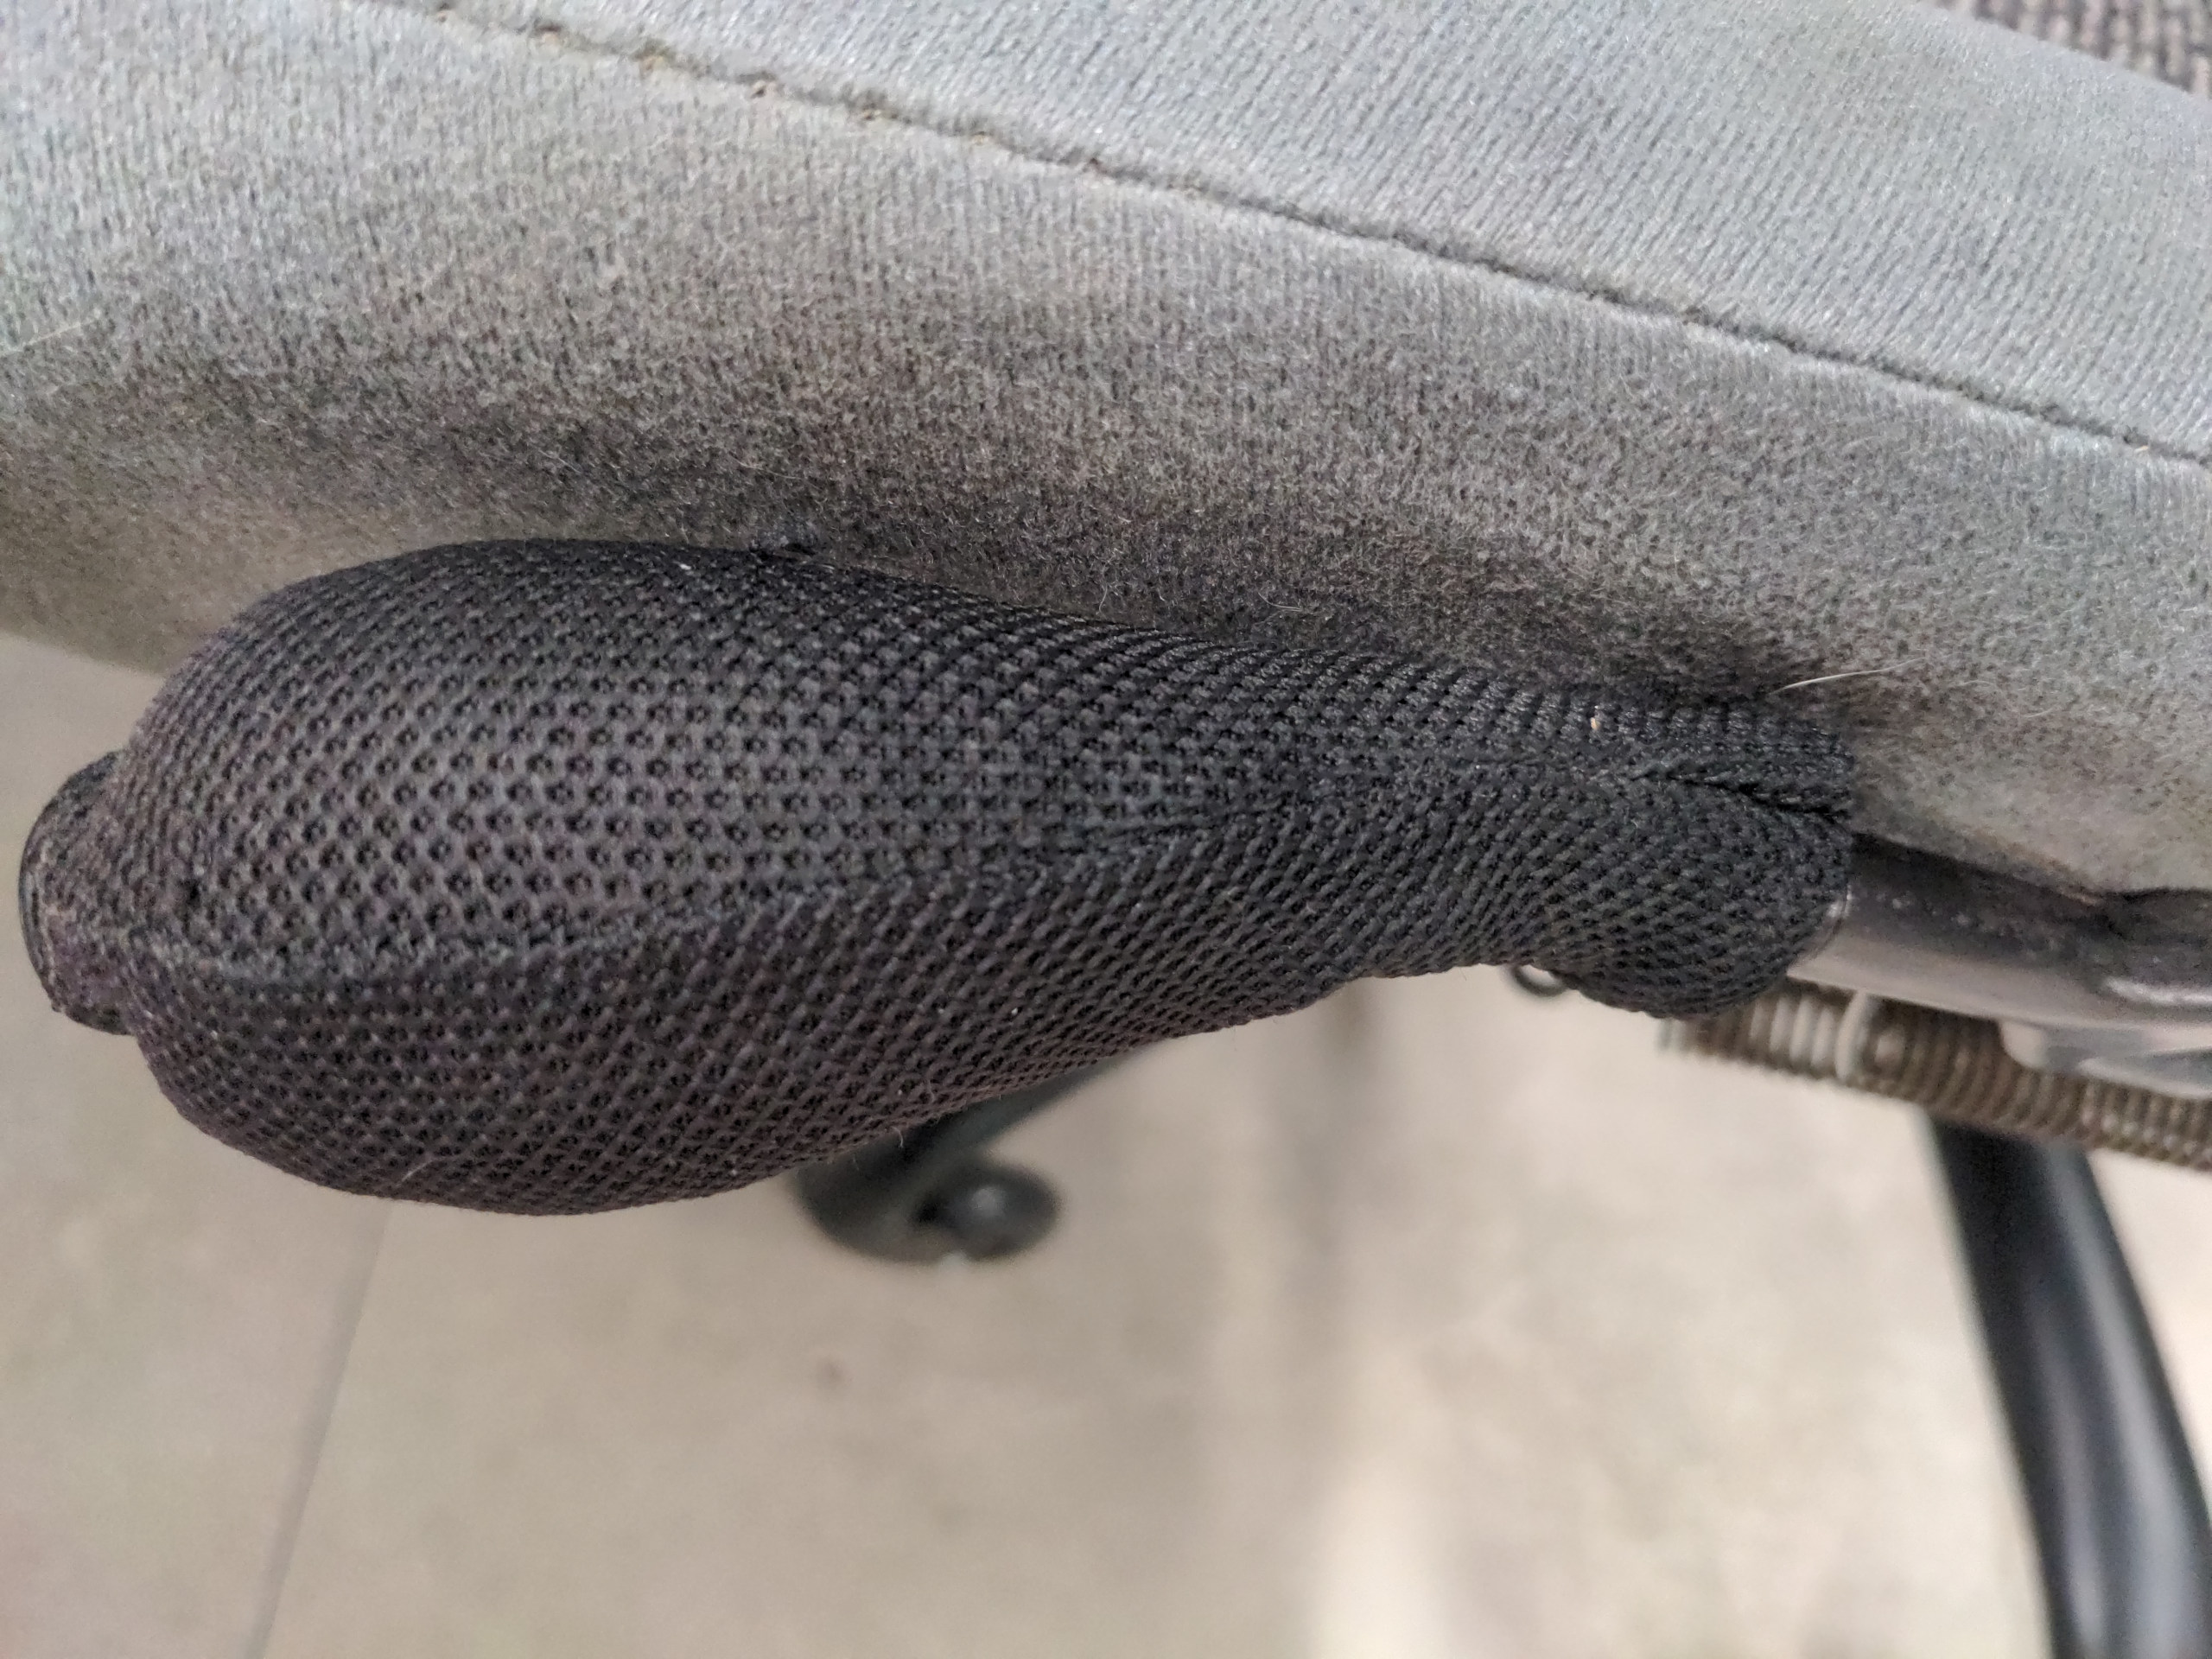
This inflates the back rest, and then via these three buttons...
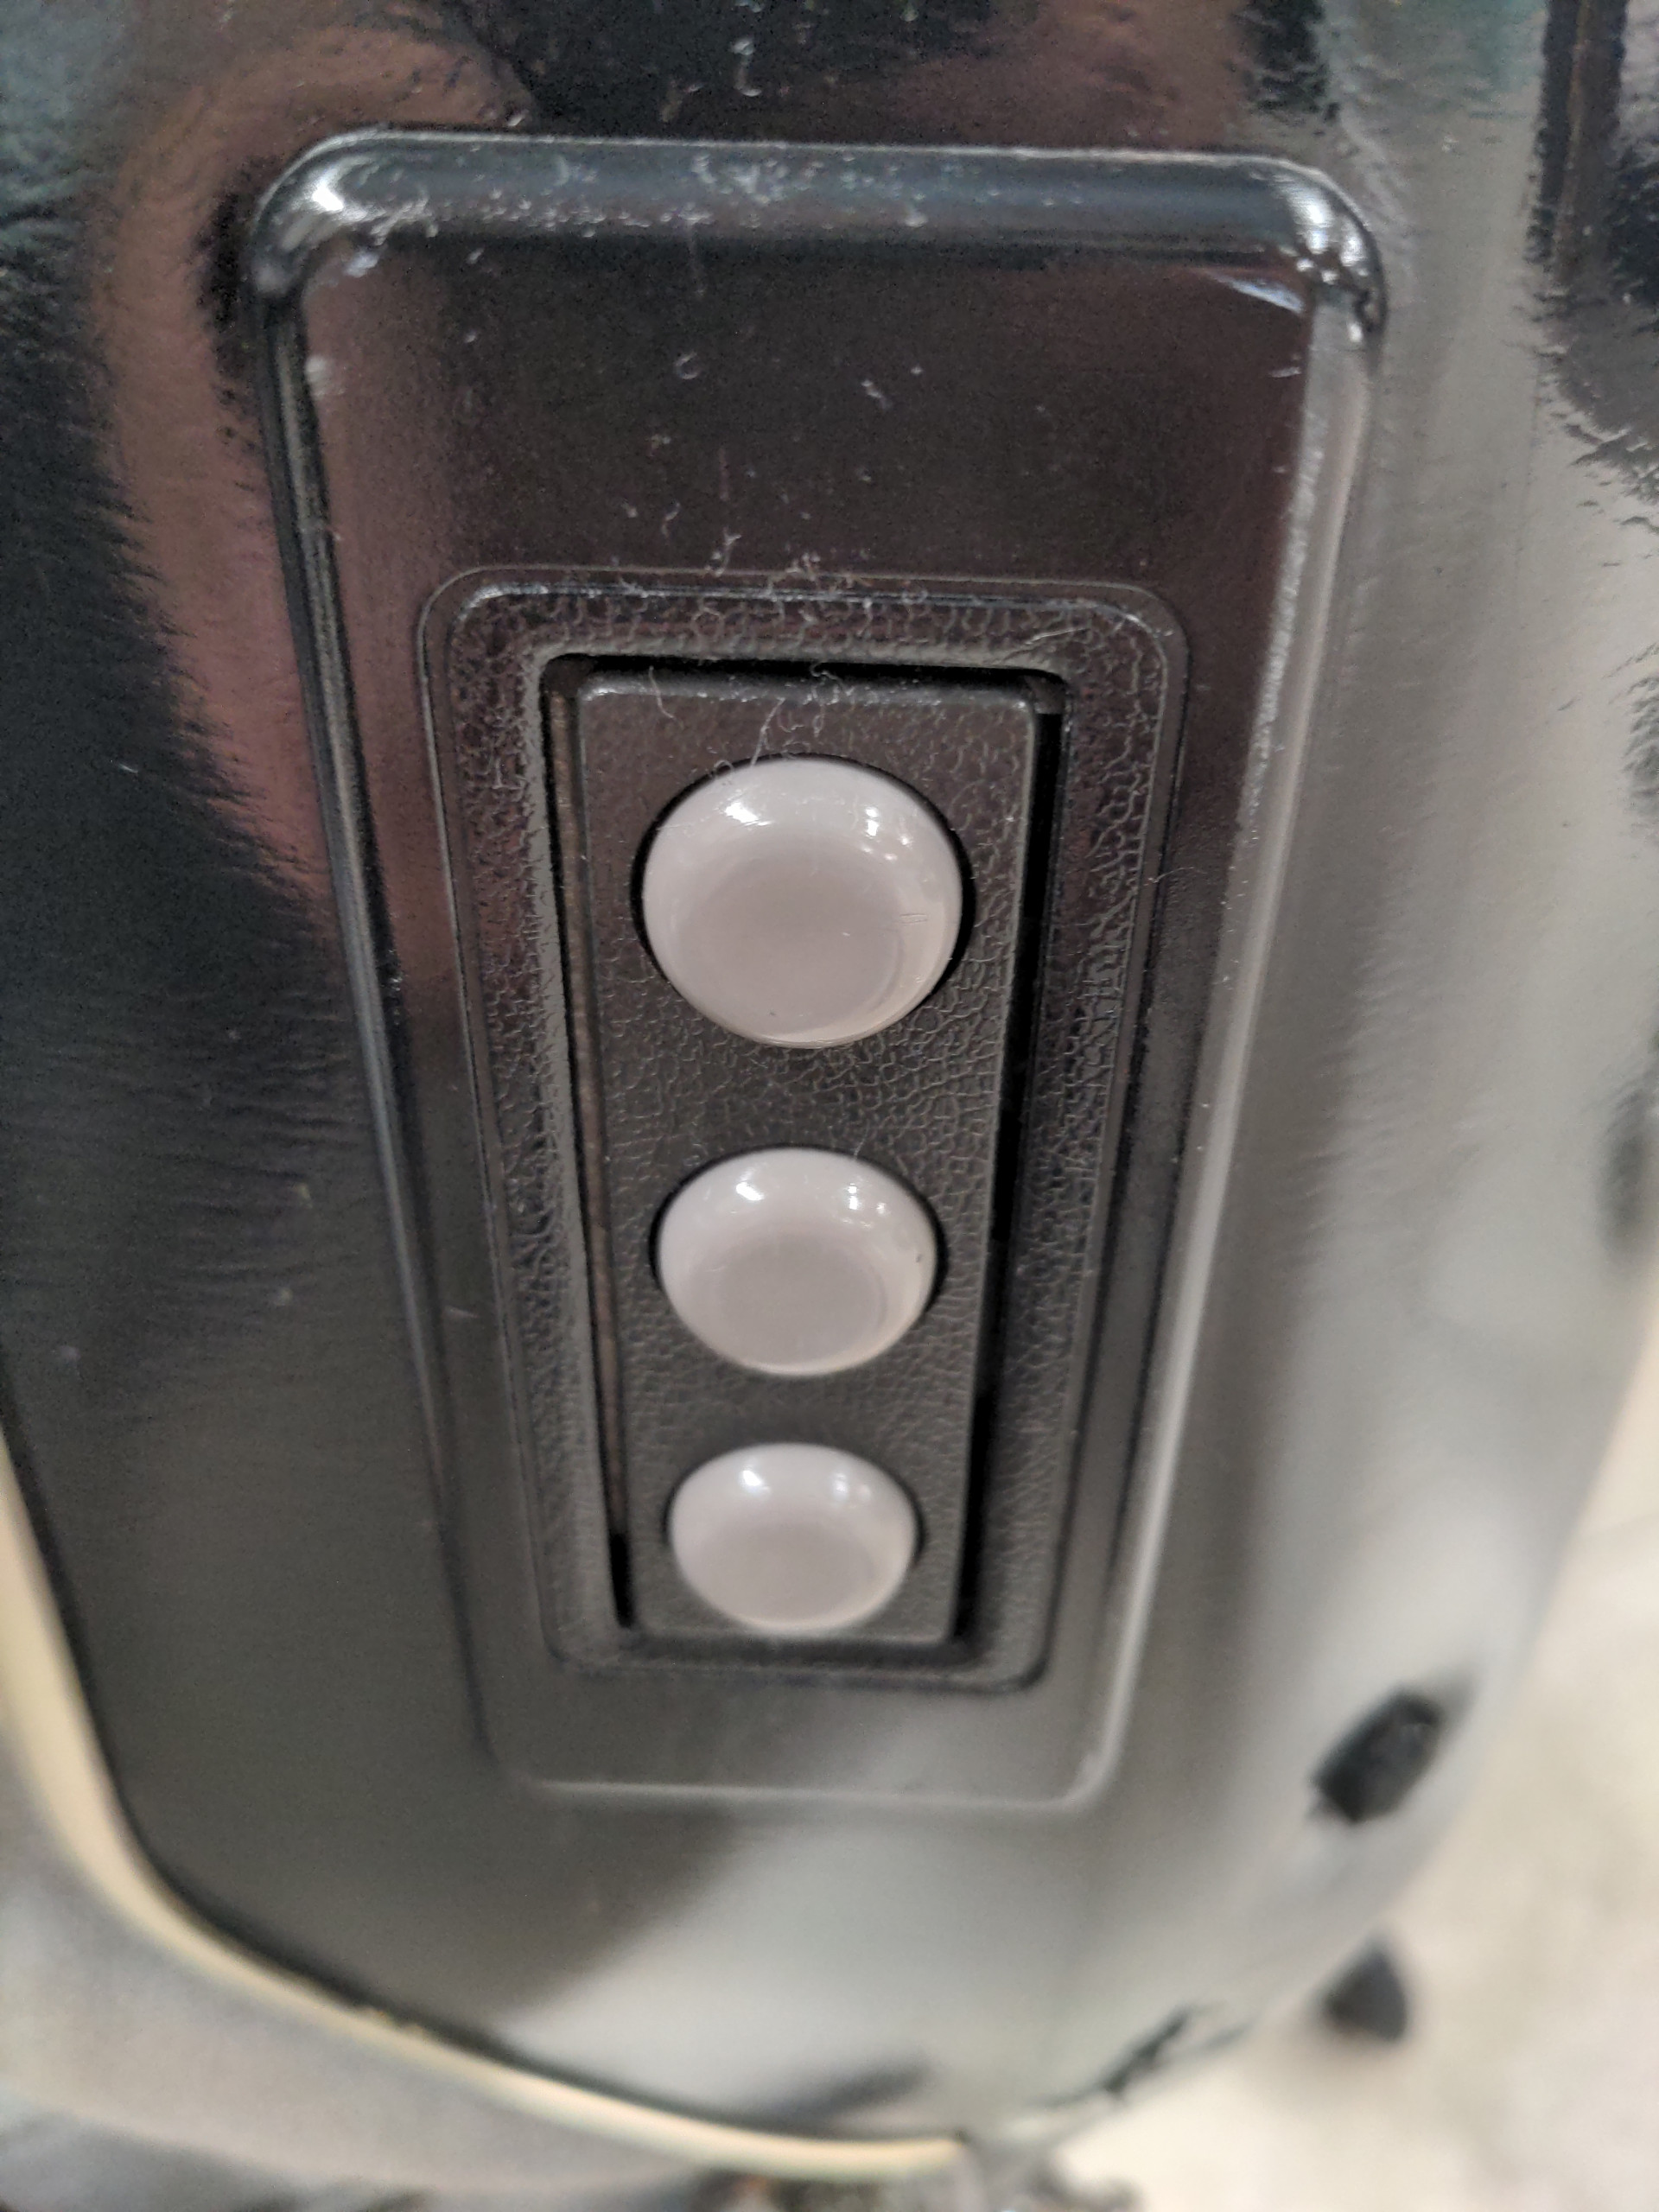
...you can let air out of three separate pads in the back rest, individually, for perfect comfort. It's overkill and I love it.
Separately, the gas lifting ram blew out in my desk chair at the day-job office. It's one of those nice Herman Miller chairs. The day-job was happy to fix or replace it for me. But this post starts with a Toyota Supra front seat so I think you can figure out where this is going.
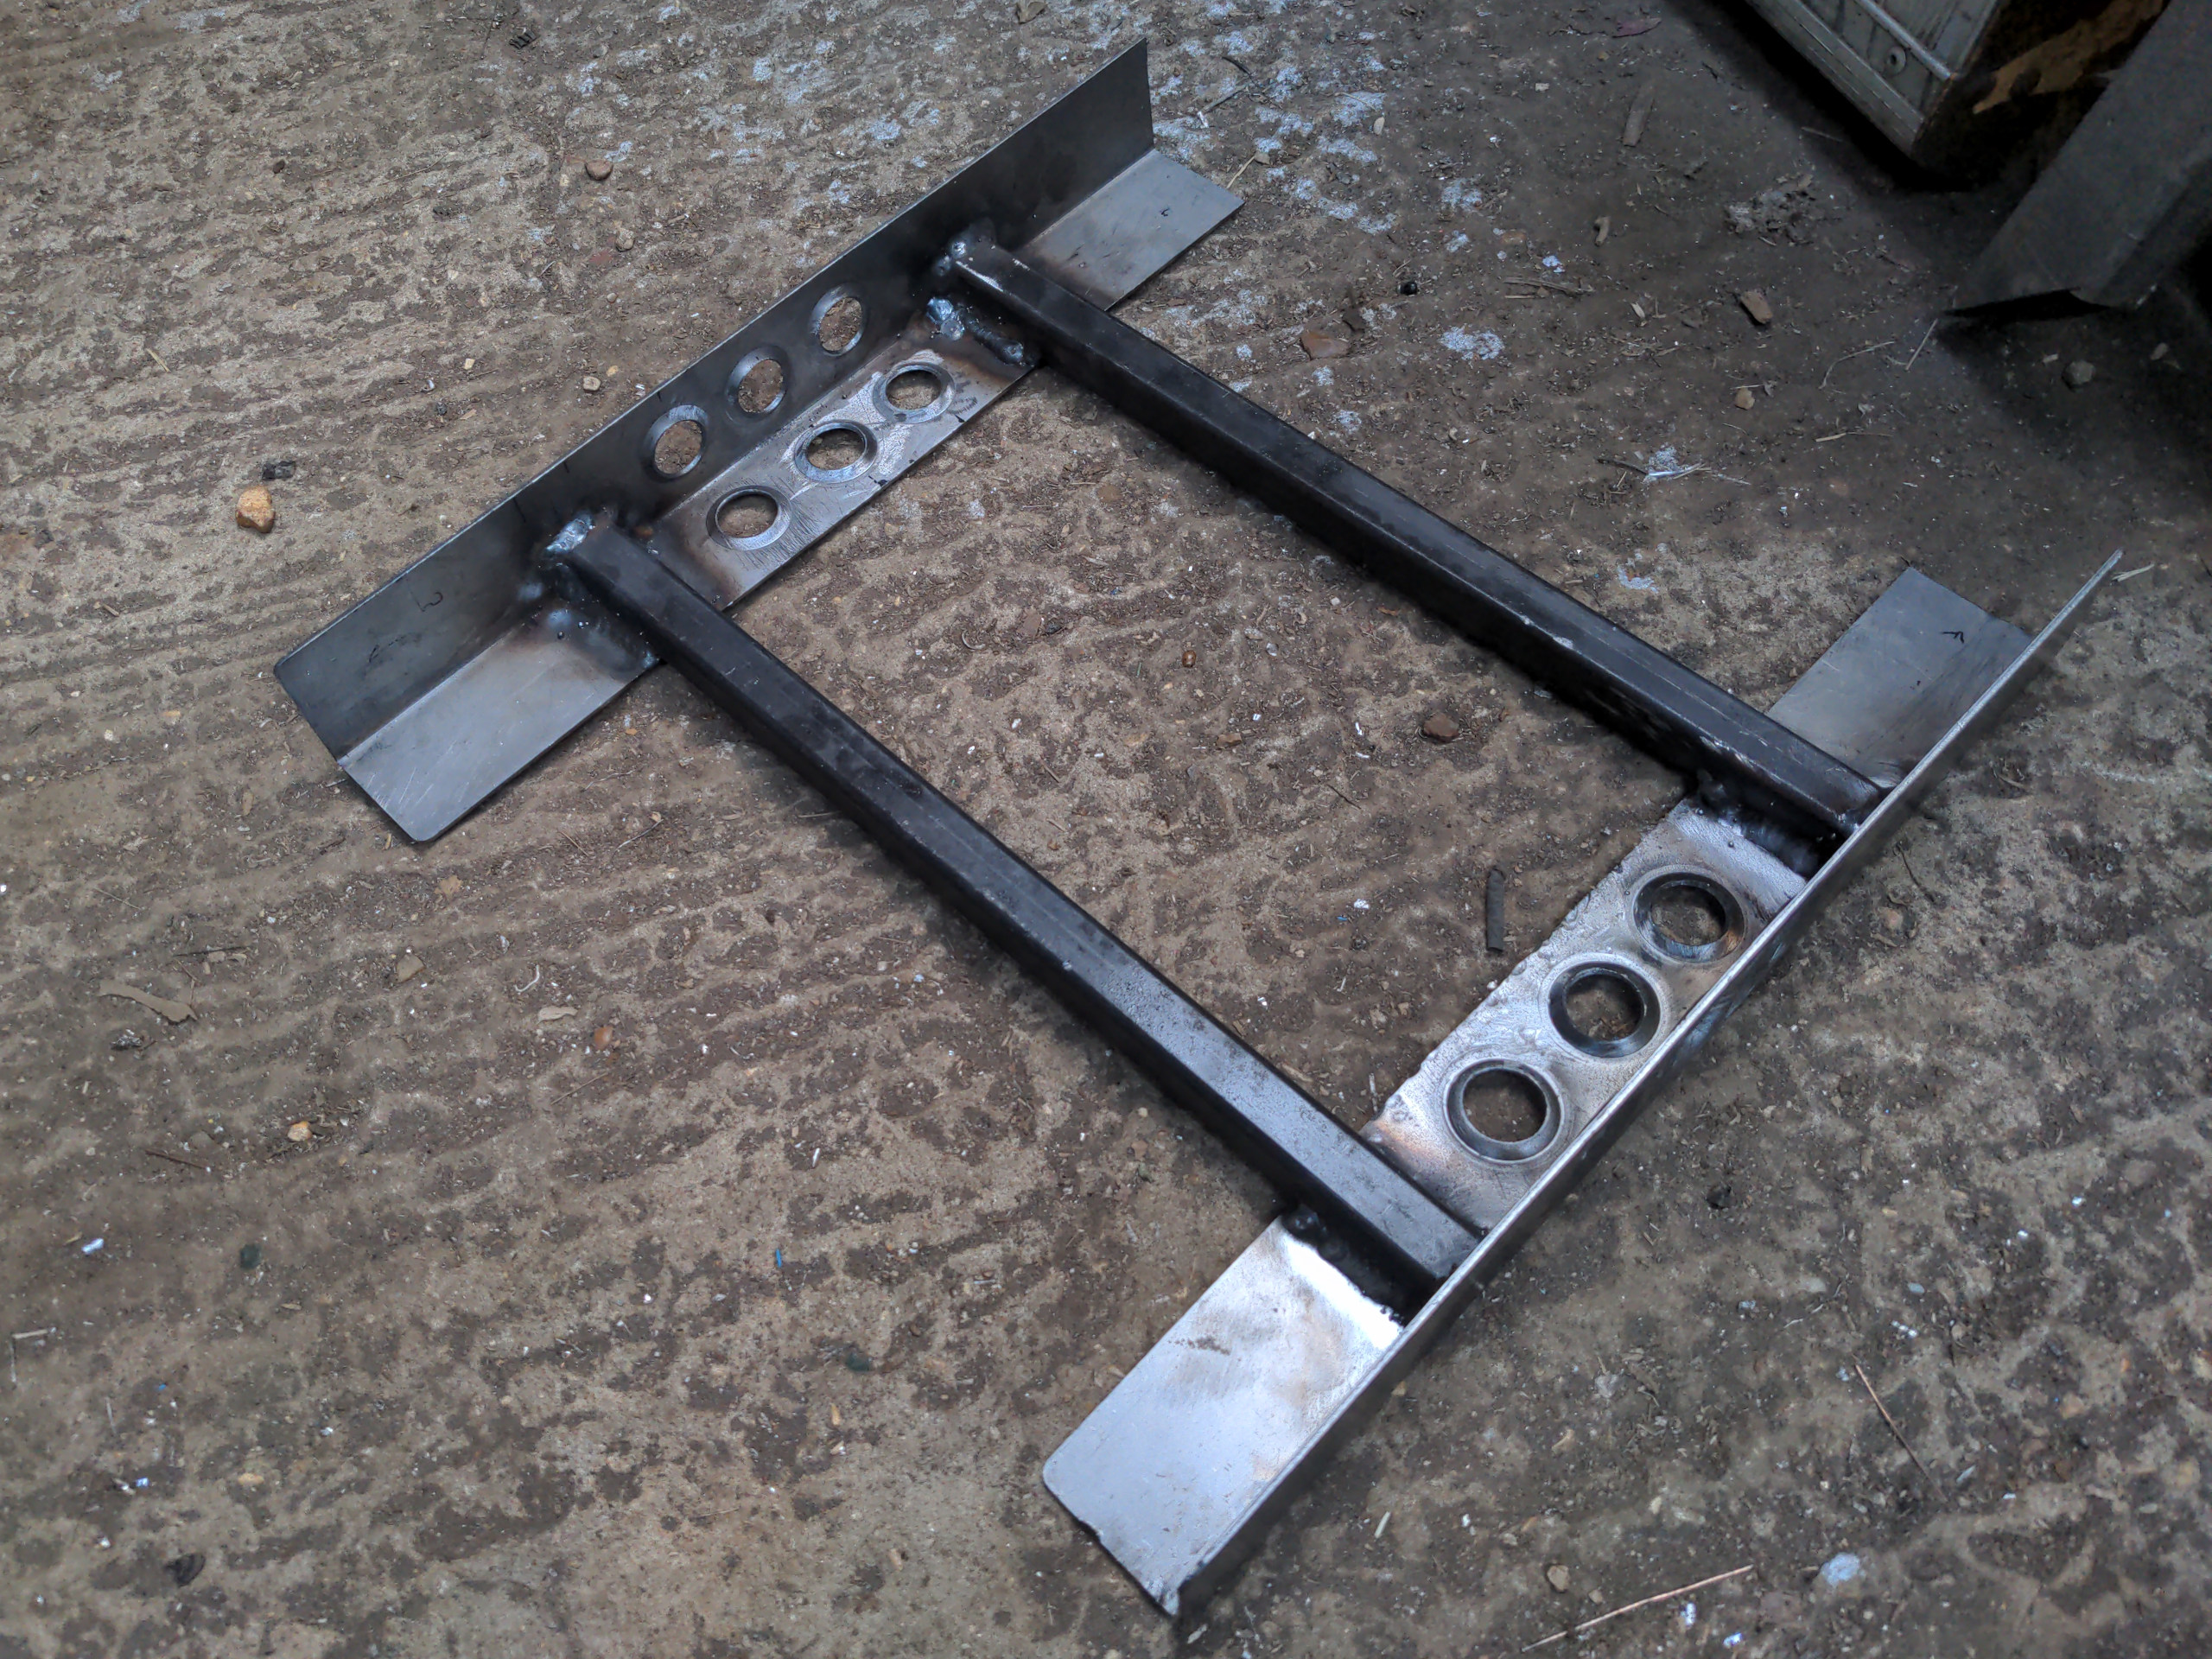
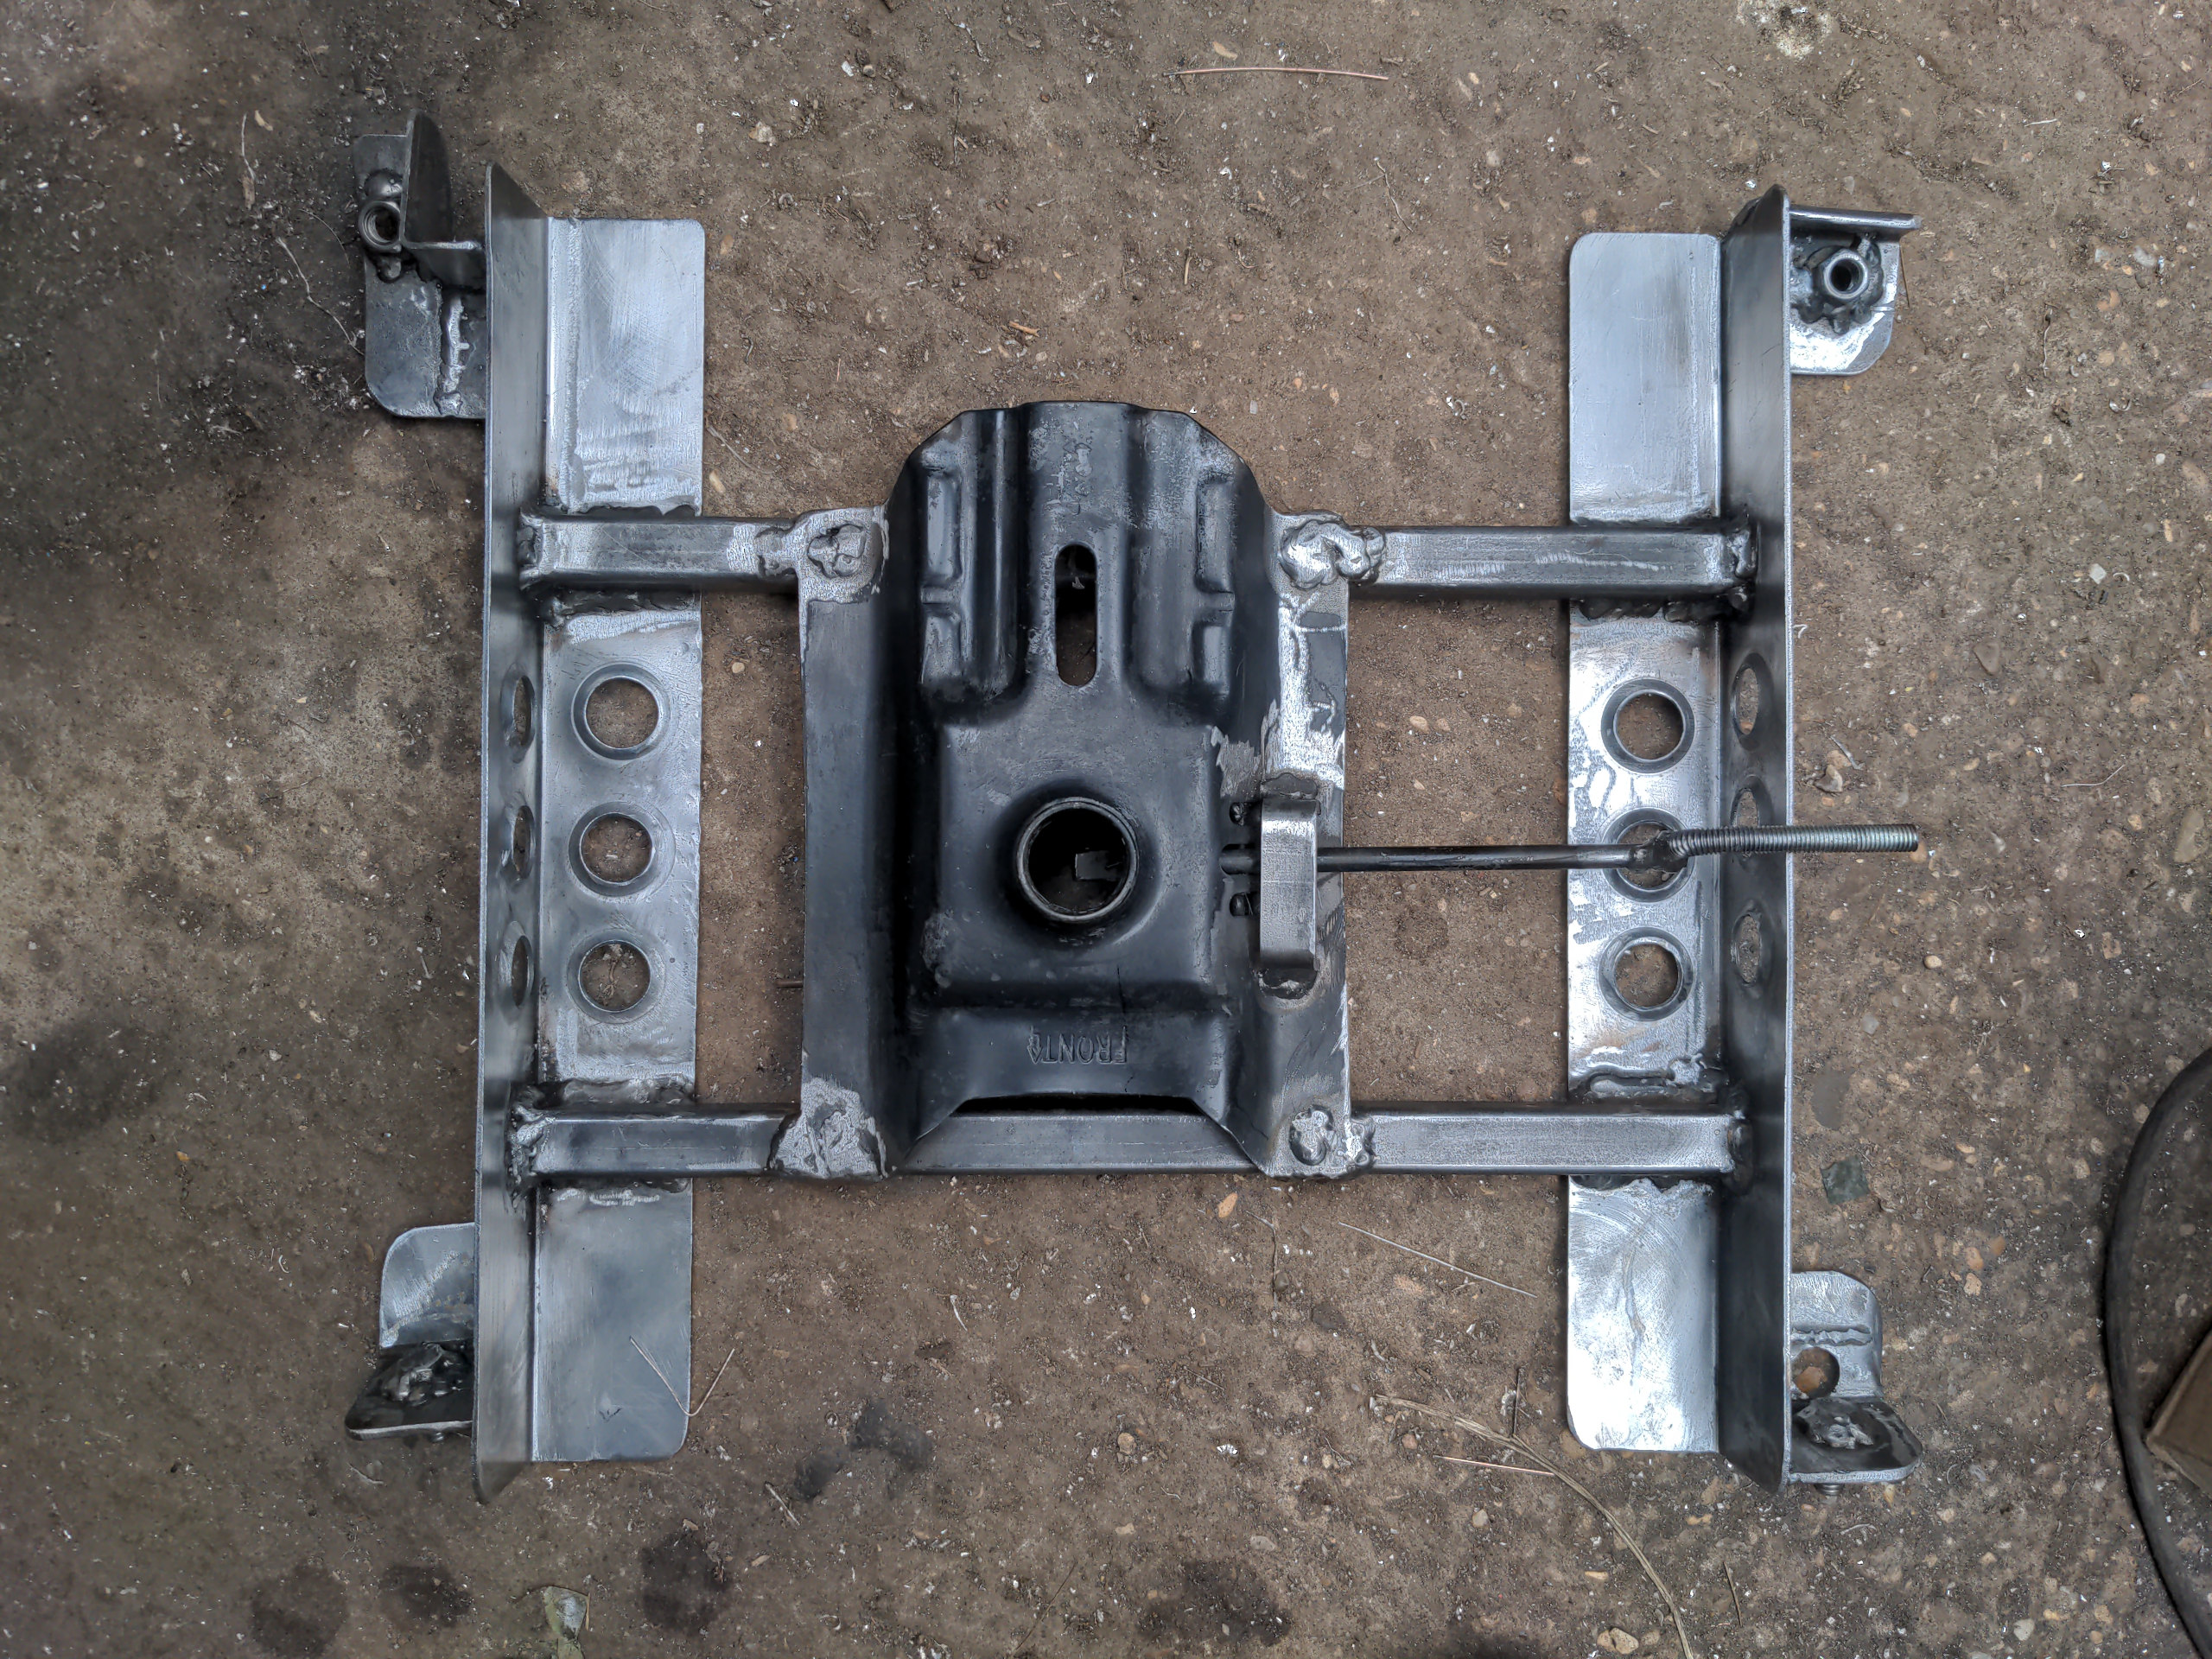
This is the start of a subframe to adapt a Toyota Supra front seat to a desk chair swivel base. It's made of some 50x50x2mm steel angle with some dimples for weight saving, separated by some 20x20mmx3mm steel box section. It's much less heavy-duty than the previous one I made; that was all 50x25mm box section which was strong enough to lift a car with. This subframe should weigh a good deal less and be more than strong enough.
This time around I decided to make this completely reversible, preserving the original seat rails. Partly because the seat rails are riveted and inseparable from the seat, and partly because these seats are rare - only 31 of this Supra generation remain registered in the UK, compared with, e.g., 6,130 Jaguar E-types. I don't really plan on unbolting it and selling it any time soon, but I'd like to keep that option open.

Here's the subframe with some more shit welded onto it. On each of the corners are mounting points made of random bits of steel from my box of offcuts. They're all at weird angles and of different shapes, because they have to be. They match the shapes and angles of the mounting points of the Supra seat rails. On the front are some captive bolts, and on the rear mounting points are captive nuts. This makes assembly easier.
In the middle is the base plate for a swivel chair. I didn't make it; it's an off-the-shelf generic spare part. This plops on to a standard swivel chair base. You don't have to look too hard to see that this is off-centre. Remember I have designed this subframe around the seat rails; the rails on the Supra seats are slightly offset to one side. I want the seat itself to be centred, because the centre of the seat is where the weight will be.
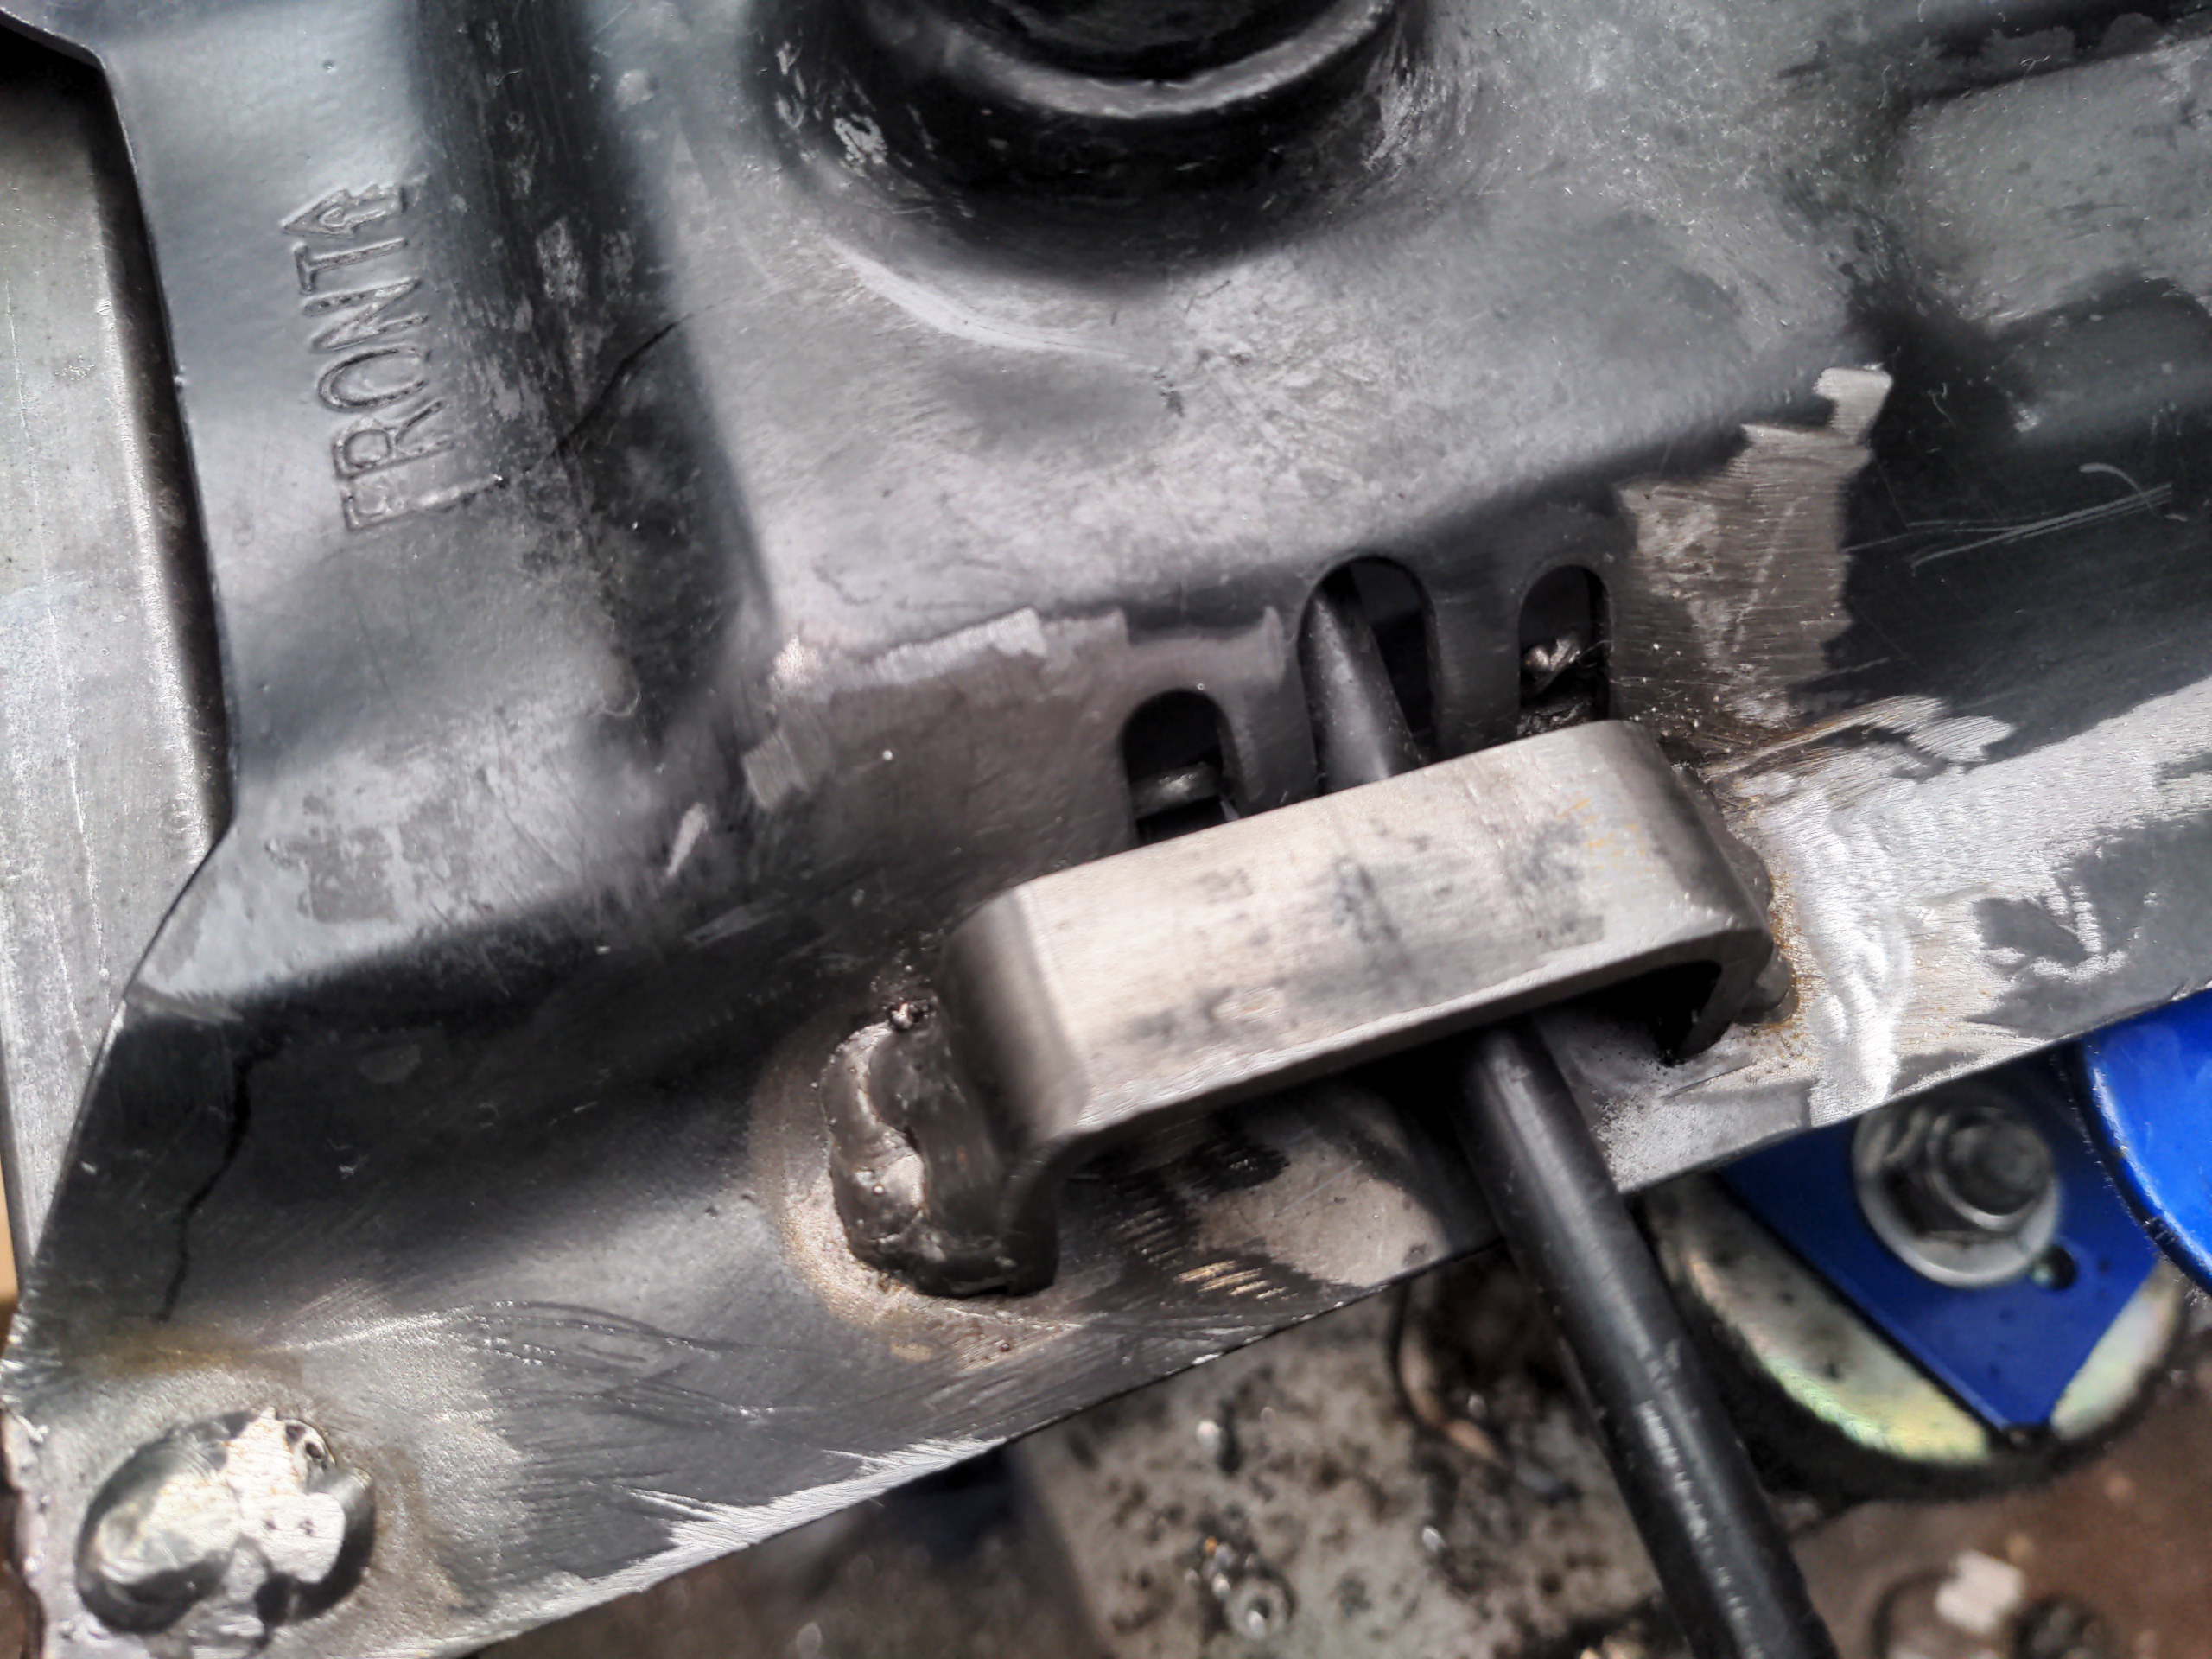
Here is the subframe after fully committing to the base plate position, cleaning up with a wire brush, rounding off all the corners and cleaning up all the welds. There are also two little additions. One of them is this little retaining bracket to stop the gas ram actuation lever from dropping too far. Without this, it'll drop down to nearly a 90 degree angle at rest, and that would be annoying.
I could have solved that problem with a piece of string, but you know, I didn't.
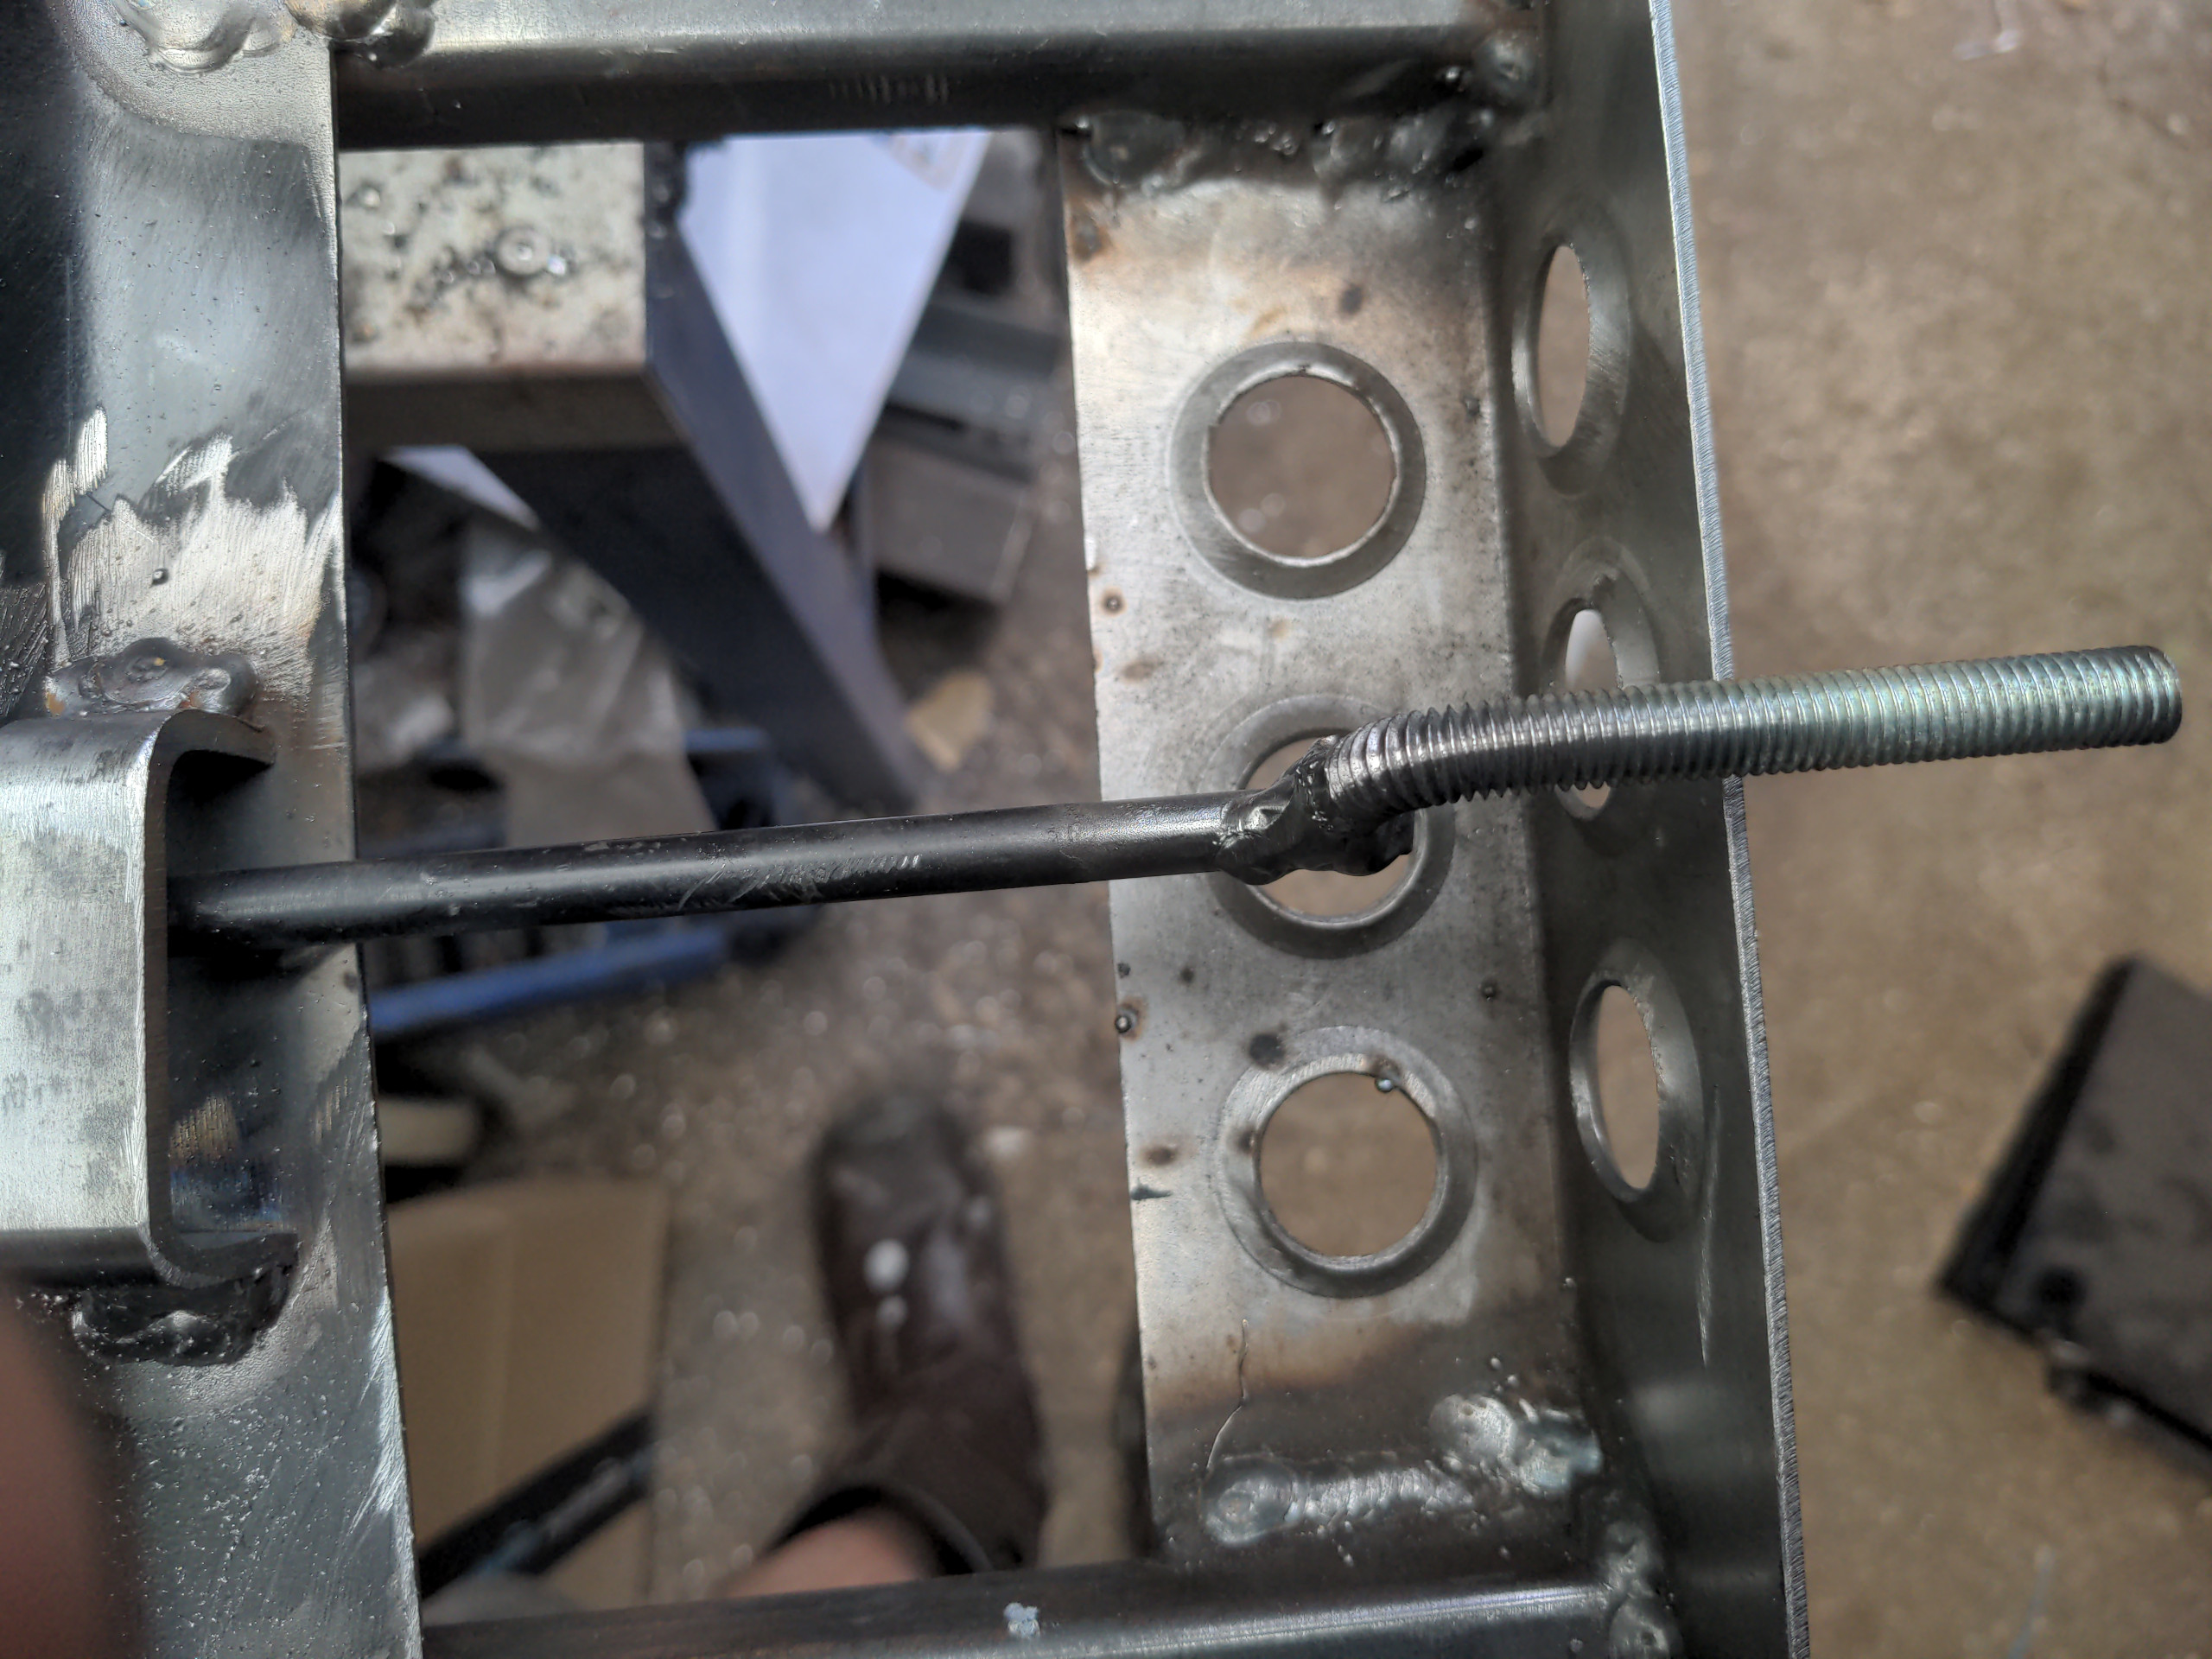
The other addition was extending the aforementioned lever. Because of the width of the subframe and Supra seat as compared to a normal desk chair, the lever wasn't long enough to use comfortably. A long M8 bolt was unfortunate enough to be in my line of sight. I bent that through 90 degrees near one of the ends, chopped the original lever off and welded the bolt on to it.
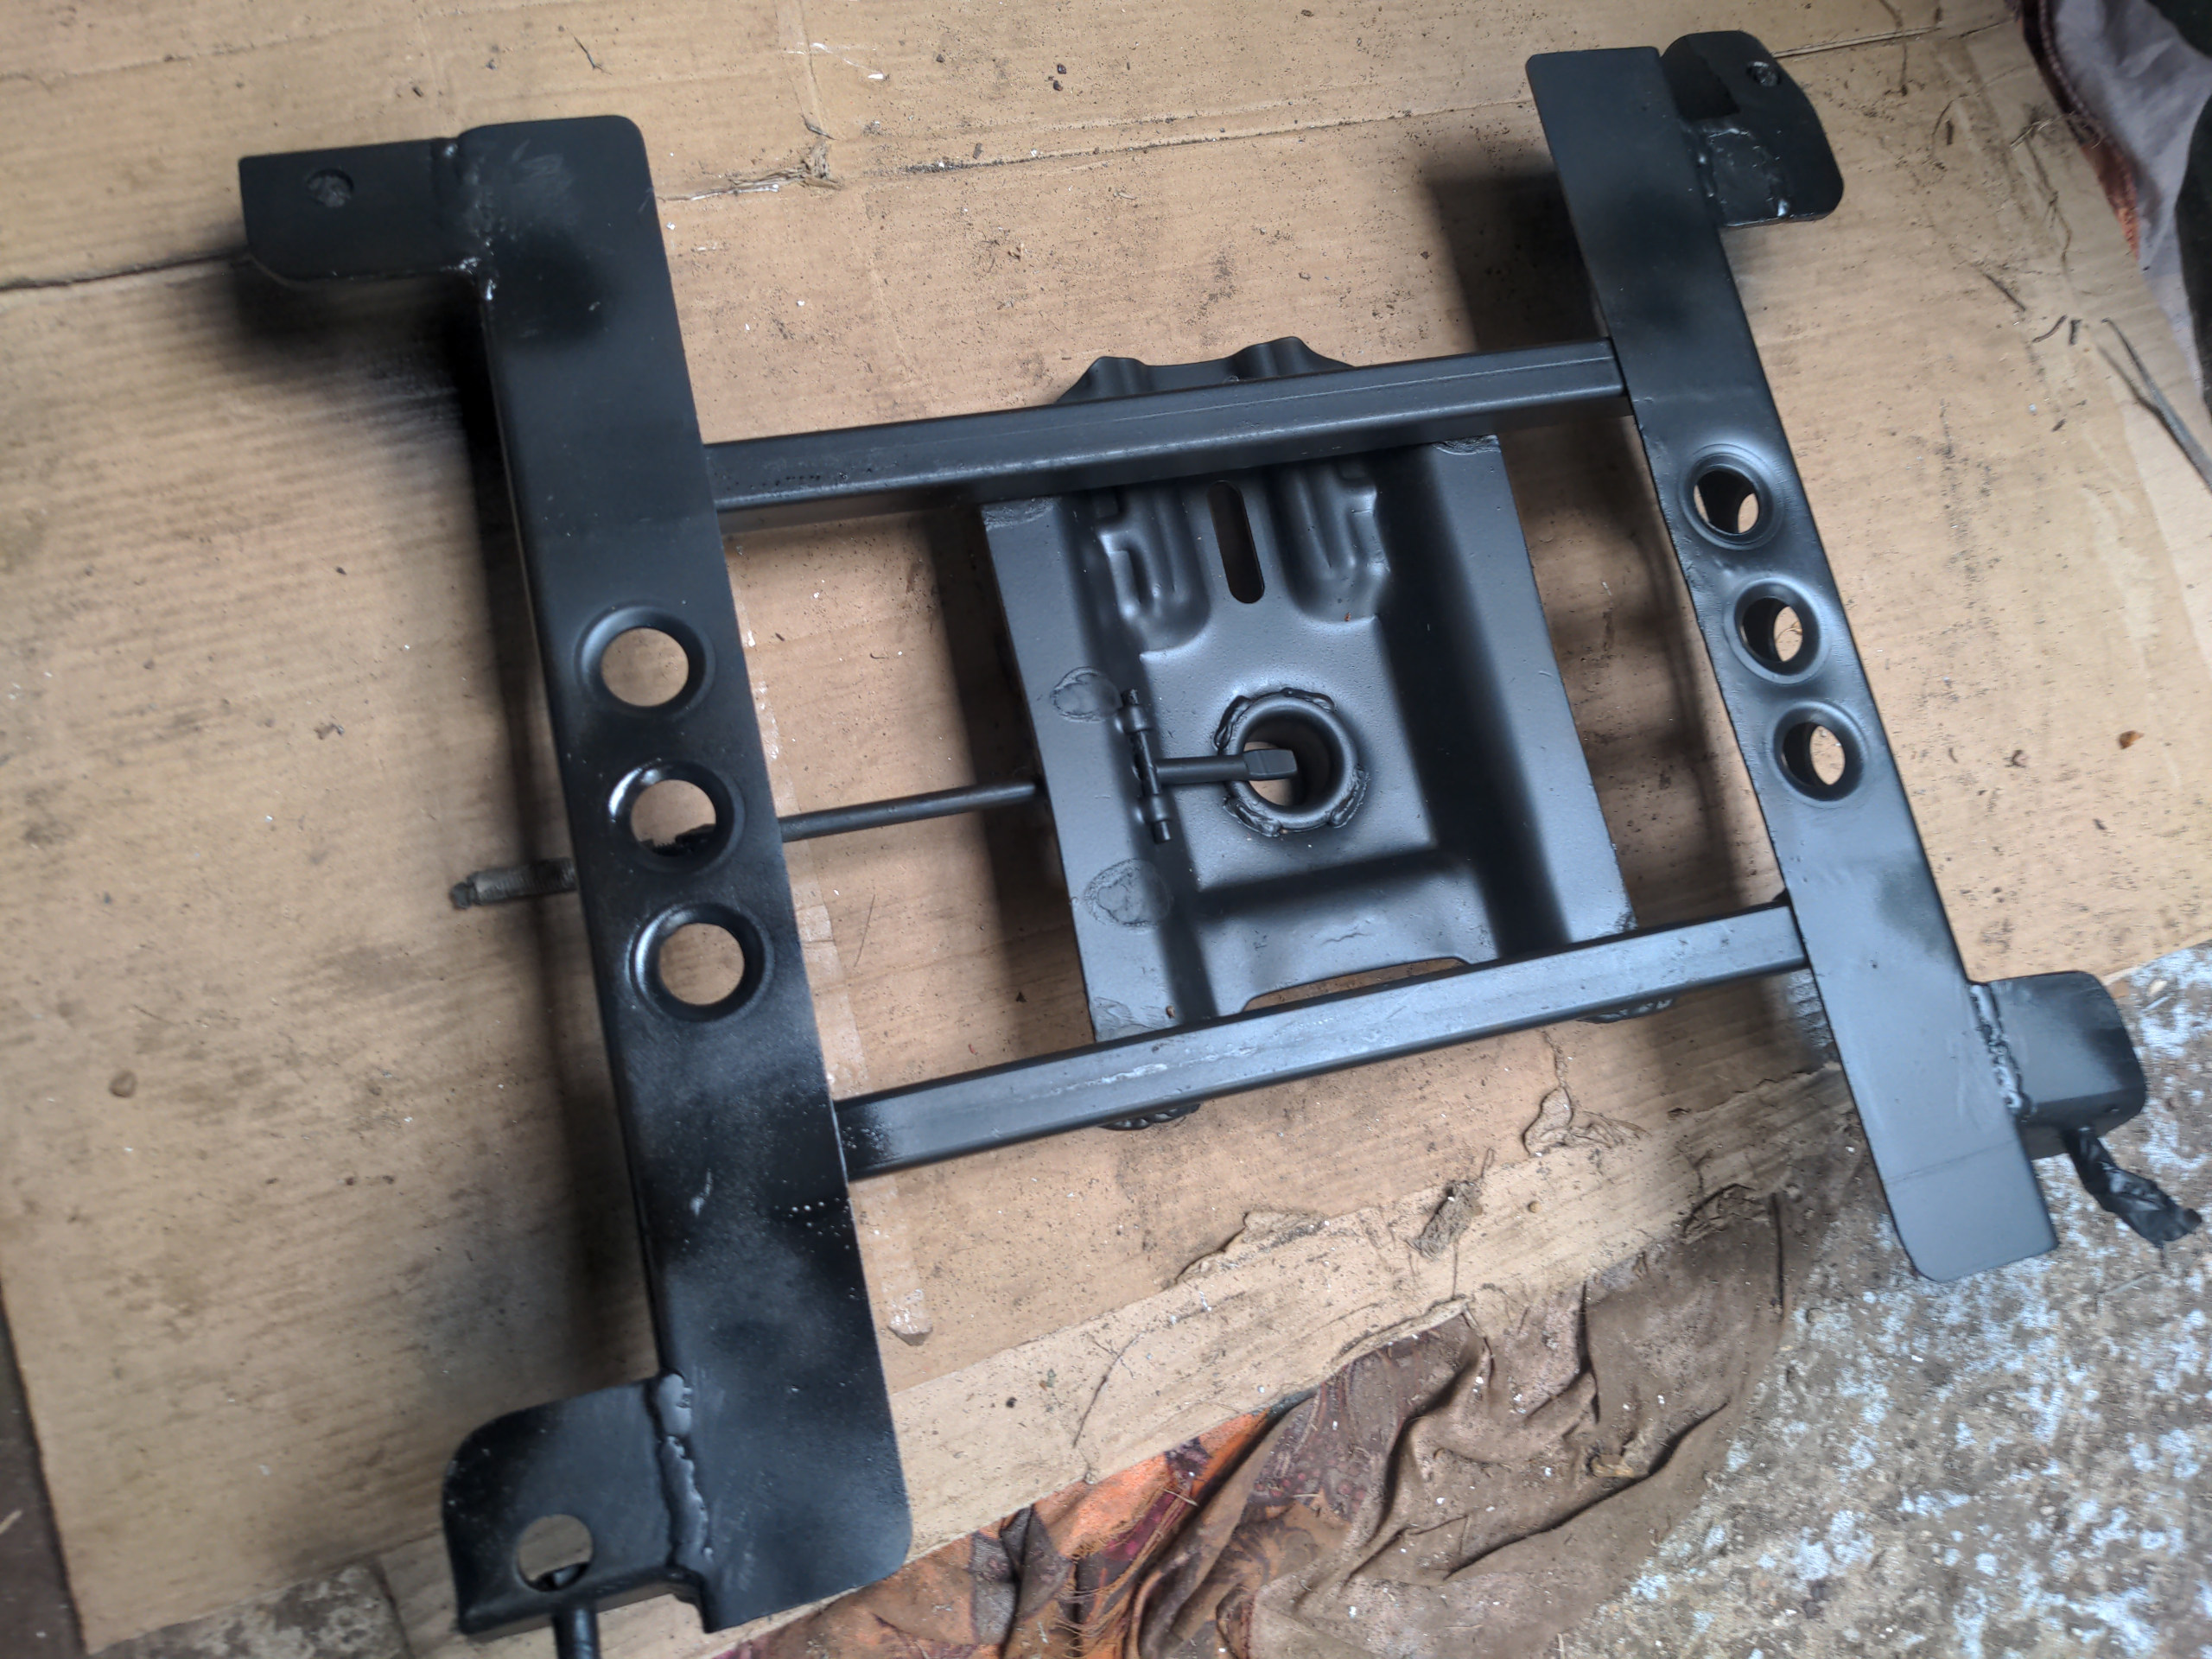
This adapter subframe still looks like a bunch of random bits of metal stuck together. With a coat of Jenolite stain black it looks like a bunch of random bits welded together, but with some black paint on it.
I work for a massive company which you have almost certainly heard of. Being a massive company, for all I know it has someone whose sole job is looking for unfinished edges on things and writing reports about it. I can't fault that, and if that person exists I'd like to make their job easier. That is why I ensured there were no unfinished edges where I could reasonably touch them, either while using the chair or while transporting it.

I used this stuff designed to protect the edges of car doors, and which I would absolutely never use on a car because I can't see how it would go on without destroying the paint (rather defeating its purpose). It goes around tight corners really well, and grips nicely especially when squished a little with pliers. It does the job here and isn't going to fall off.
The threaded extension for the gas ram actuation lever allowed me to make a little threaded replacement knob.

That is just a random piece of steel tube from the offcuts box, with an M8 nut crammed into it and welded. That would make a decent knob by itself. But that tube happened to be exactly the right size for me to bond on...
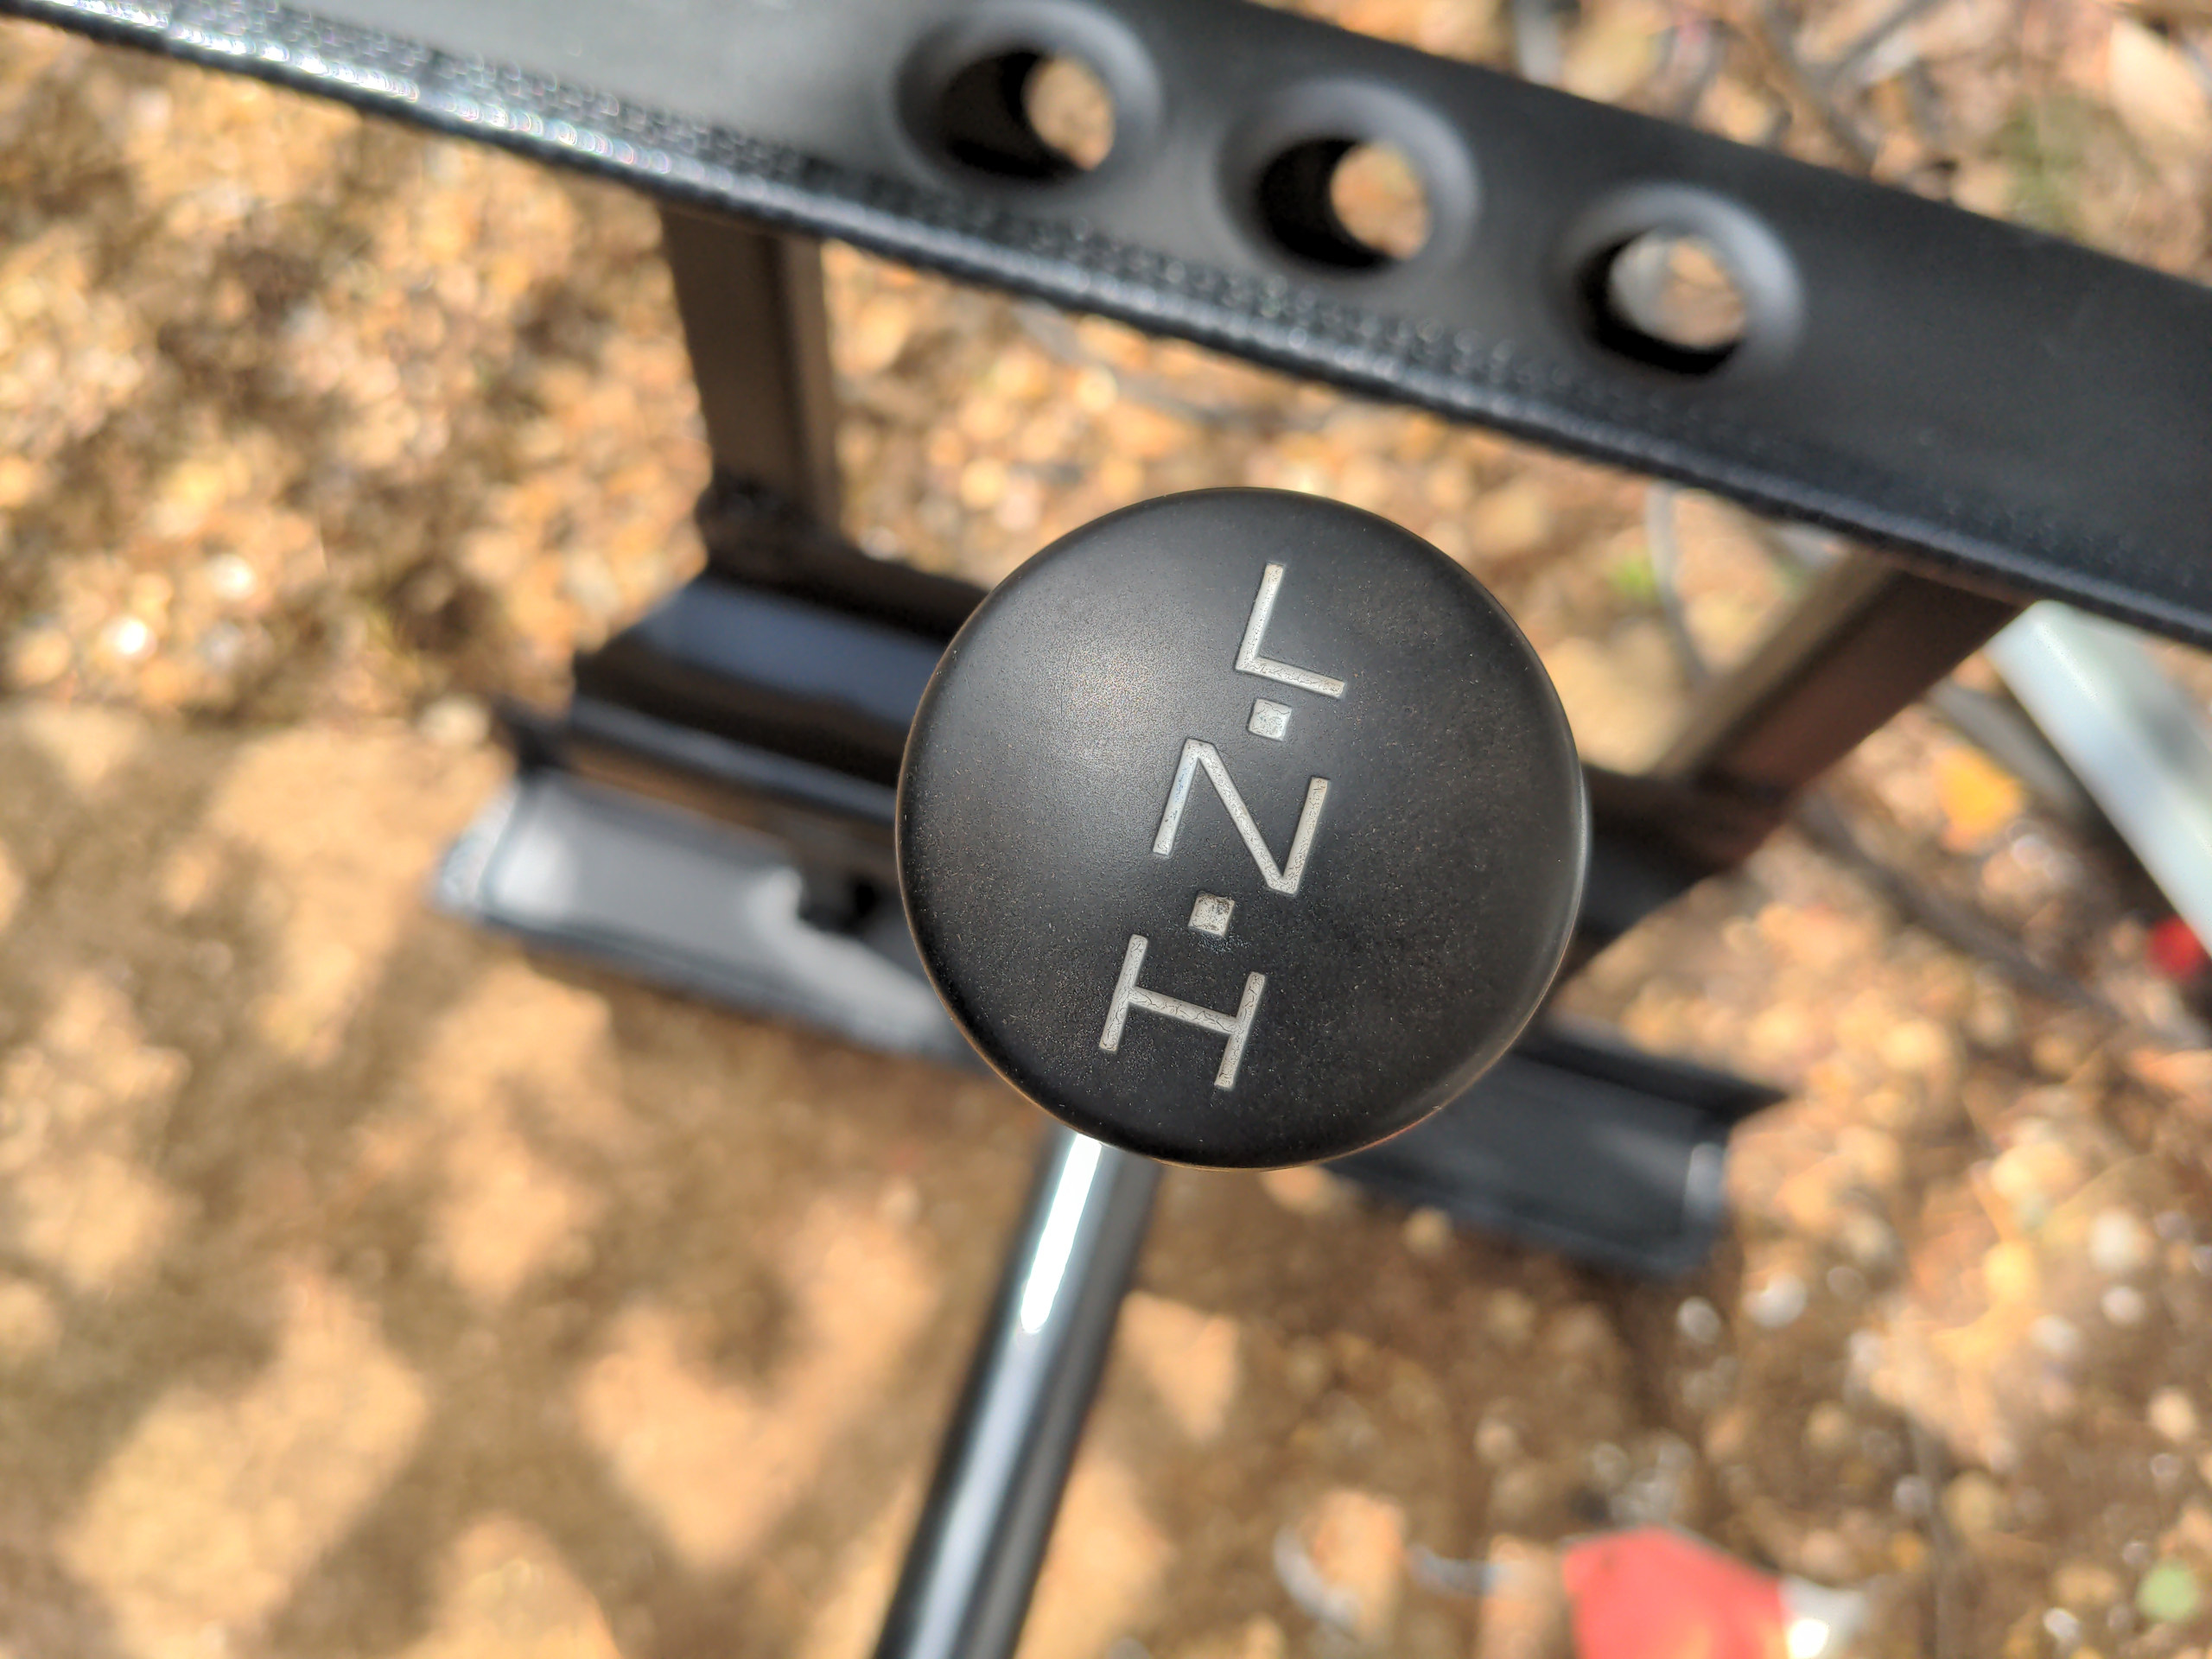
...a transfer box gear lever knob from a 1979 Range Rover because of course I did.
:)
As said, the seat was in near-perfect condition, but it needed a clean. A vacuum cleaner was not enough.
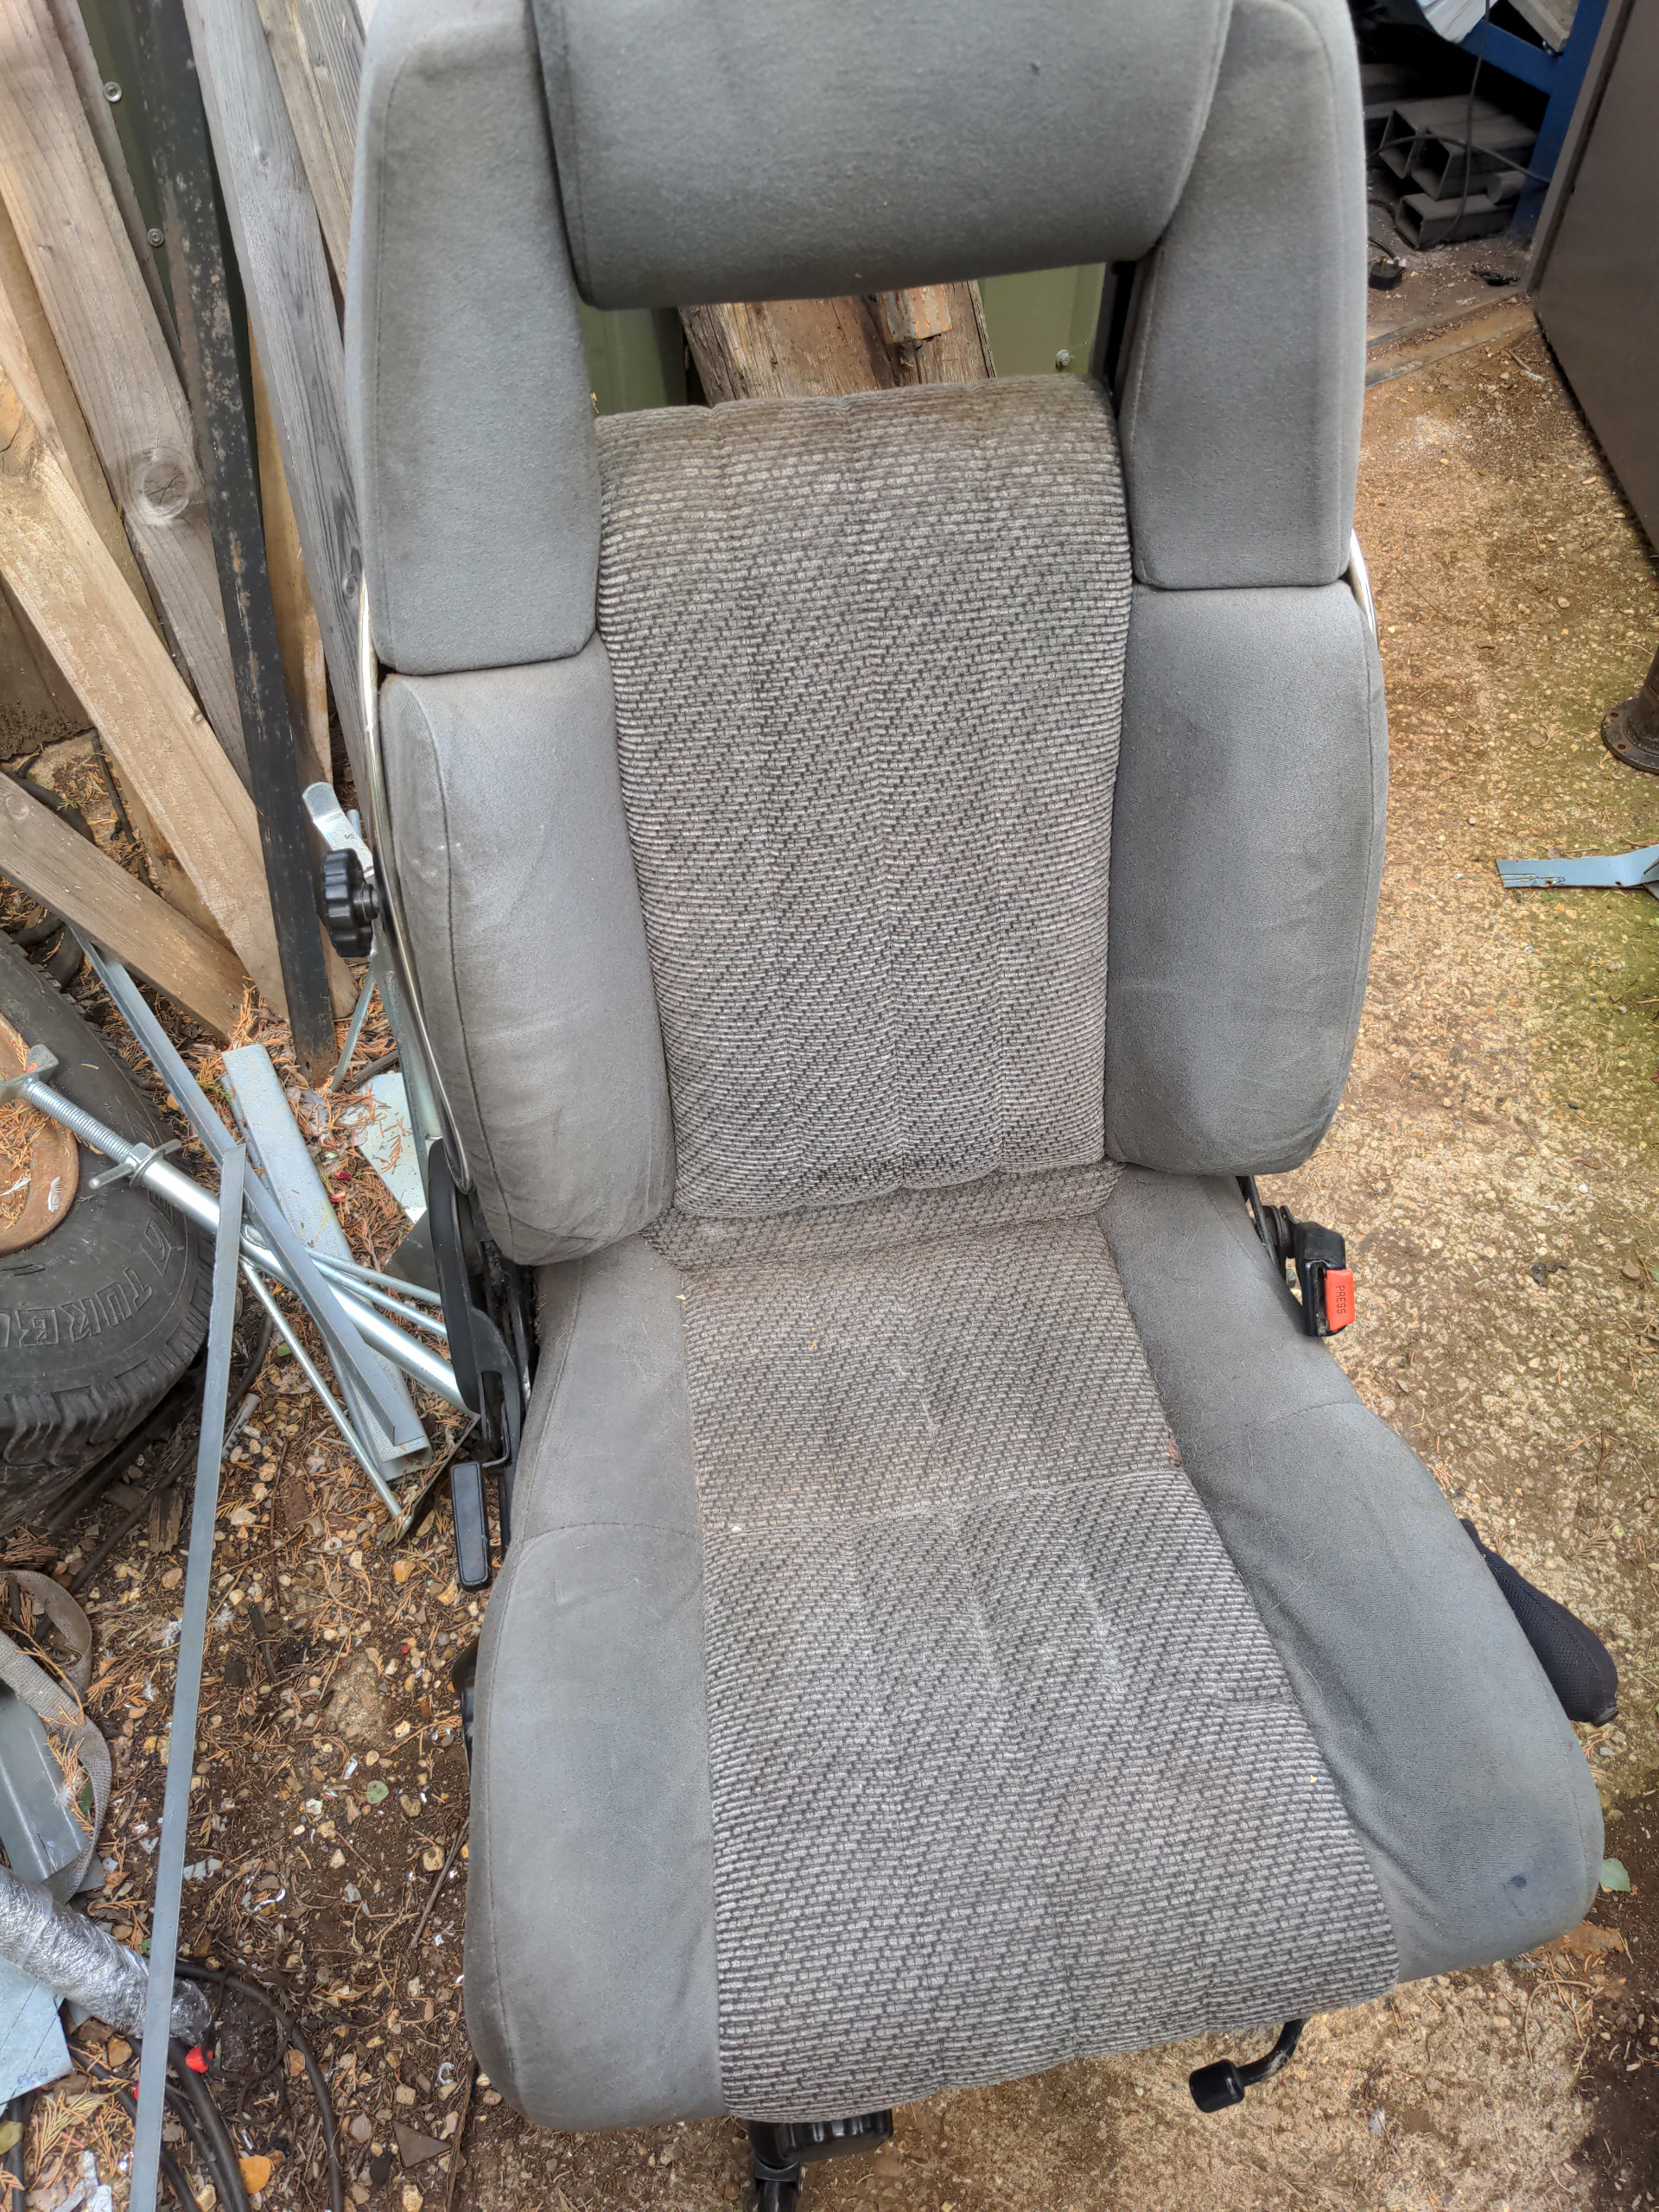
I cleaned it with solvents (narrowly-targeted), two rounds of upholstery cleaner and then alcohol wipes to make it presentable enough for indoor use in a nice office.
Anyway that's how I ended up with the best desk chair in the office, or maybe the best desk chair in any office ever.
See you soon. :)