Rationalising the 323 GTX, part 5: the heat shield
I originally planned to fold this into the upcoming "turbo" part of the rationalisation series, but there are parts of that which are still not complete, and are entirely out of my hands at the moment. Also, the heat shield turned into a multi-weekend mini-project in which I learned some things, so maybe you can too.
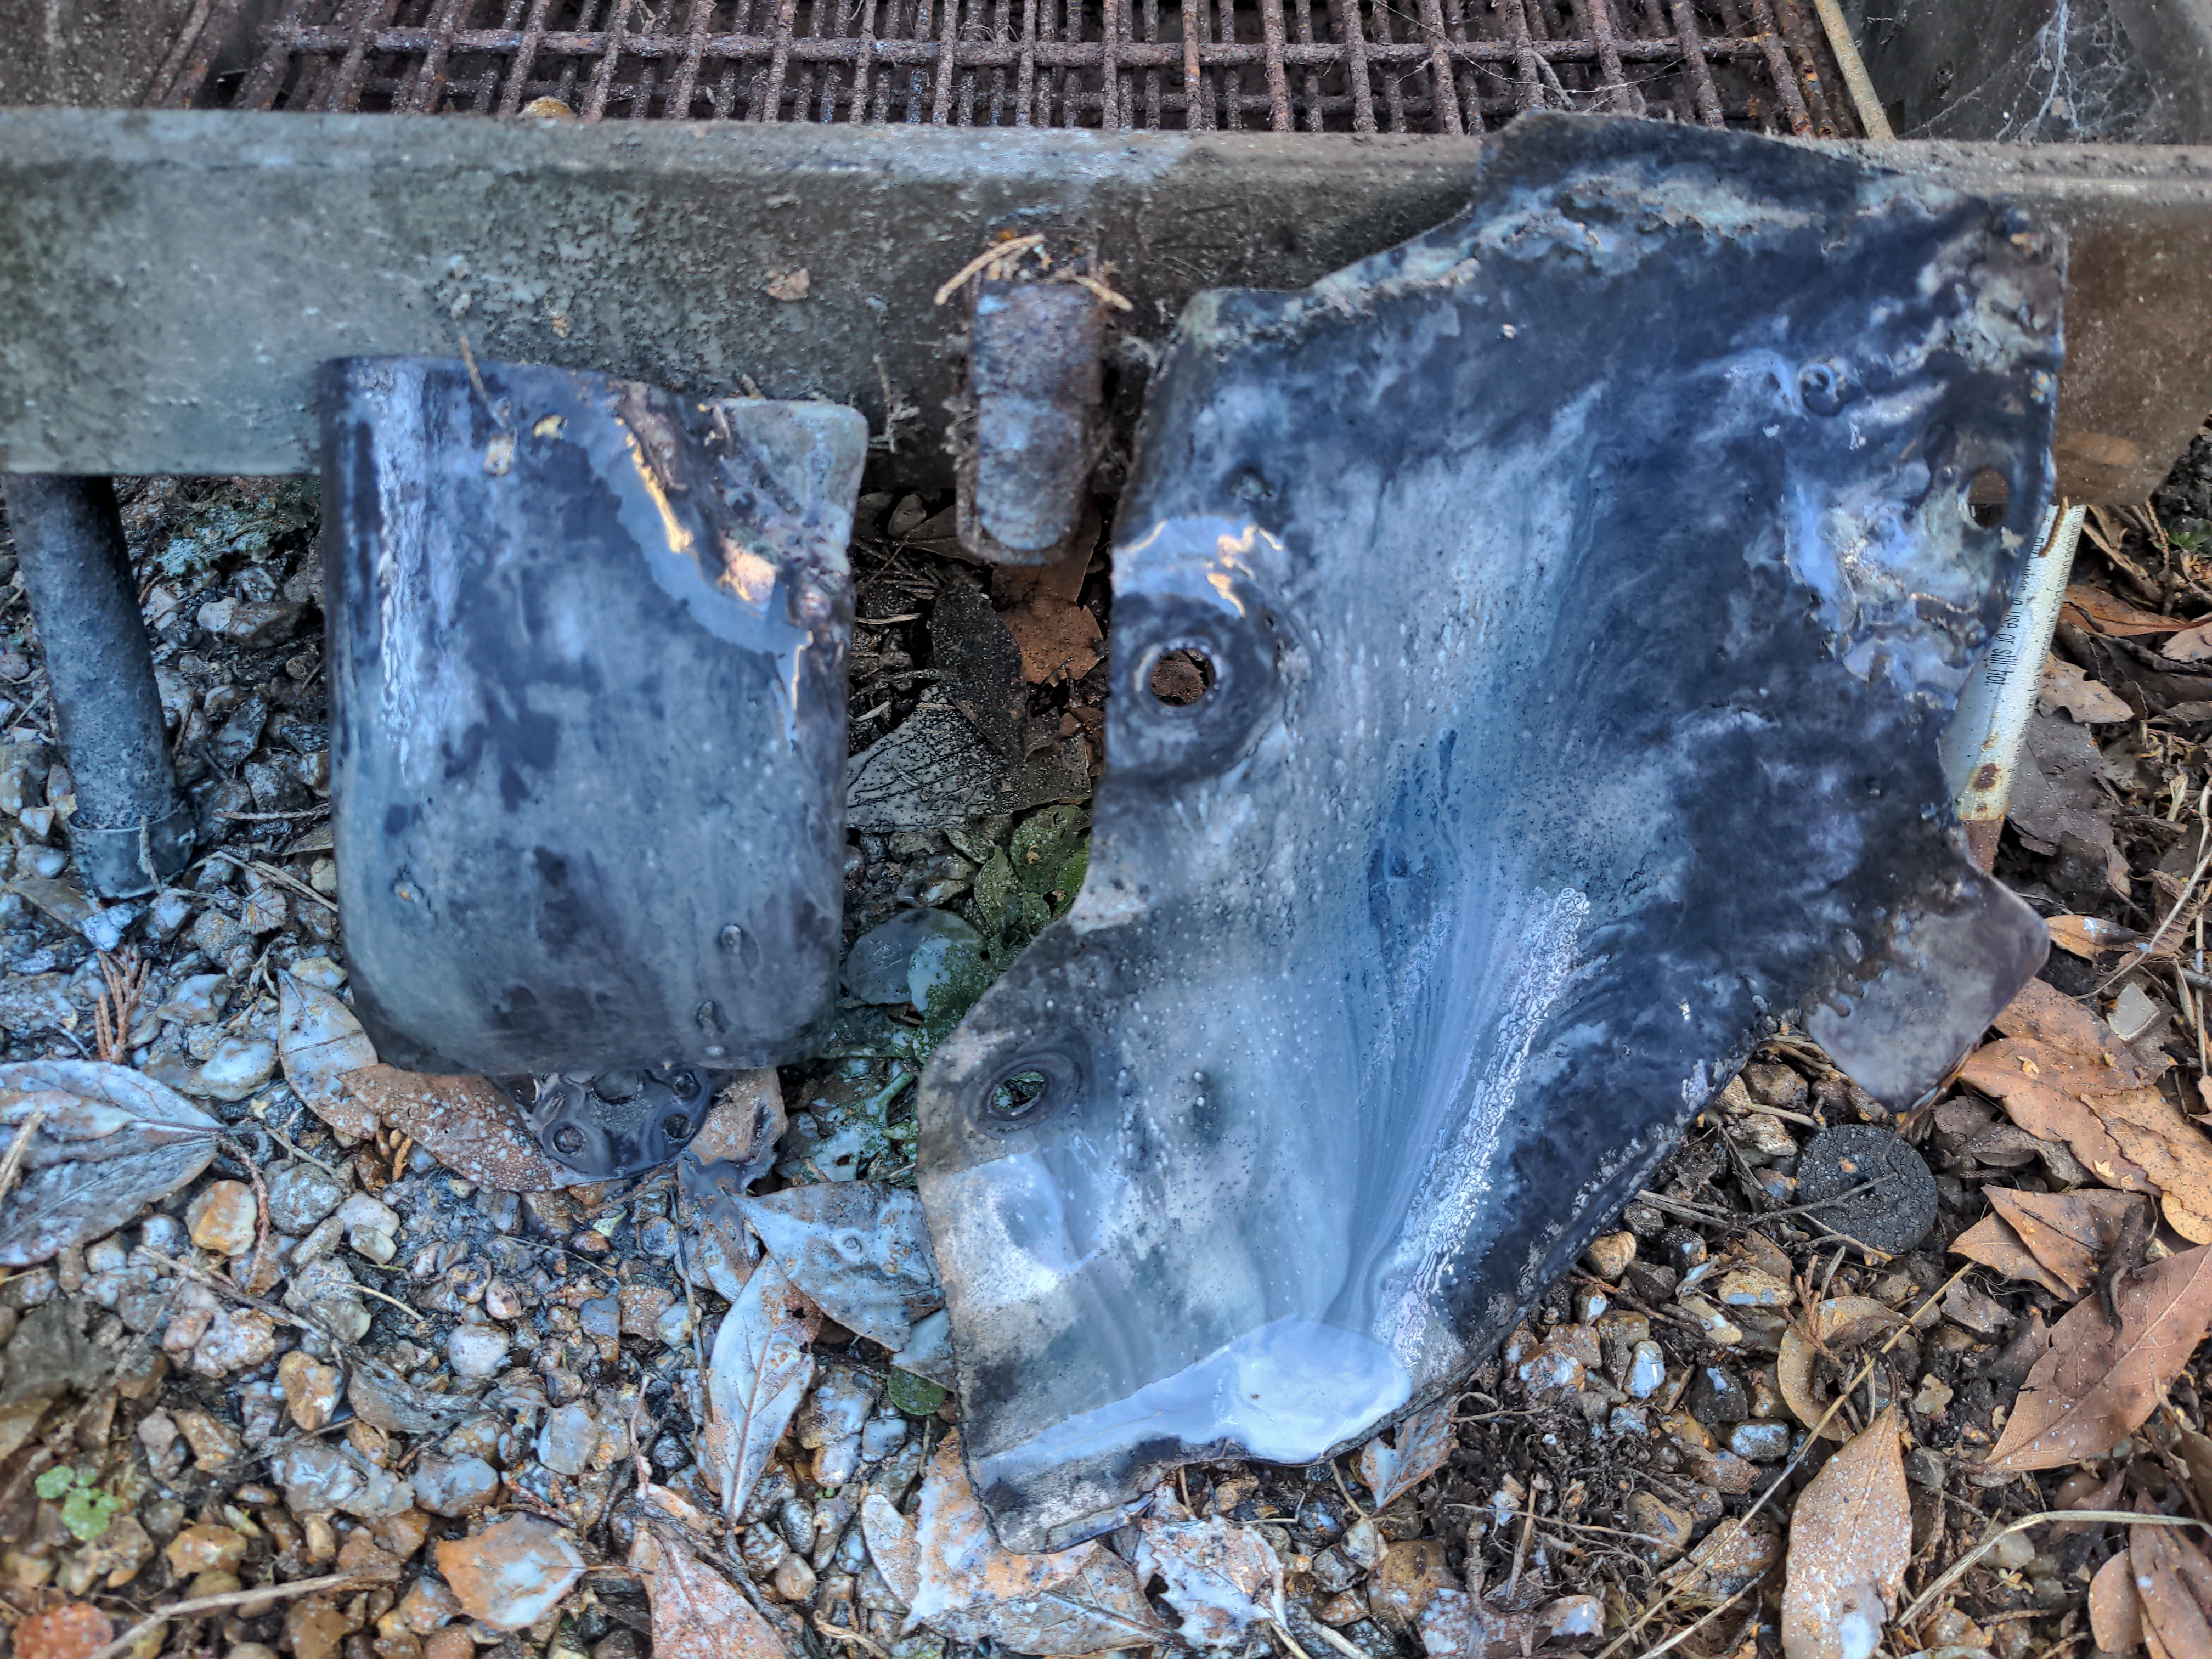
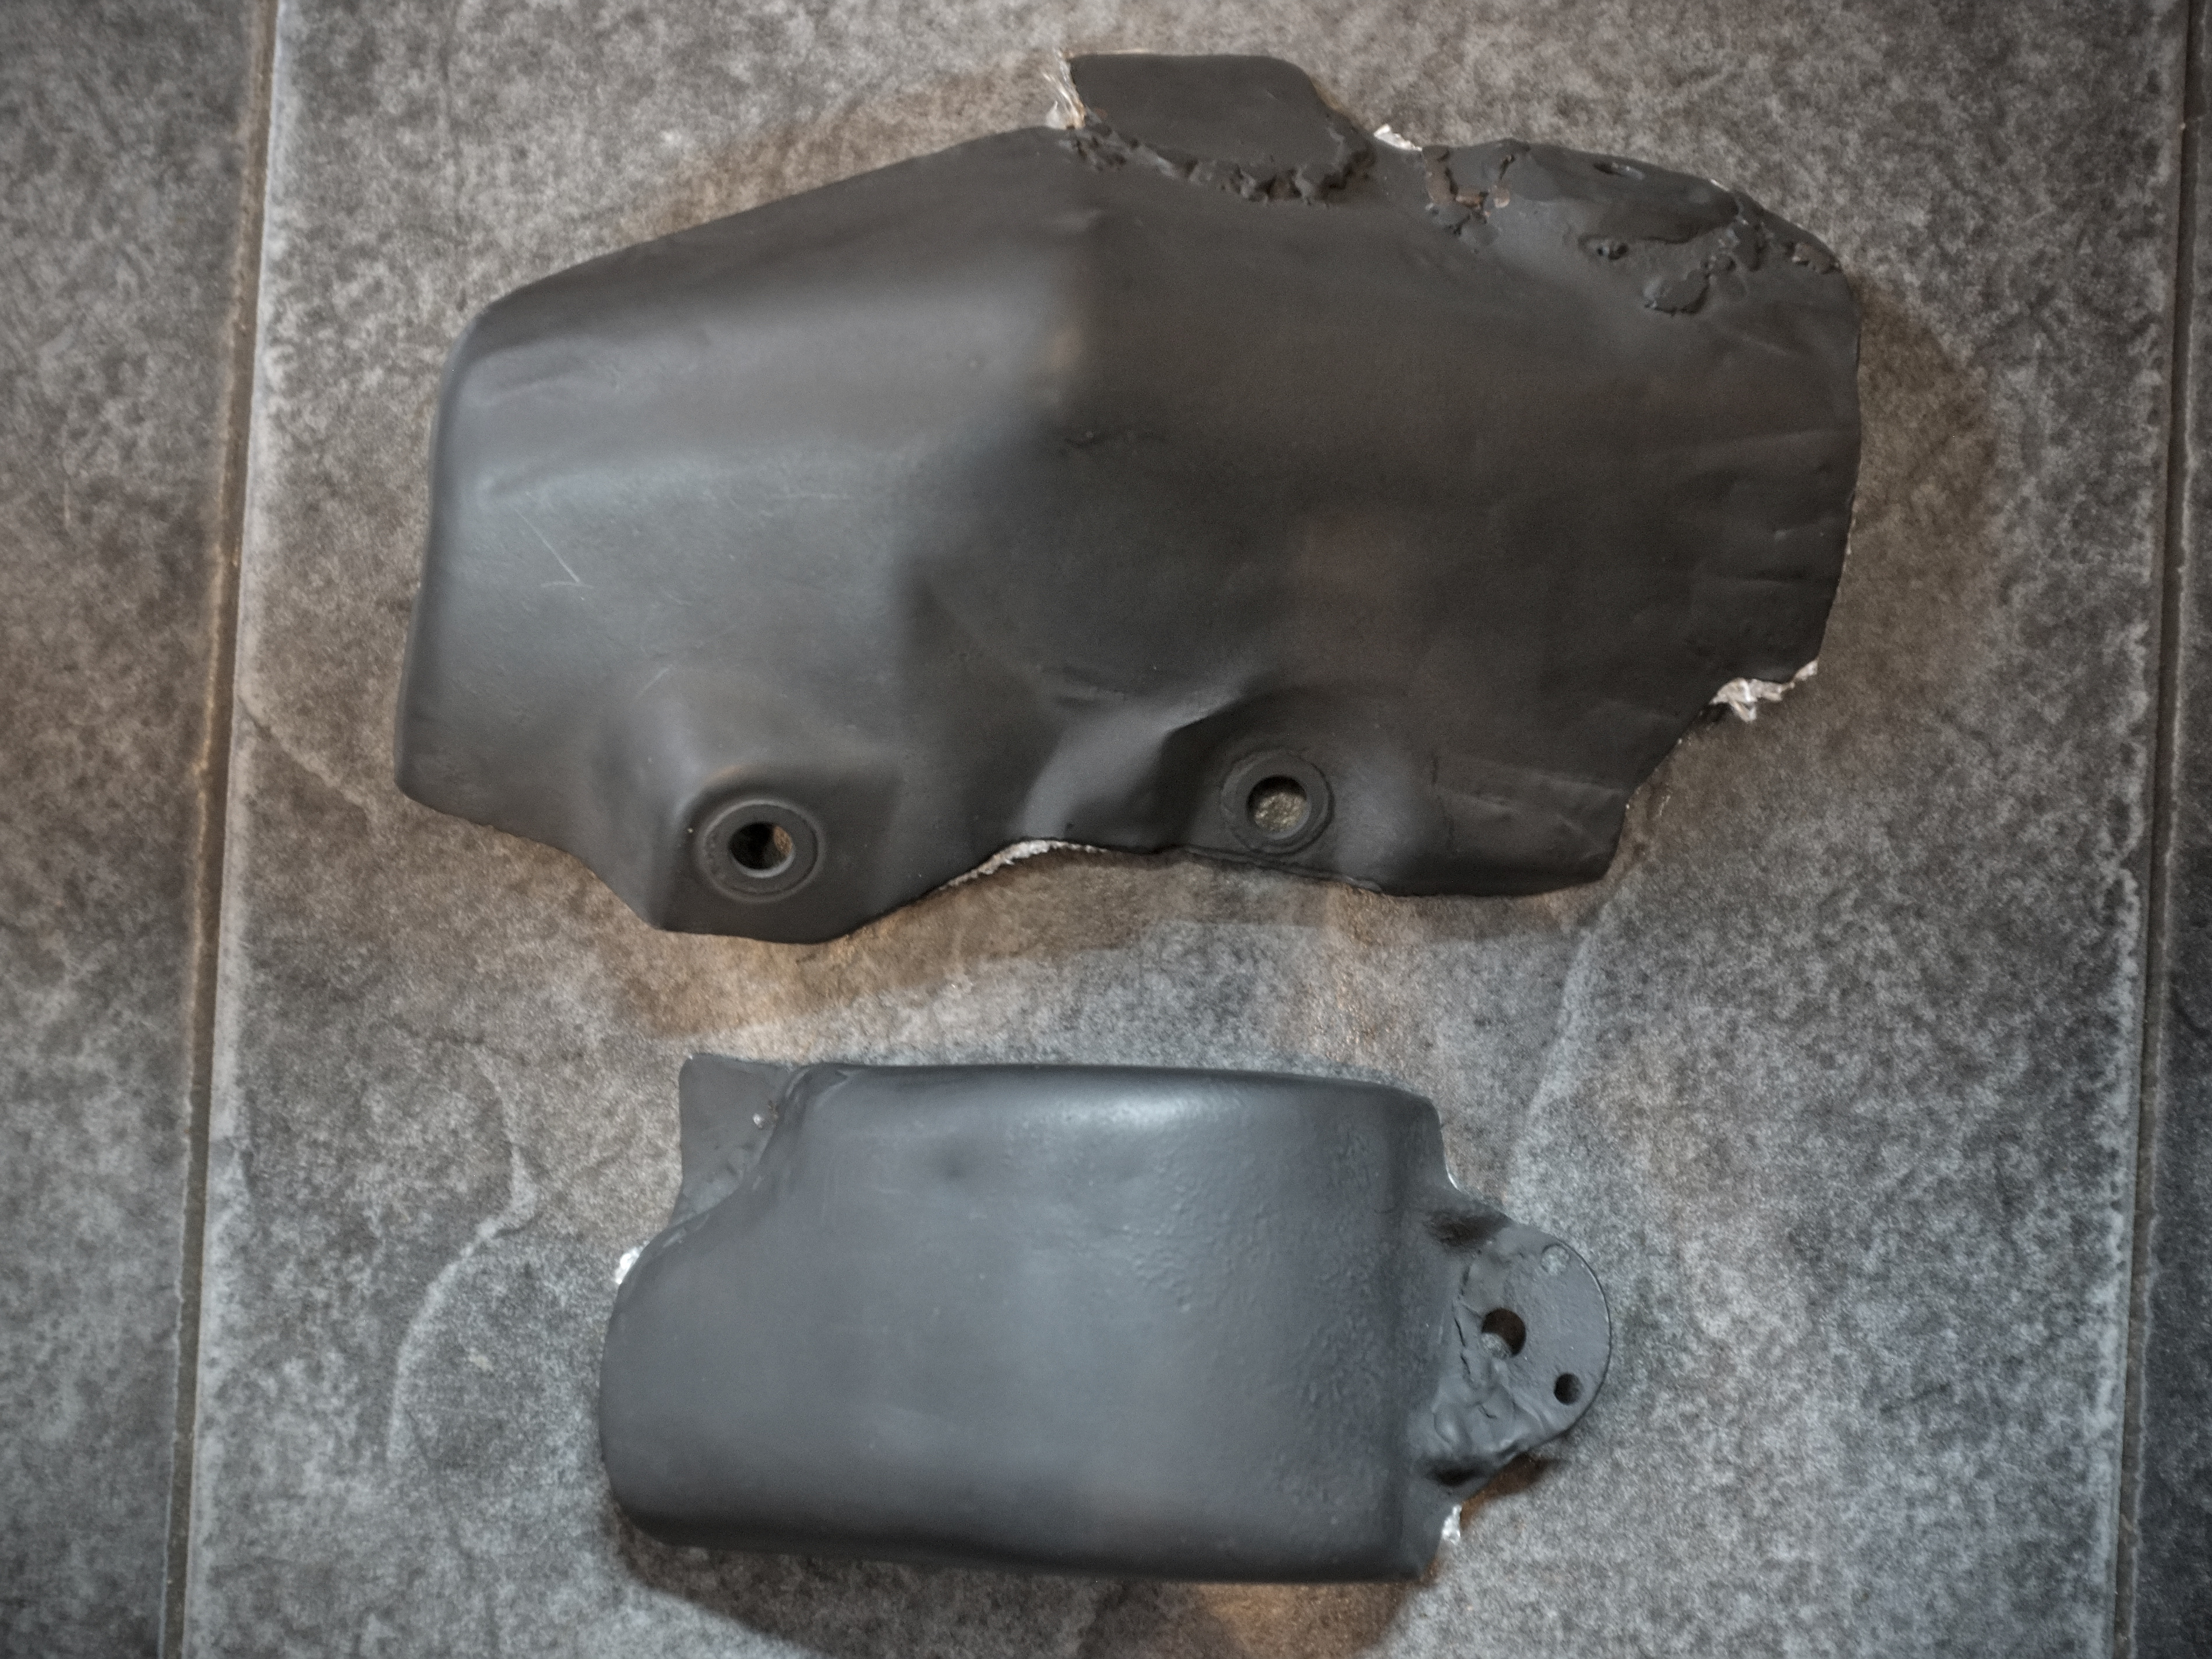
This was my heat shield.
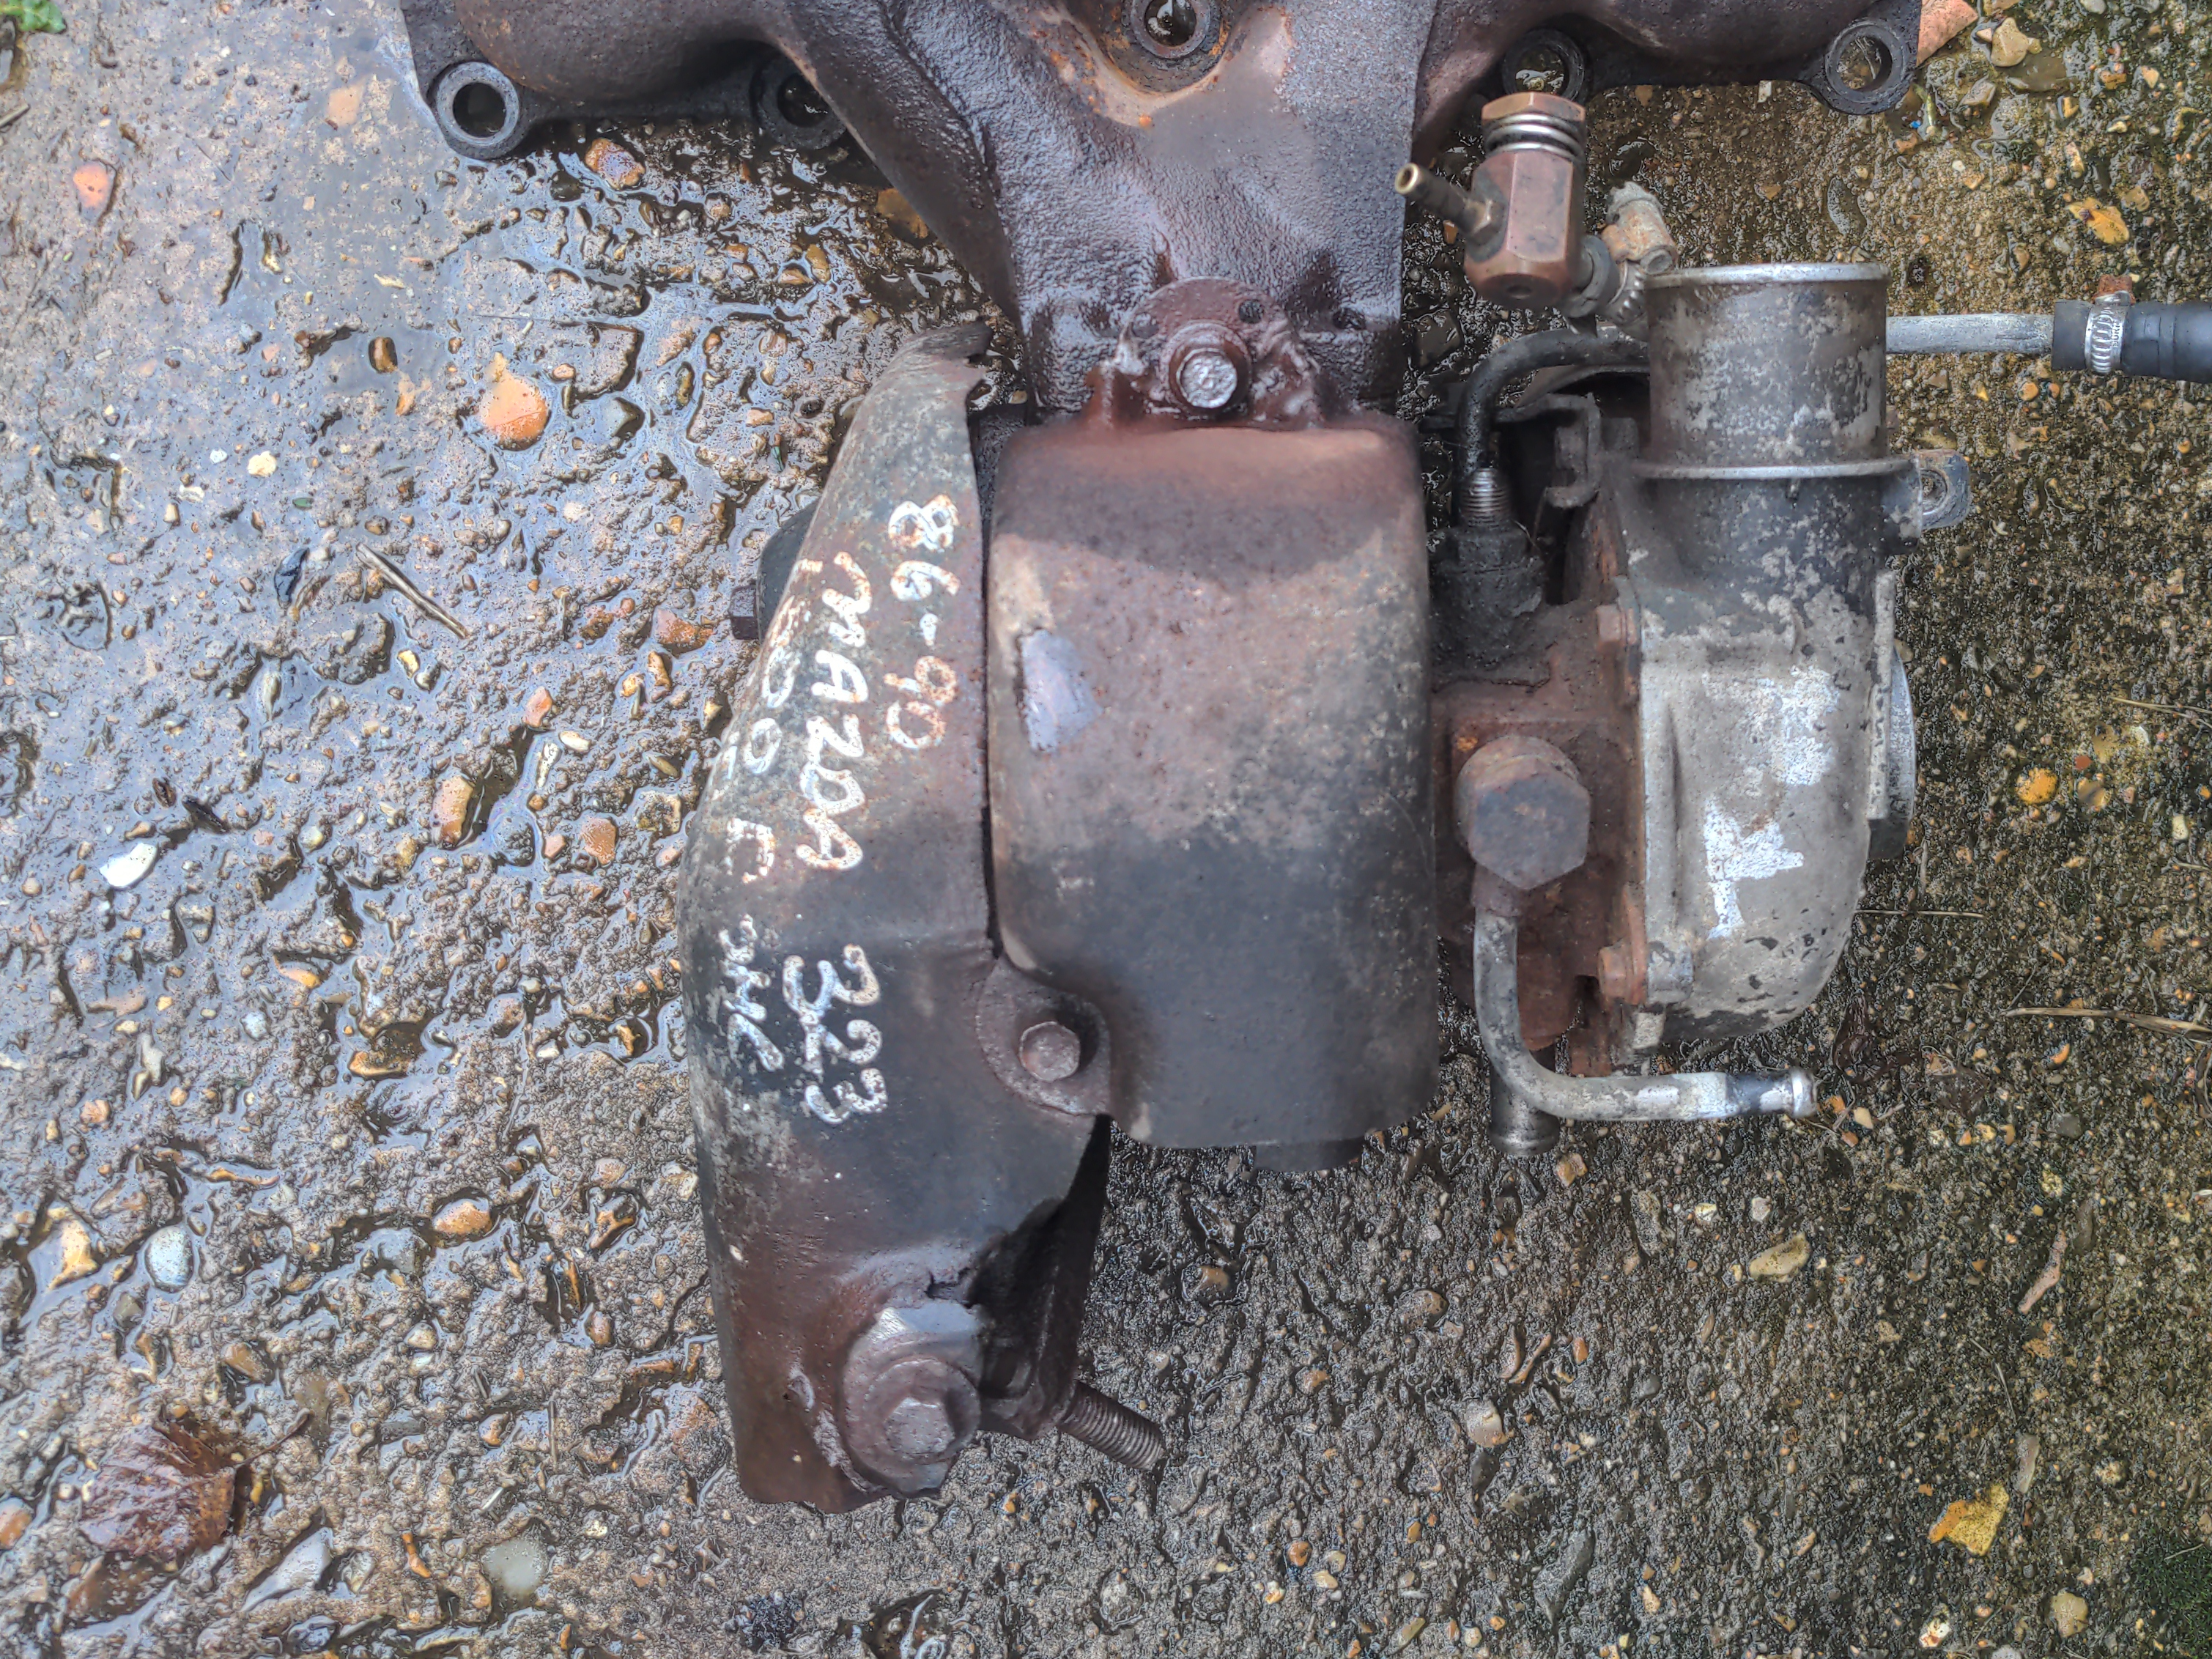
Actually, it's my heat shield bolted to a scabby, worn-out, nearly-four-decades-old turbo. The heat shield is made of two sections. In the photo above, it's the piece of metal with white scribbles on it, and the piece of metal bolted to that. It is supposed to protect things in your engine bay from the turbo's extremely hot turbine housing.
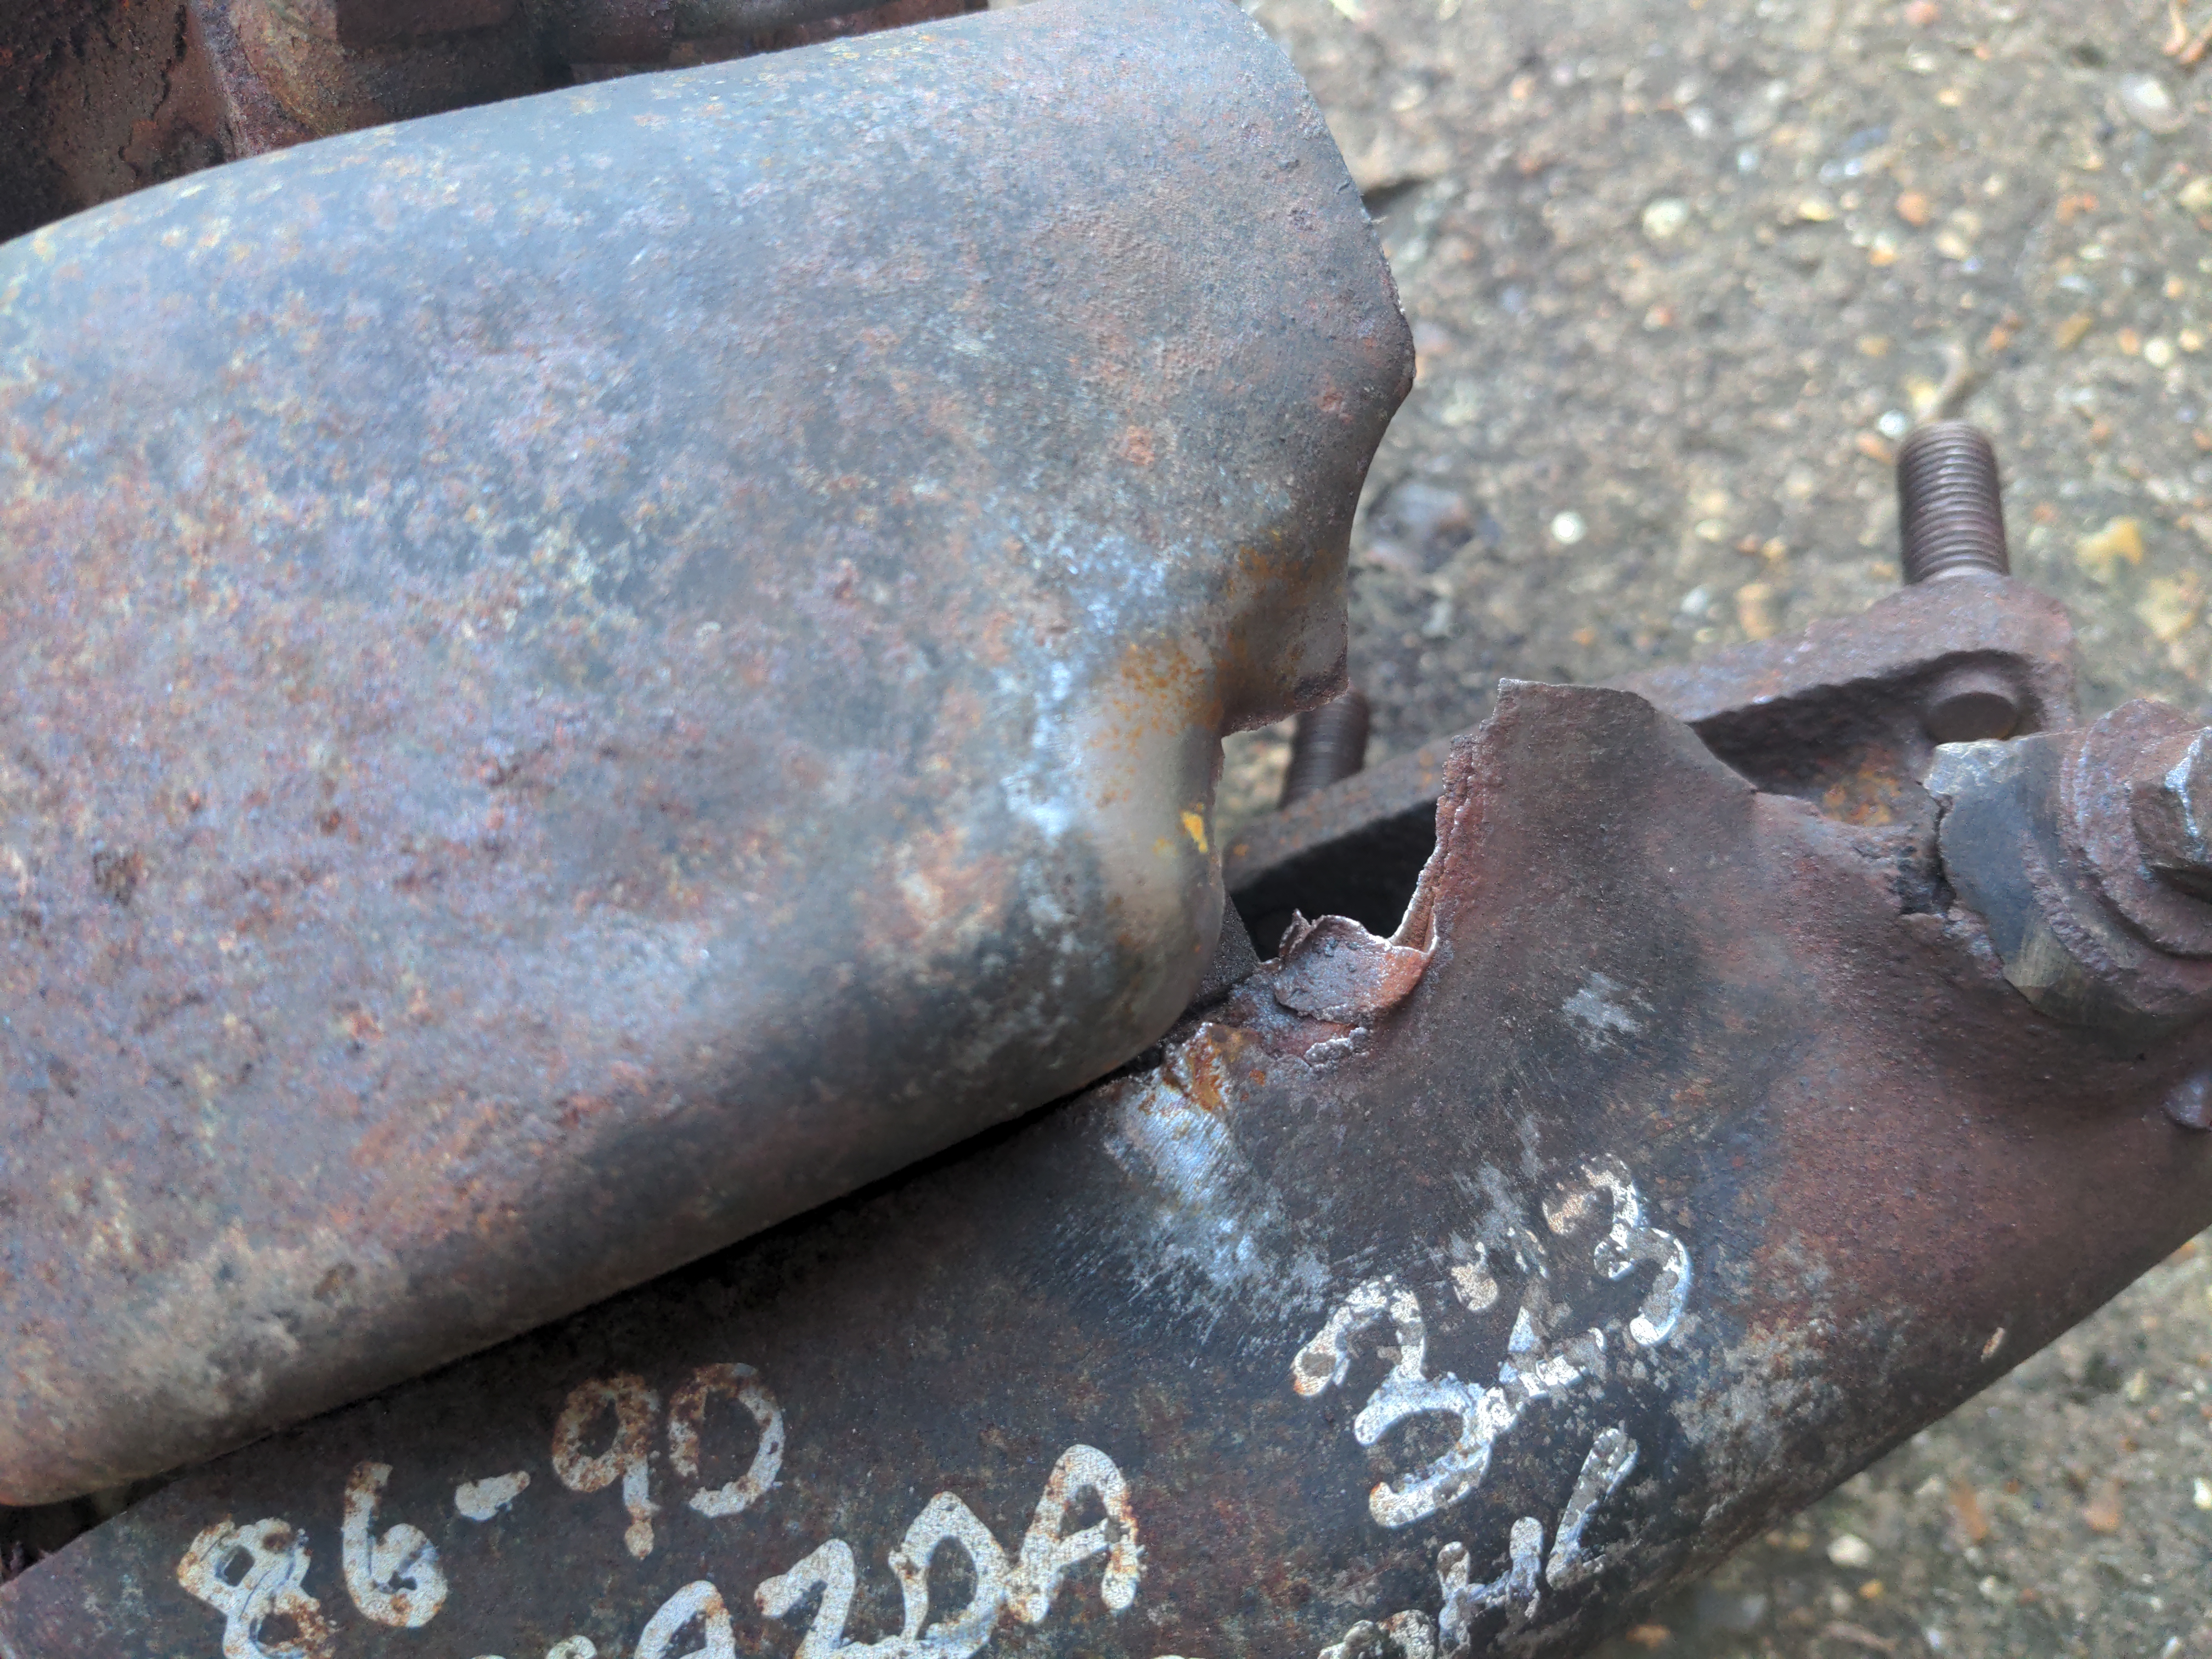
Mine was not in very good shape. It had started to rot, and when I unbolted it with the impact wrench, a bolt came undone, with a chunk of both sections of the heat shield attached to it.
As I had other things to do, and no clear plan for what to do with my turbo (if I had proceeded with a completely different turbo I wouldn't be able to re-use any part of the heat shield), I filed it under "I'll deal with that later", and stopped thinking about it for several months.
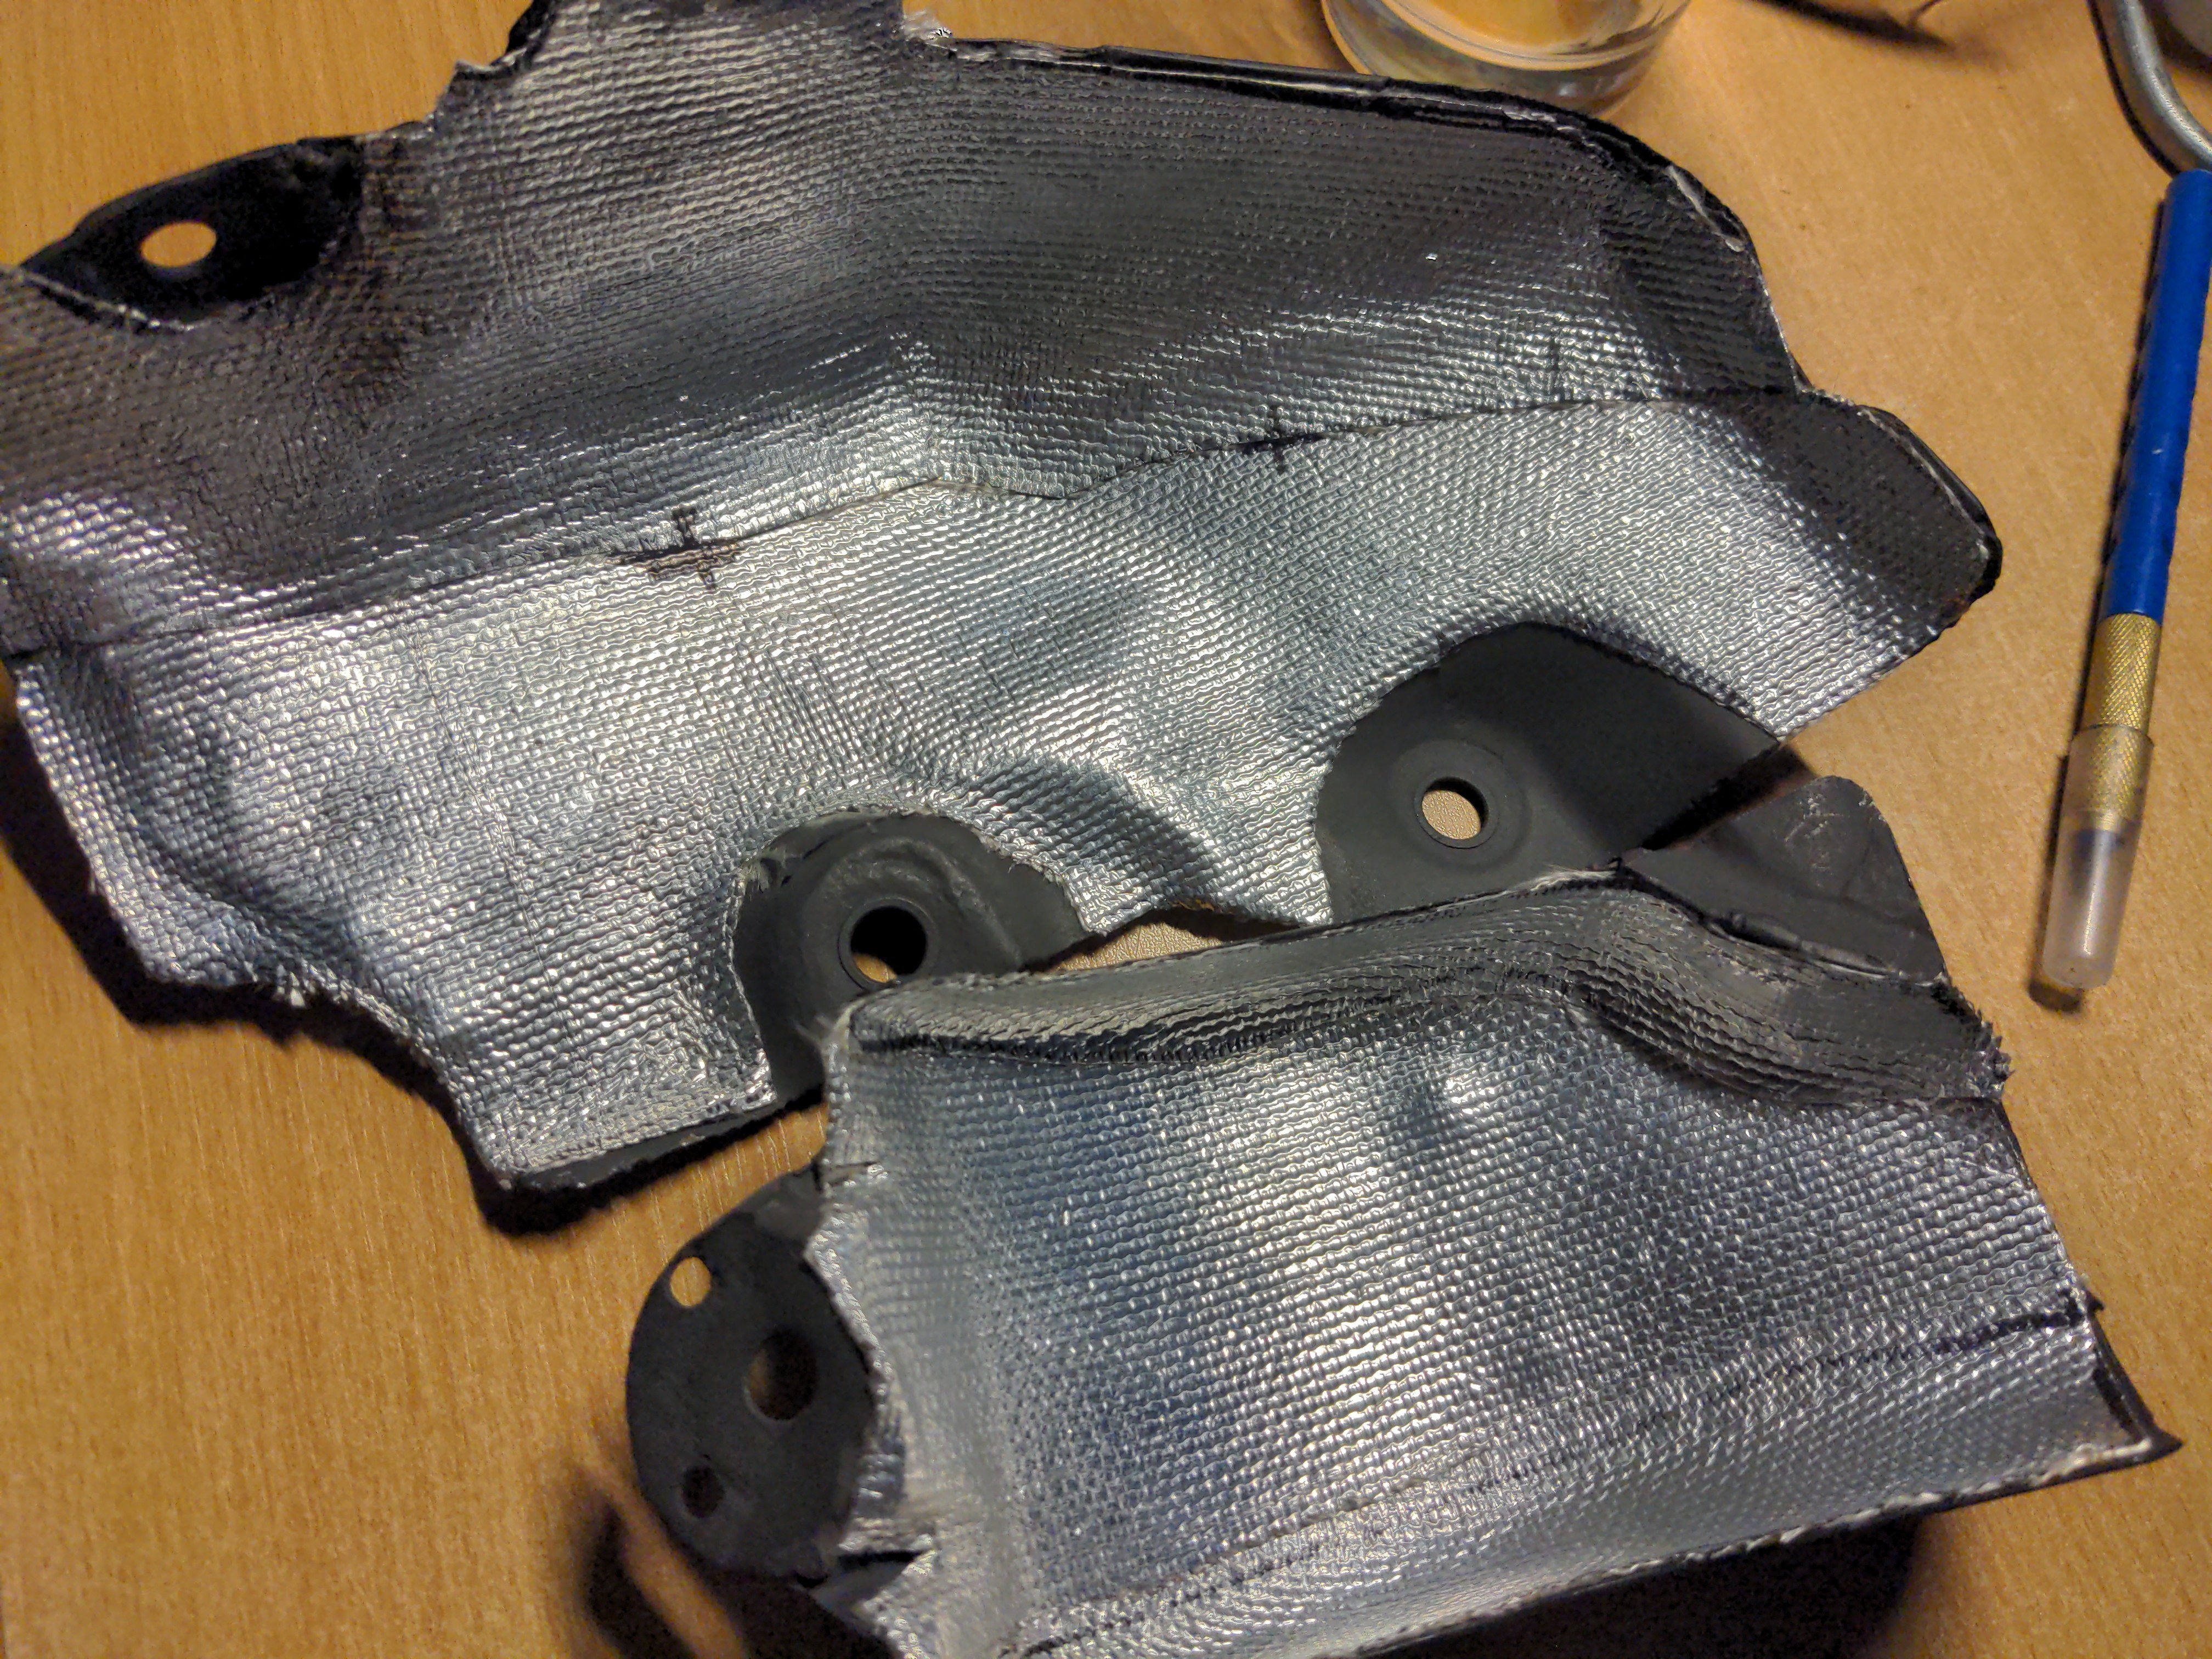
When I returned to the heat shield, I planned to make a new one, because I thought the larger section of the heat shield would be impossible to repair. It is not a solid sheet of metal; it is a sandwich made of two sheets of 0.4mm-thick steel - far too thin for me to weld. In between those sheets is a fibrous heat-resistant material. Because I have probably inhaled quite a bit of it I shall pretend that material is fibreglass, and is definitely not some other fibrous material that was rather too popular for its heat-resistant properties in decades gone by.
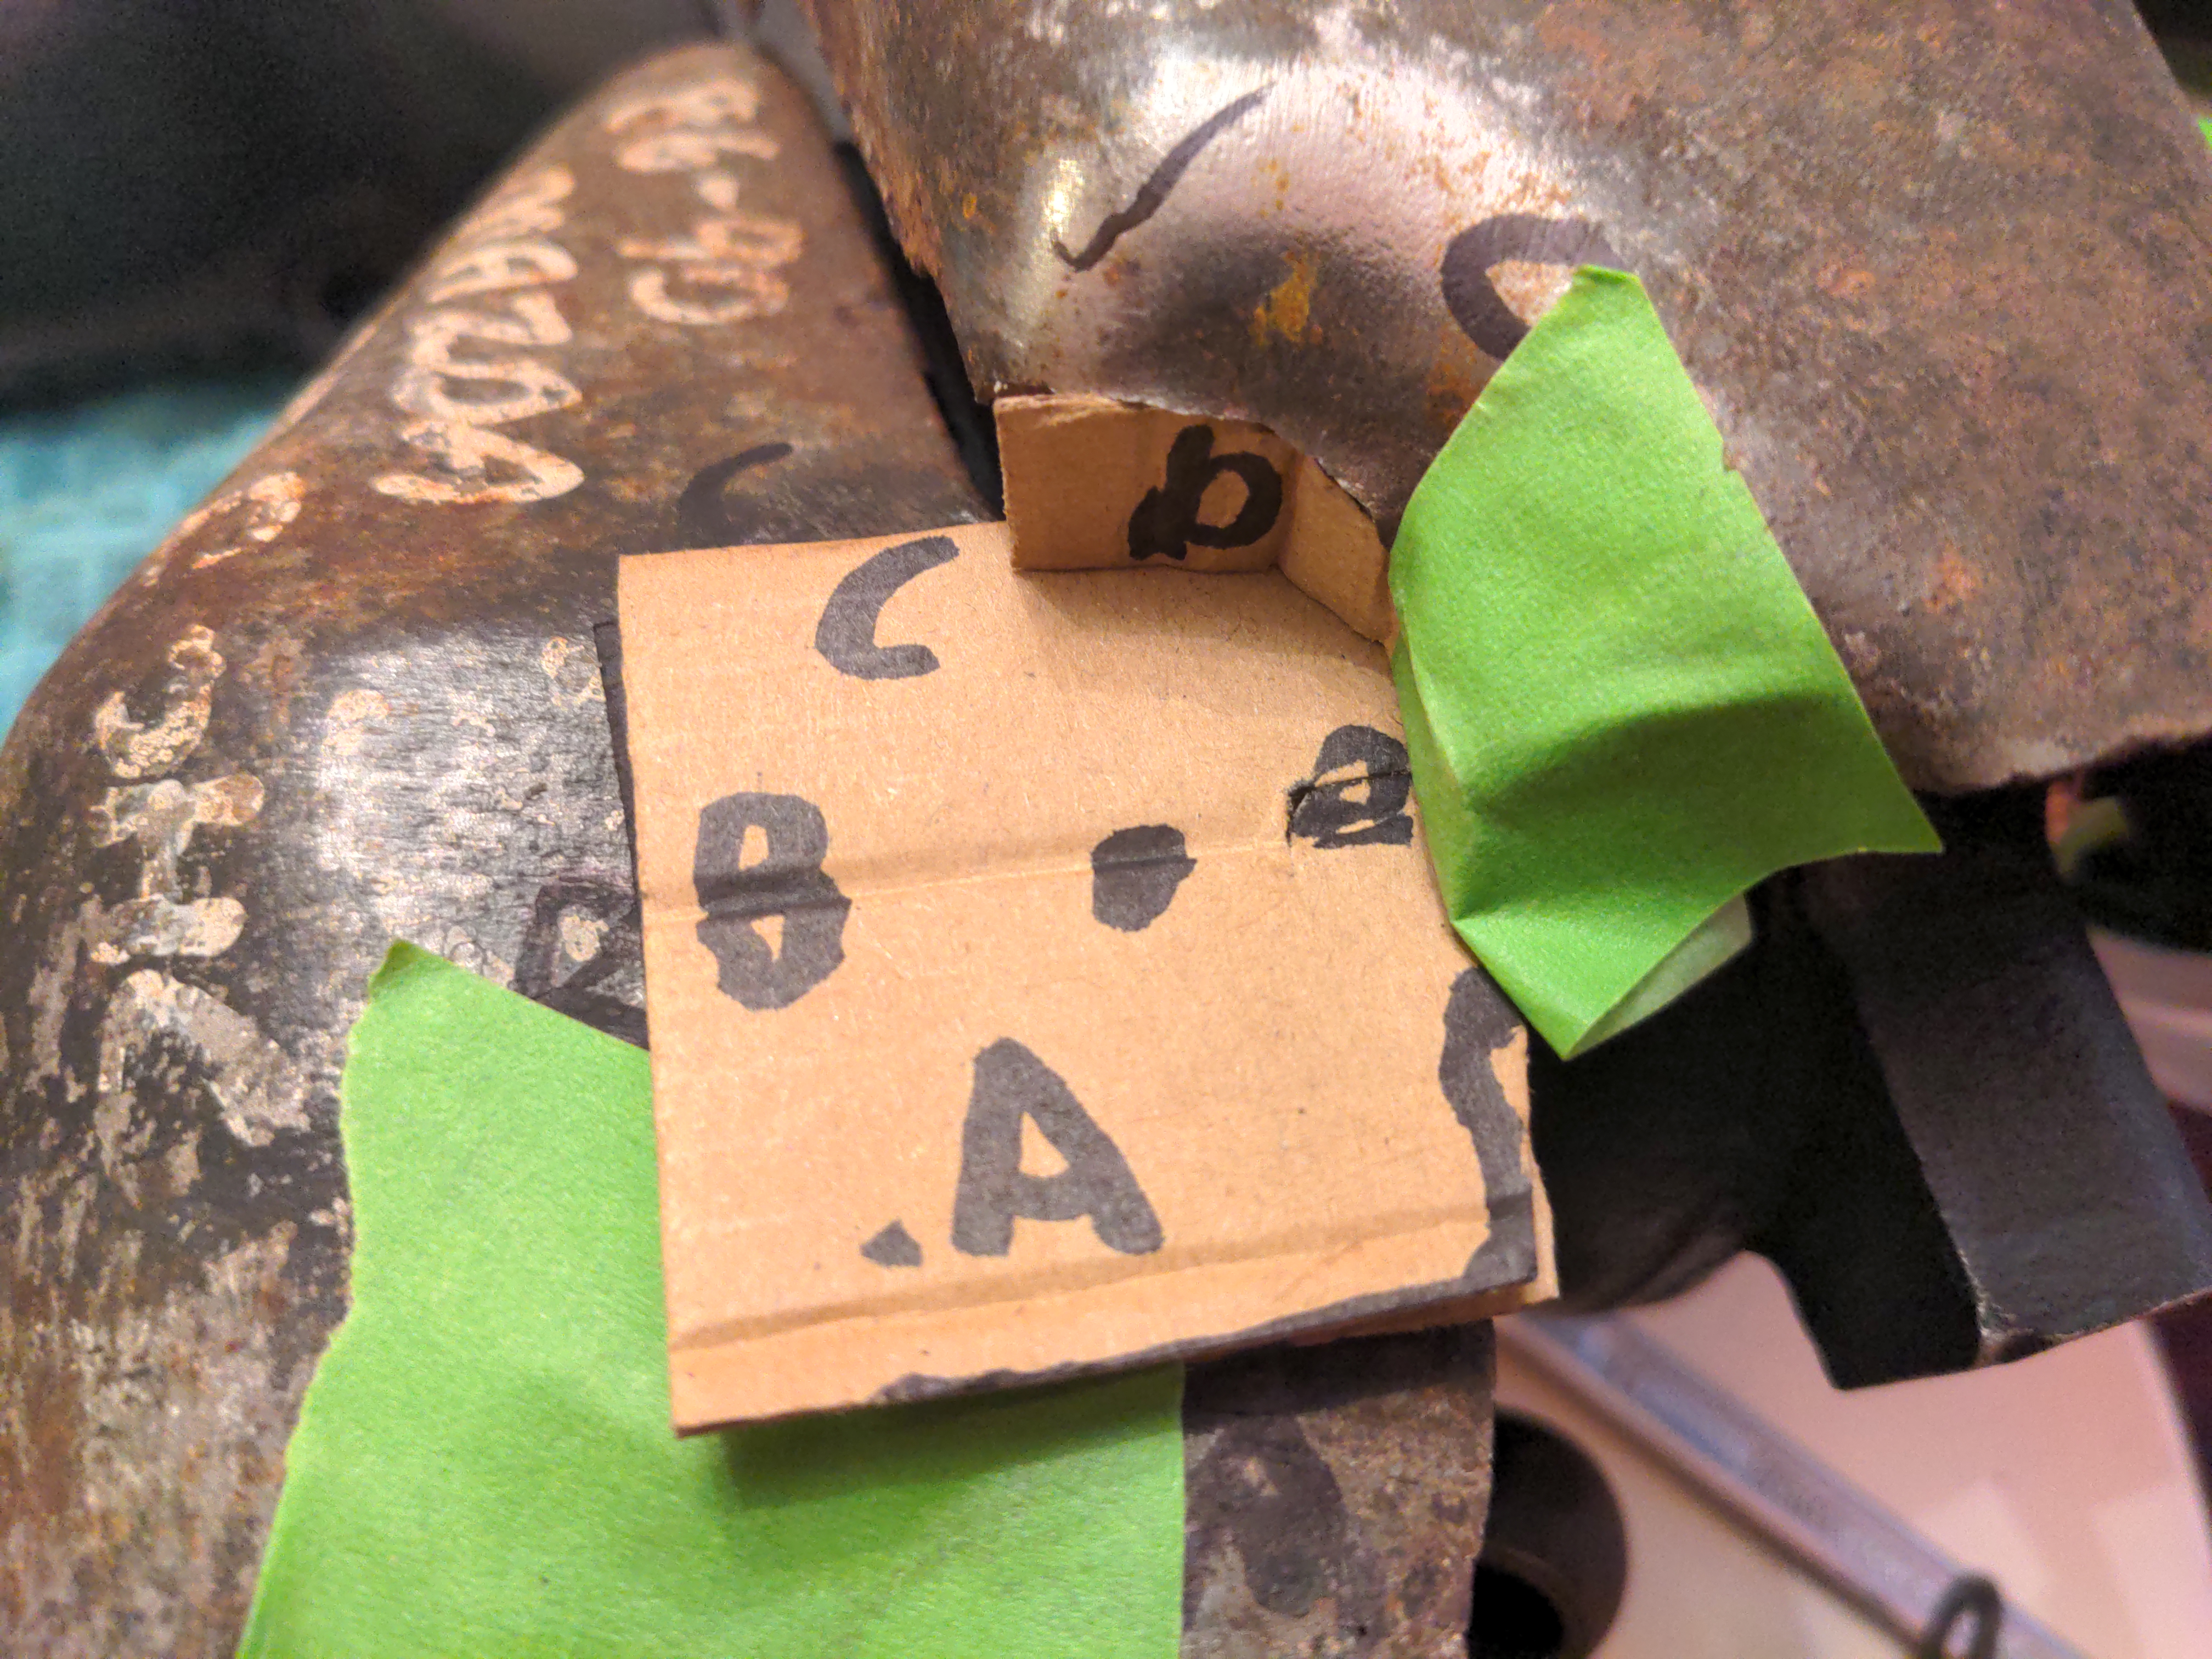
I did not enjoy the idea of making a new heat shield, because the correct material for making heat shields is about £150 for a 30x25cm sheet - and the chances that I'd get it right the first time weren't very high, so I could count on buying a couple of sheets. That would be a rather small expense in the unending stream of expenses that the 323 GTX has given me; one sheet costs a little less than one-sixth of a turbo, or one-twenty-secondth of an engine rebuild. On a whim, though, I figured that I may as well try to fix it despite being sure I would not be able to; I wouldn't have really lost anything by trying other than some offcuts of steel, some consumables, and a little time. So I made a very loose plan for some repair sections out of some cardboard...
...then I chopped up some bits of steel, and tried to stick it all together with a MIG welder.
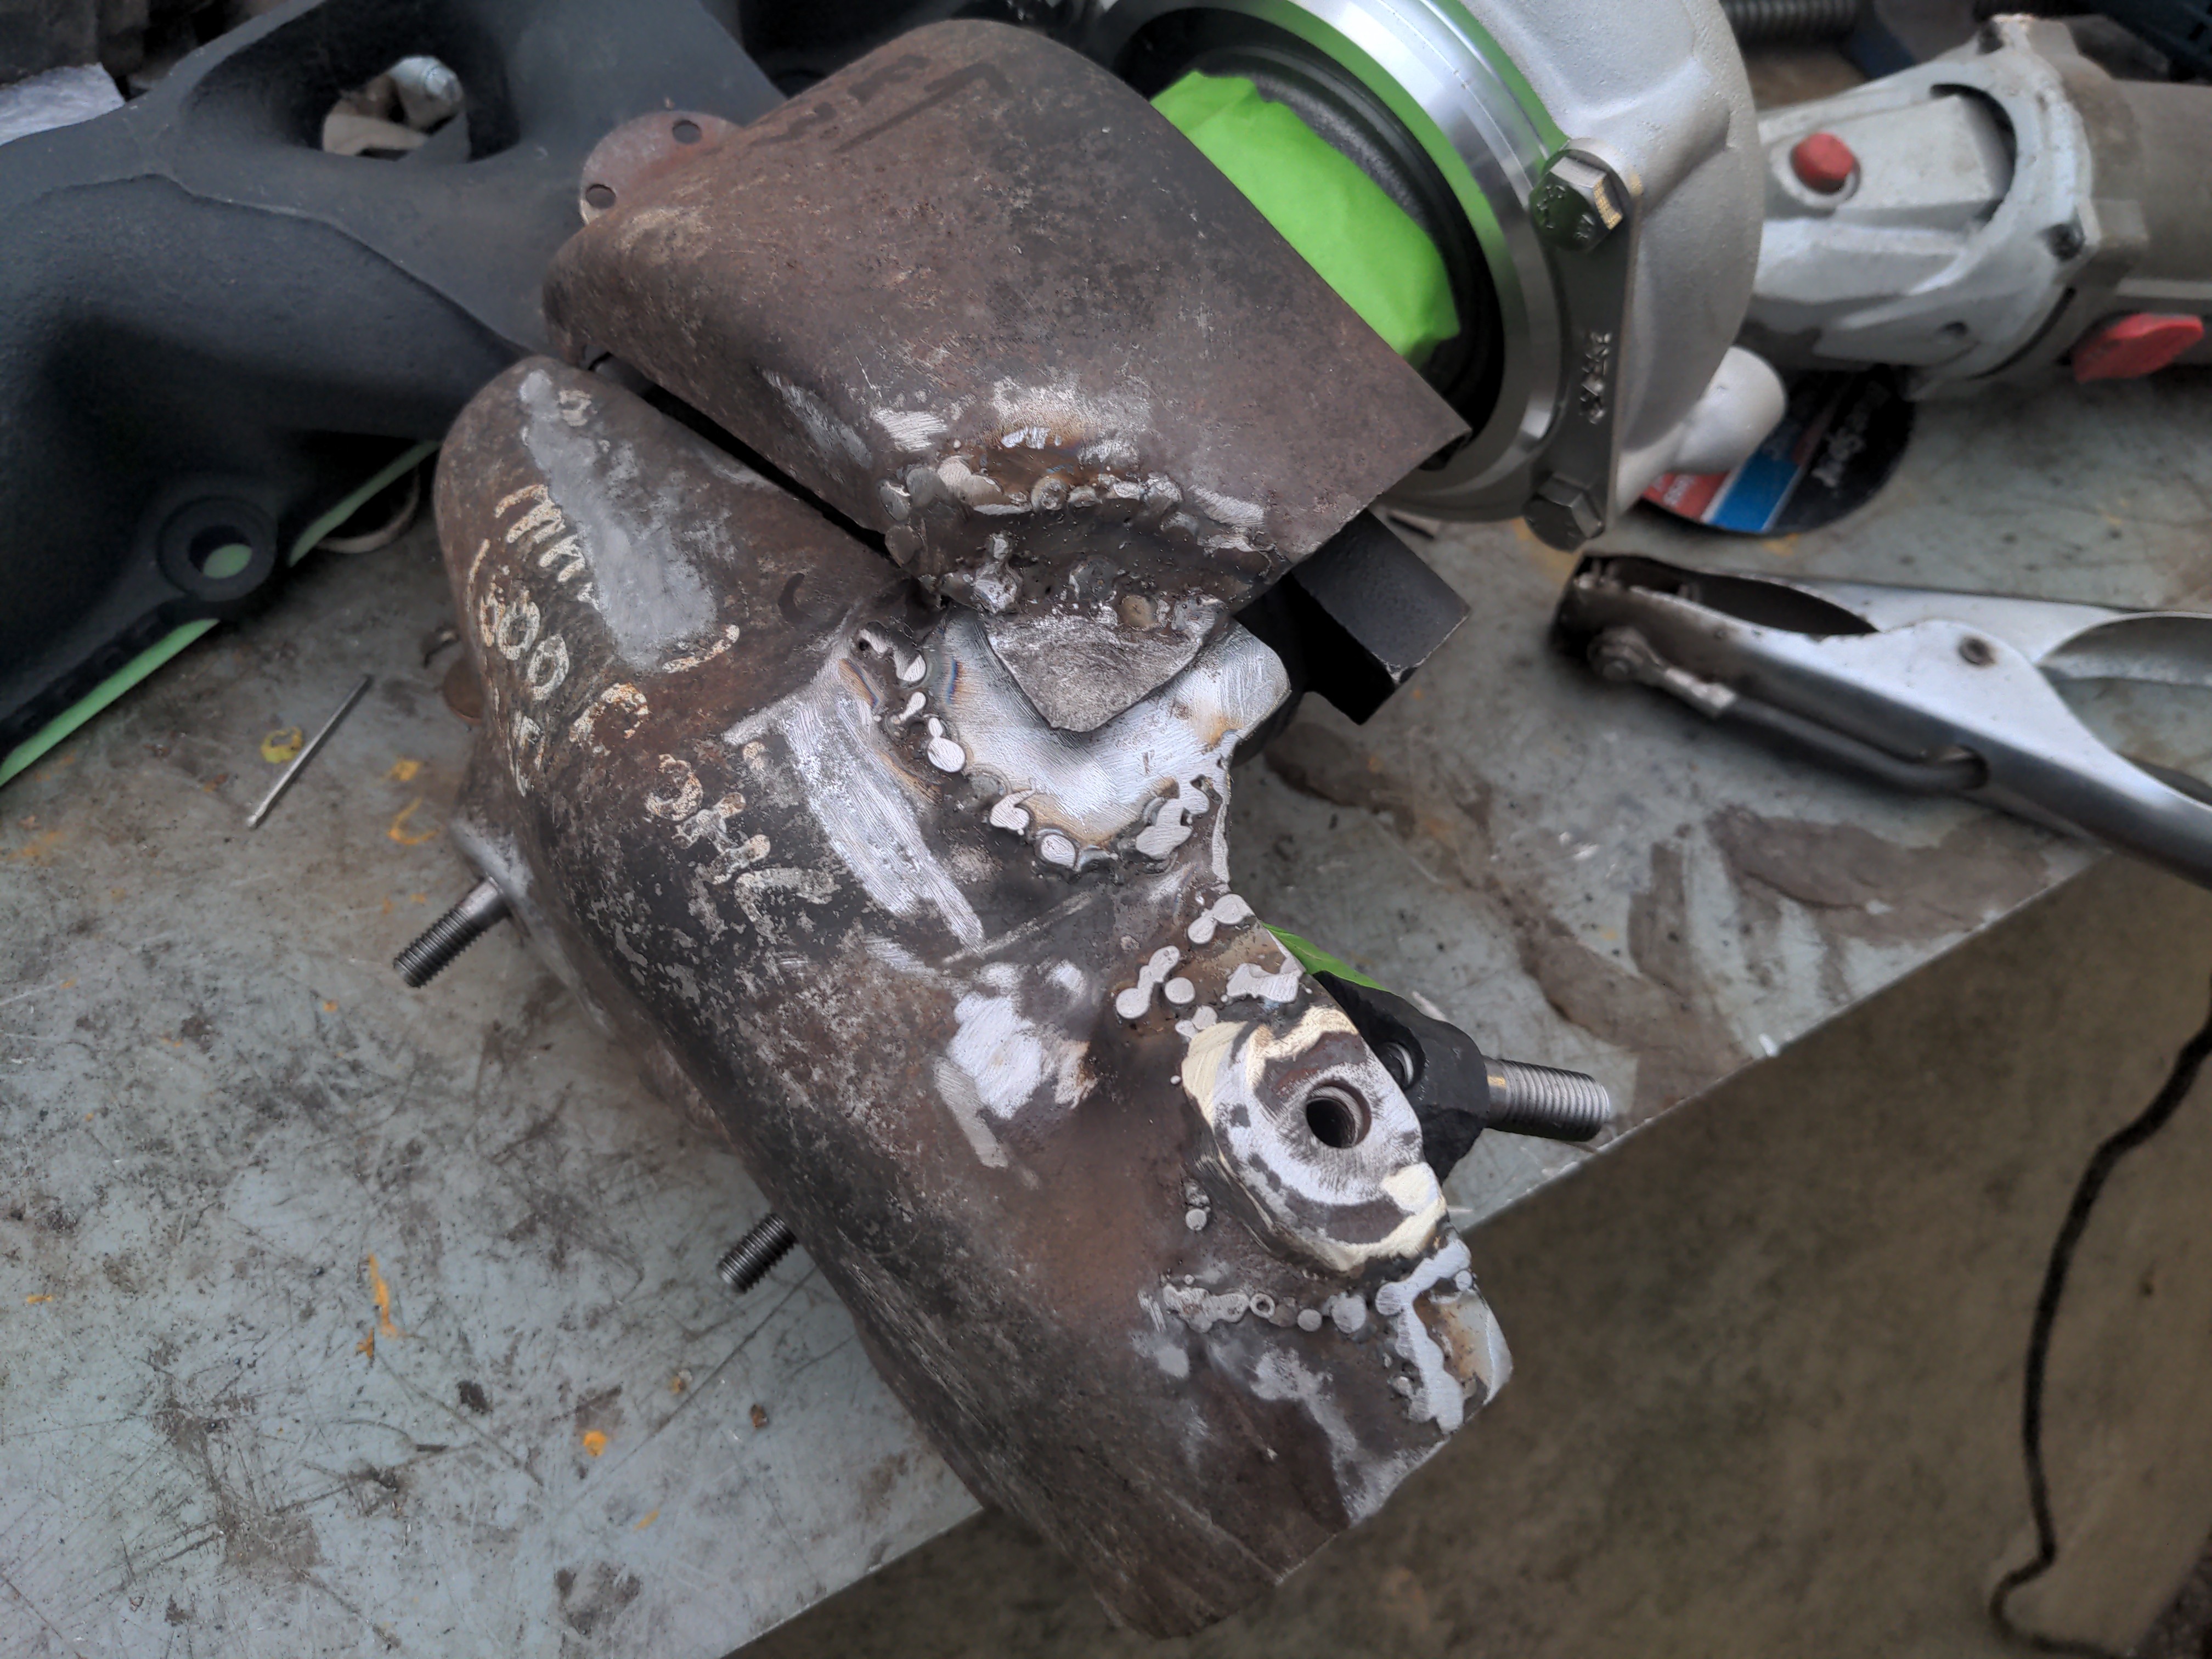
It worked! That is the kind of welding that would fill a YouTube comments section with horror, and I'm OK with that. The excuse is that the metal was paper-thin and that I'm using a worn-out 20-year-old MIG welder which doesn't work at any wire feed speed other than "full send". The full truth is the previous sentence plus the fact I do not weld often enough to be good at it. Still, it's out of sight so it doesn't matter how ugly it is, and these crude welds are strong enough for these non-structural purposes. I went back over some of the areas the next weekend because I wasn't happy with it; it didn't look much better than this after the second round.
Anyway, that was a small success; I did a minor modification with an angle grinder to accommodate the new CHRA, de-rusted the rest of the heat shield with Jenolite rust eater...
...and I could have left it there. Having an unpainted steel heat shield was better than what I had, which was a disintegrating unpainted heat shield. But I wanted to paint it. That would mostly be to make it look nice, but that would also give it a better chance of lasting another 36 years.
And that's why I had a BBQ!
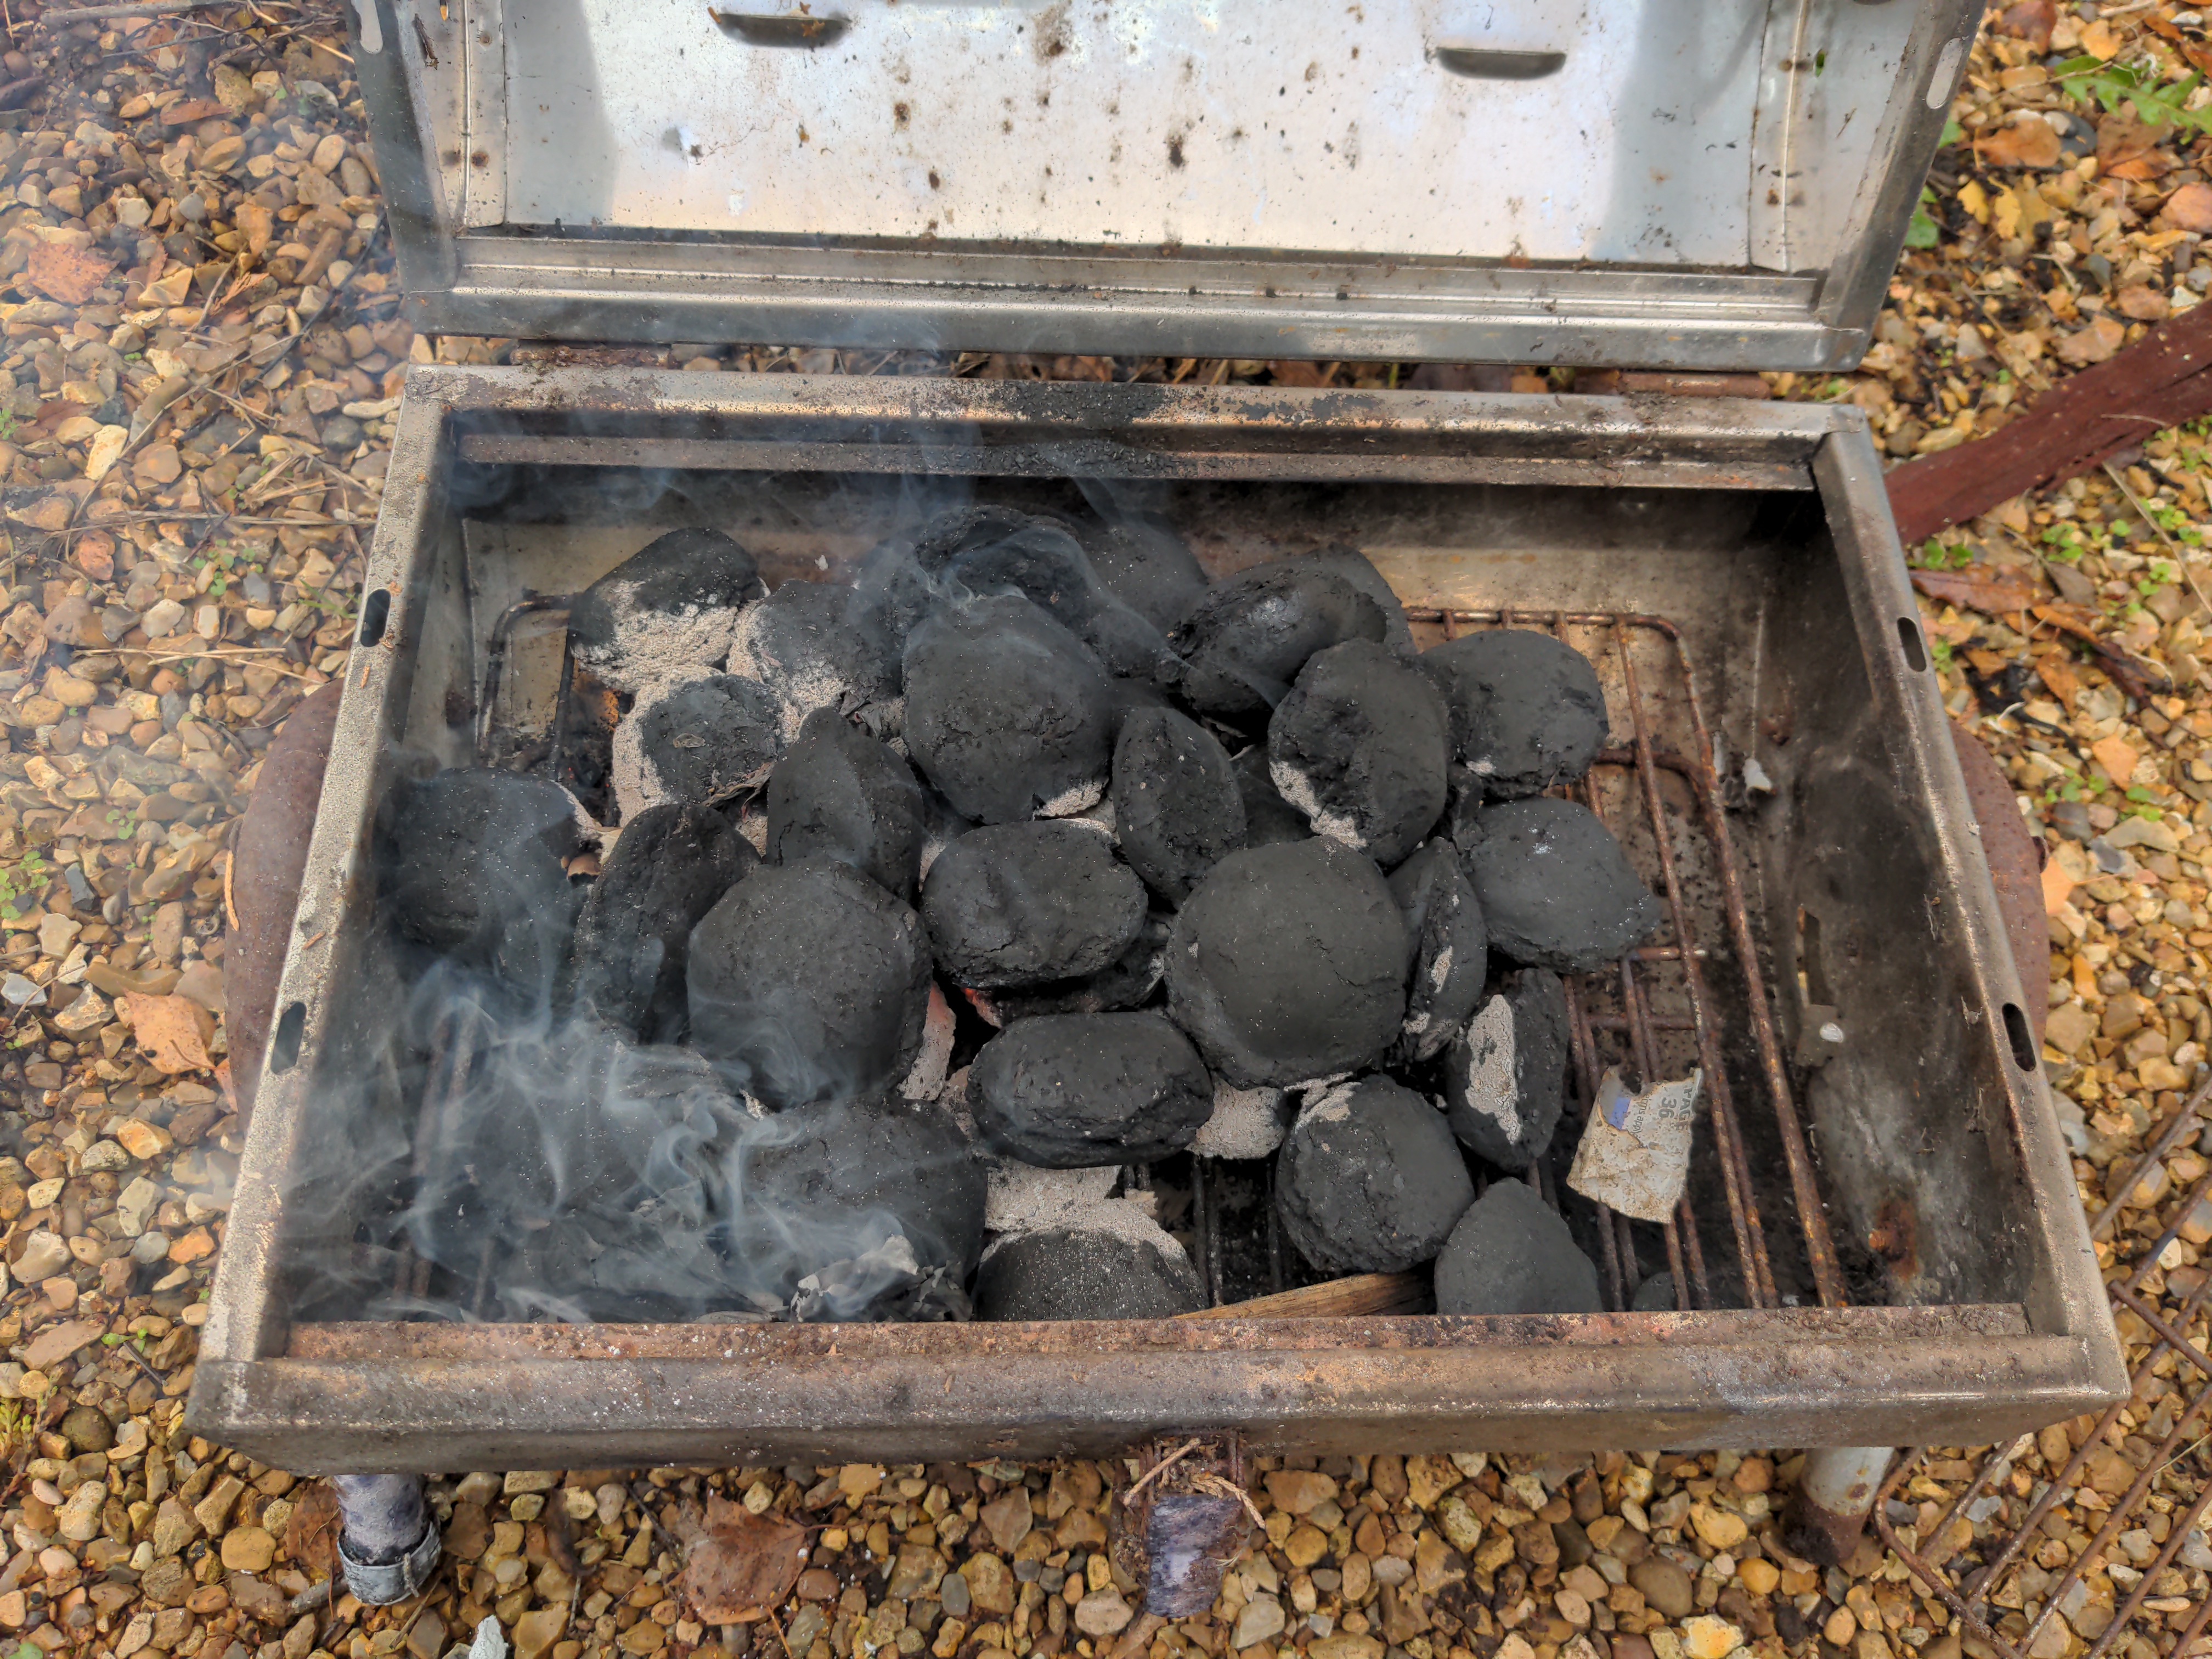
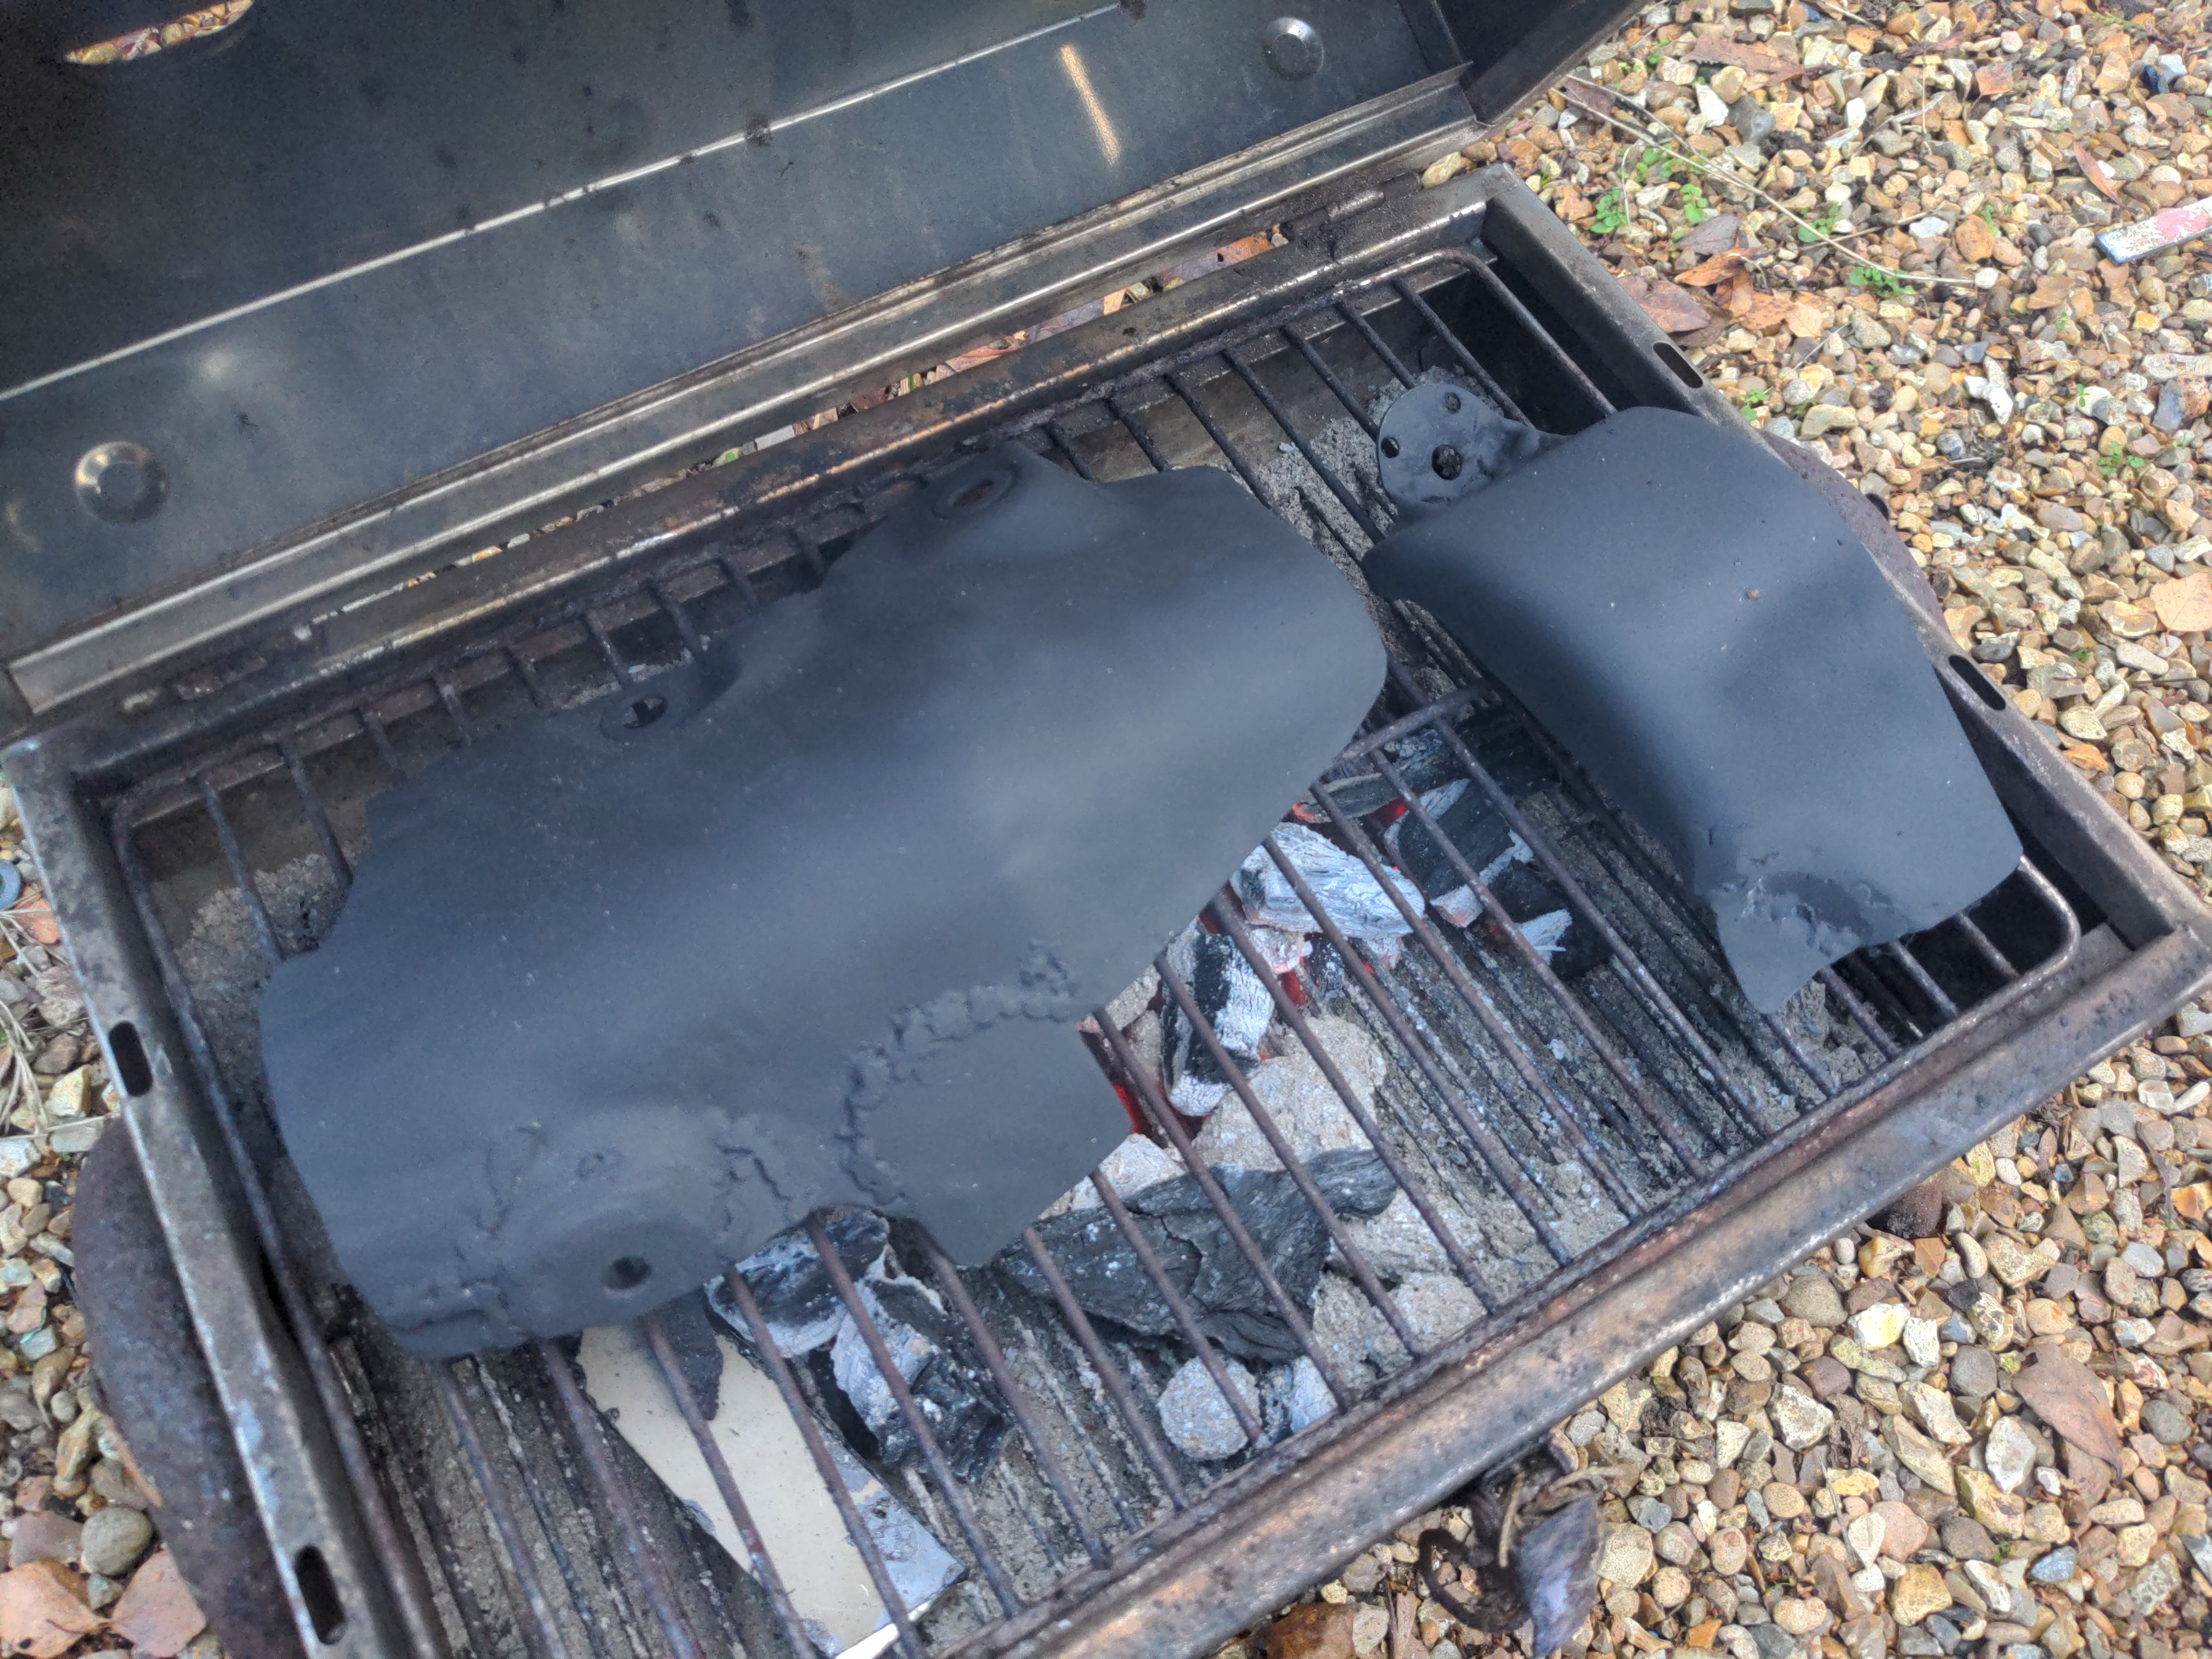
The temperatures near the turbine area of a turbocharger can be quite extreme, hence the need for a heat shield. For paint to survive in this area for any time, it needs to be special high-temperature paint, and all paints of this type require curing in a hot environment, usually in the region of 150°C (300°F). I previously attempted this by improvising a solar oven, but with no sunshine to be seen in England for the next six months I decided to liberate an old BBQ and use that for generating a lot of heat.
I tried to time all this so as soon as the BBQ was uncomfortably hot, the heat shield would be painted and ready to go in the "oven". Some time later, after curing and cooling, the result...
...was a total failure. The paint came off in my hands while handling it, as if I had thrown flour onto the part and expected it to stick. I don't know why this did not work. The surface was impeccably clean when I sprayed it, it was sprayed under relatively-controlled conditions, and the BBQ was definitely hot enough to cure the paint. Maybe the lesson here is not to buy no-brand-in-particular VHT paint. That probably means I need to revisit some earlier stuff since I have pipework painted with the same silver VHT paint.
Anyway, I wiped off what was left of the VHT paint and tried something else! Something I already had, which was this stuff:
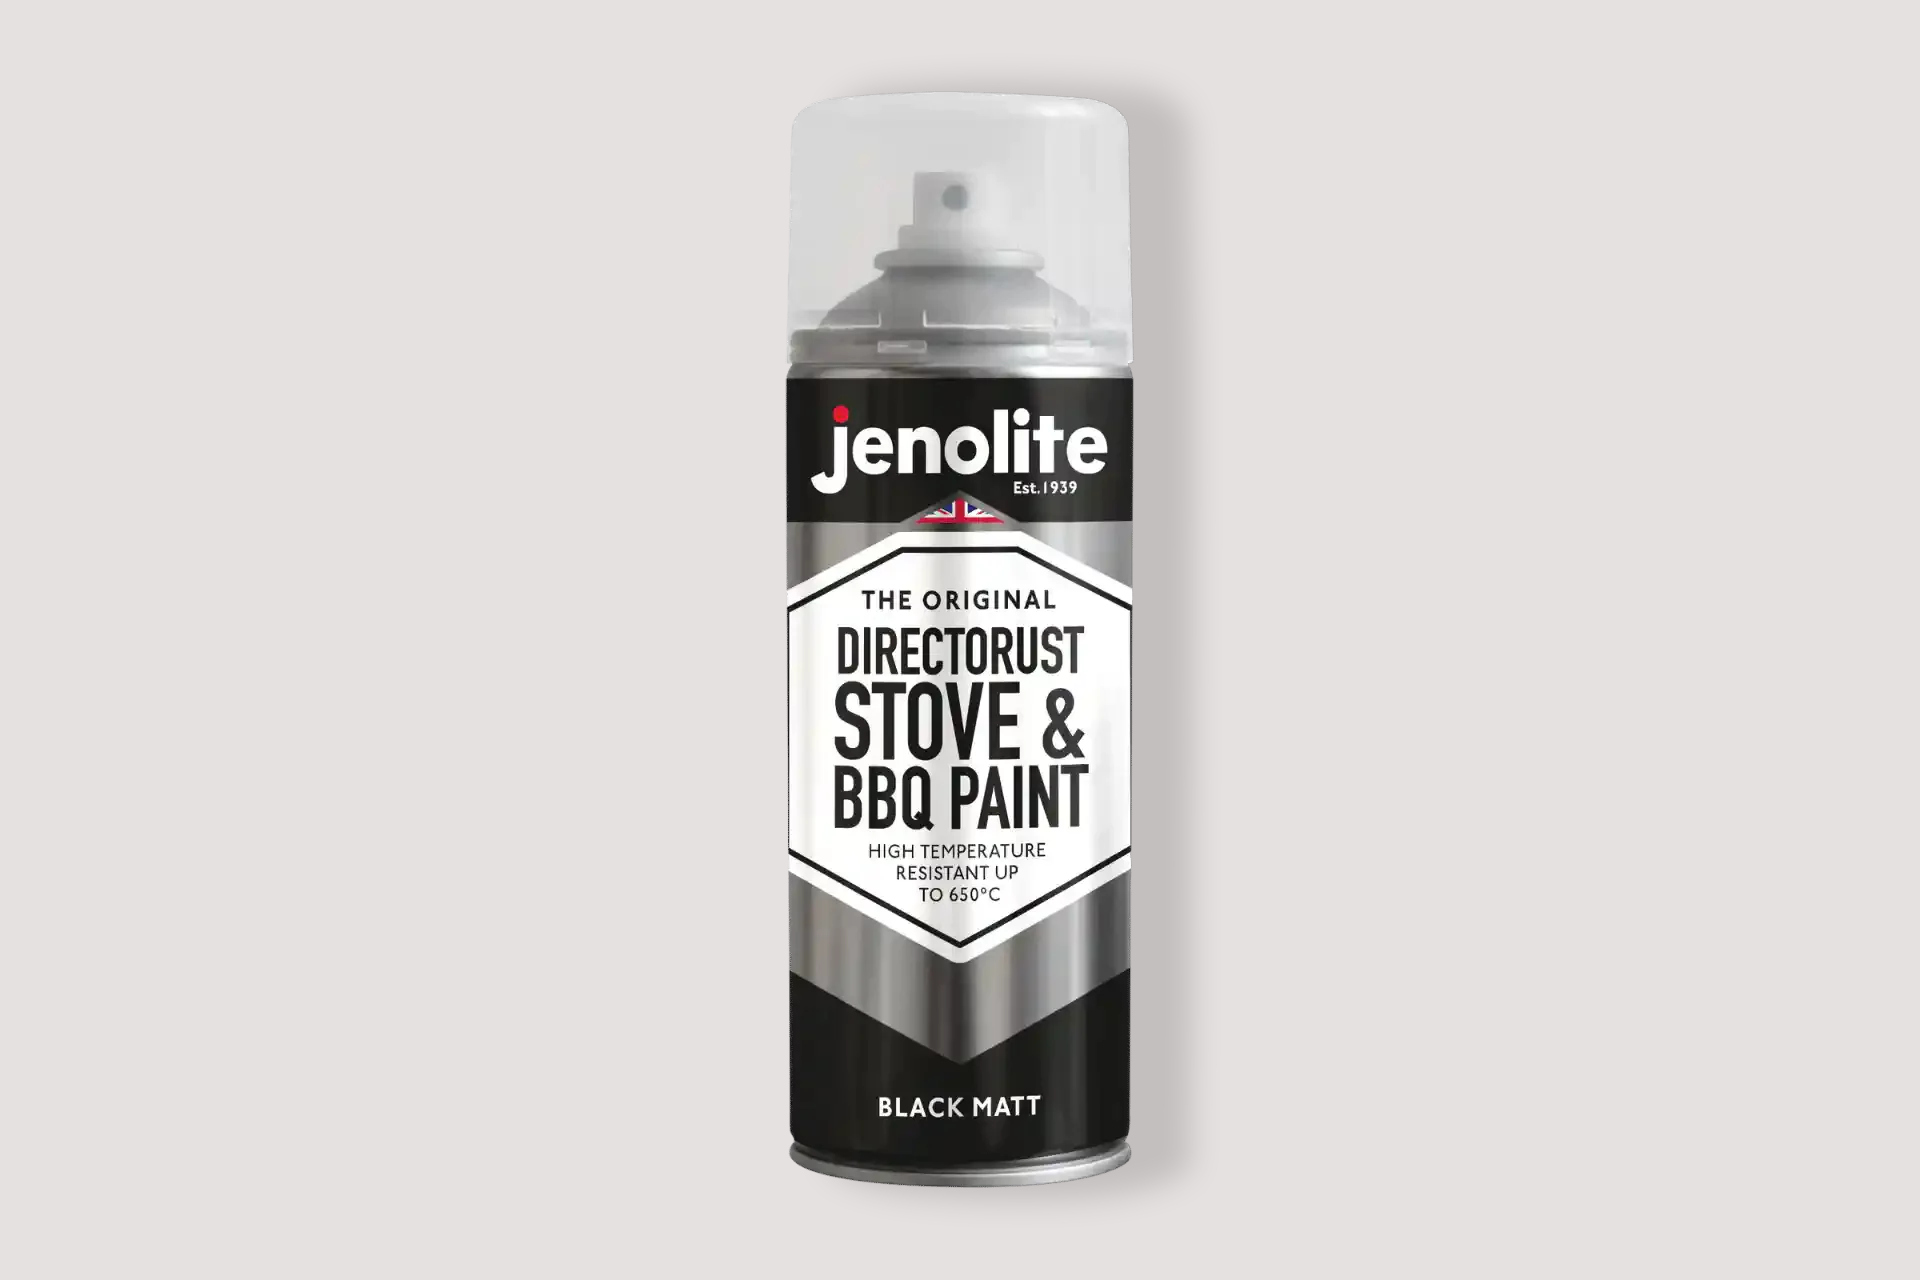
It is Jenolite black BBQ paint. It is good for 650°C. That is as hot as I'd ever want it to be at the heat shield; if it got much hotter than that I'd have some other problem like the car being on fire (though later I will mitigate that too). It is less blingy than the silver VHT, but that is probably better, because it won't look like garbage once it inevitably gets dirty.
The instructions on the can say nothing about using heat to cure, but product descriptions online seem to hint at it. And, if it's going to burn off to some extent on its first heating I would rather that happen in controlled conditions, like on my BBQ, rather than on my car, where it would probably result in a scramble to work out what was causing all the smoke.
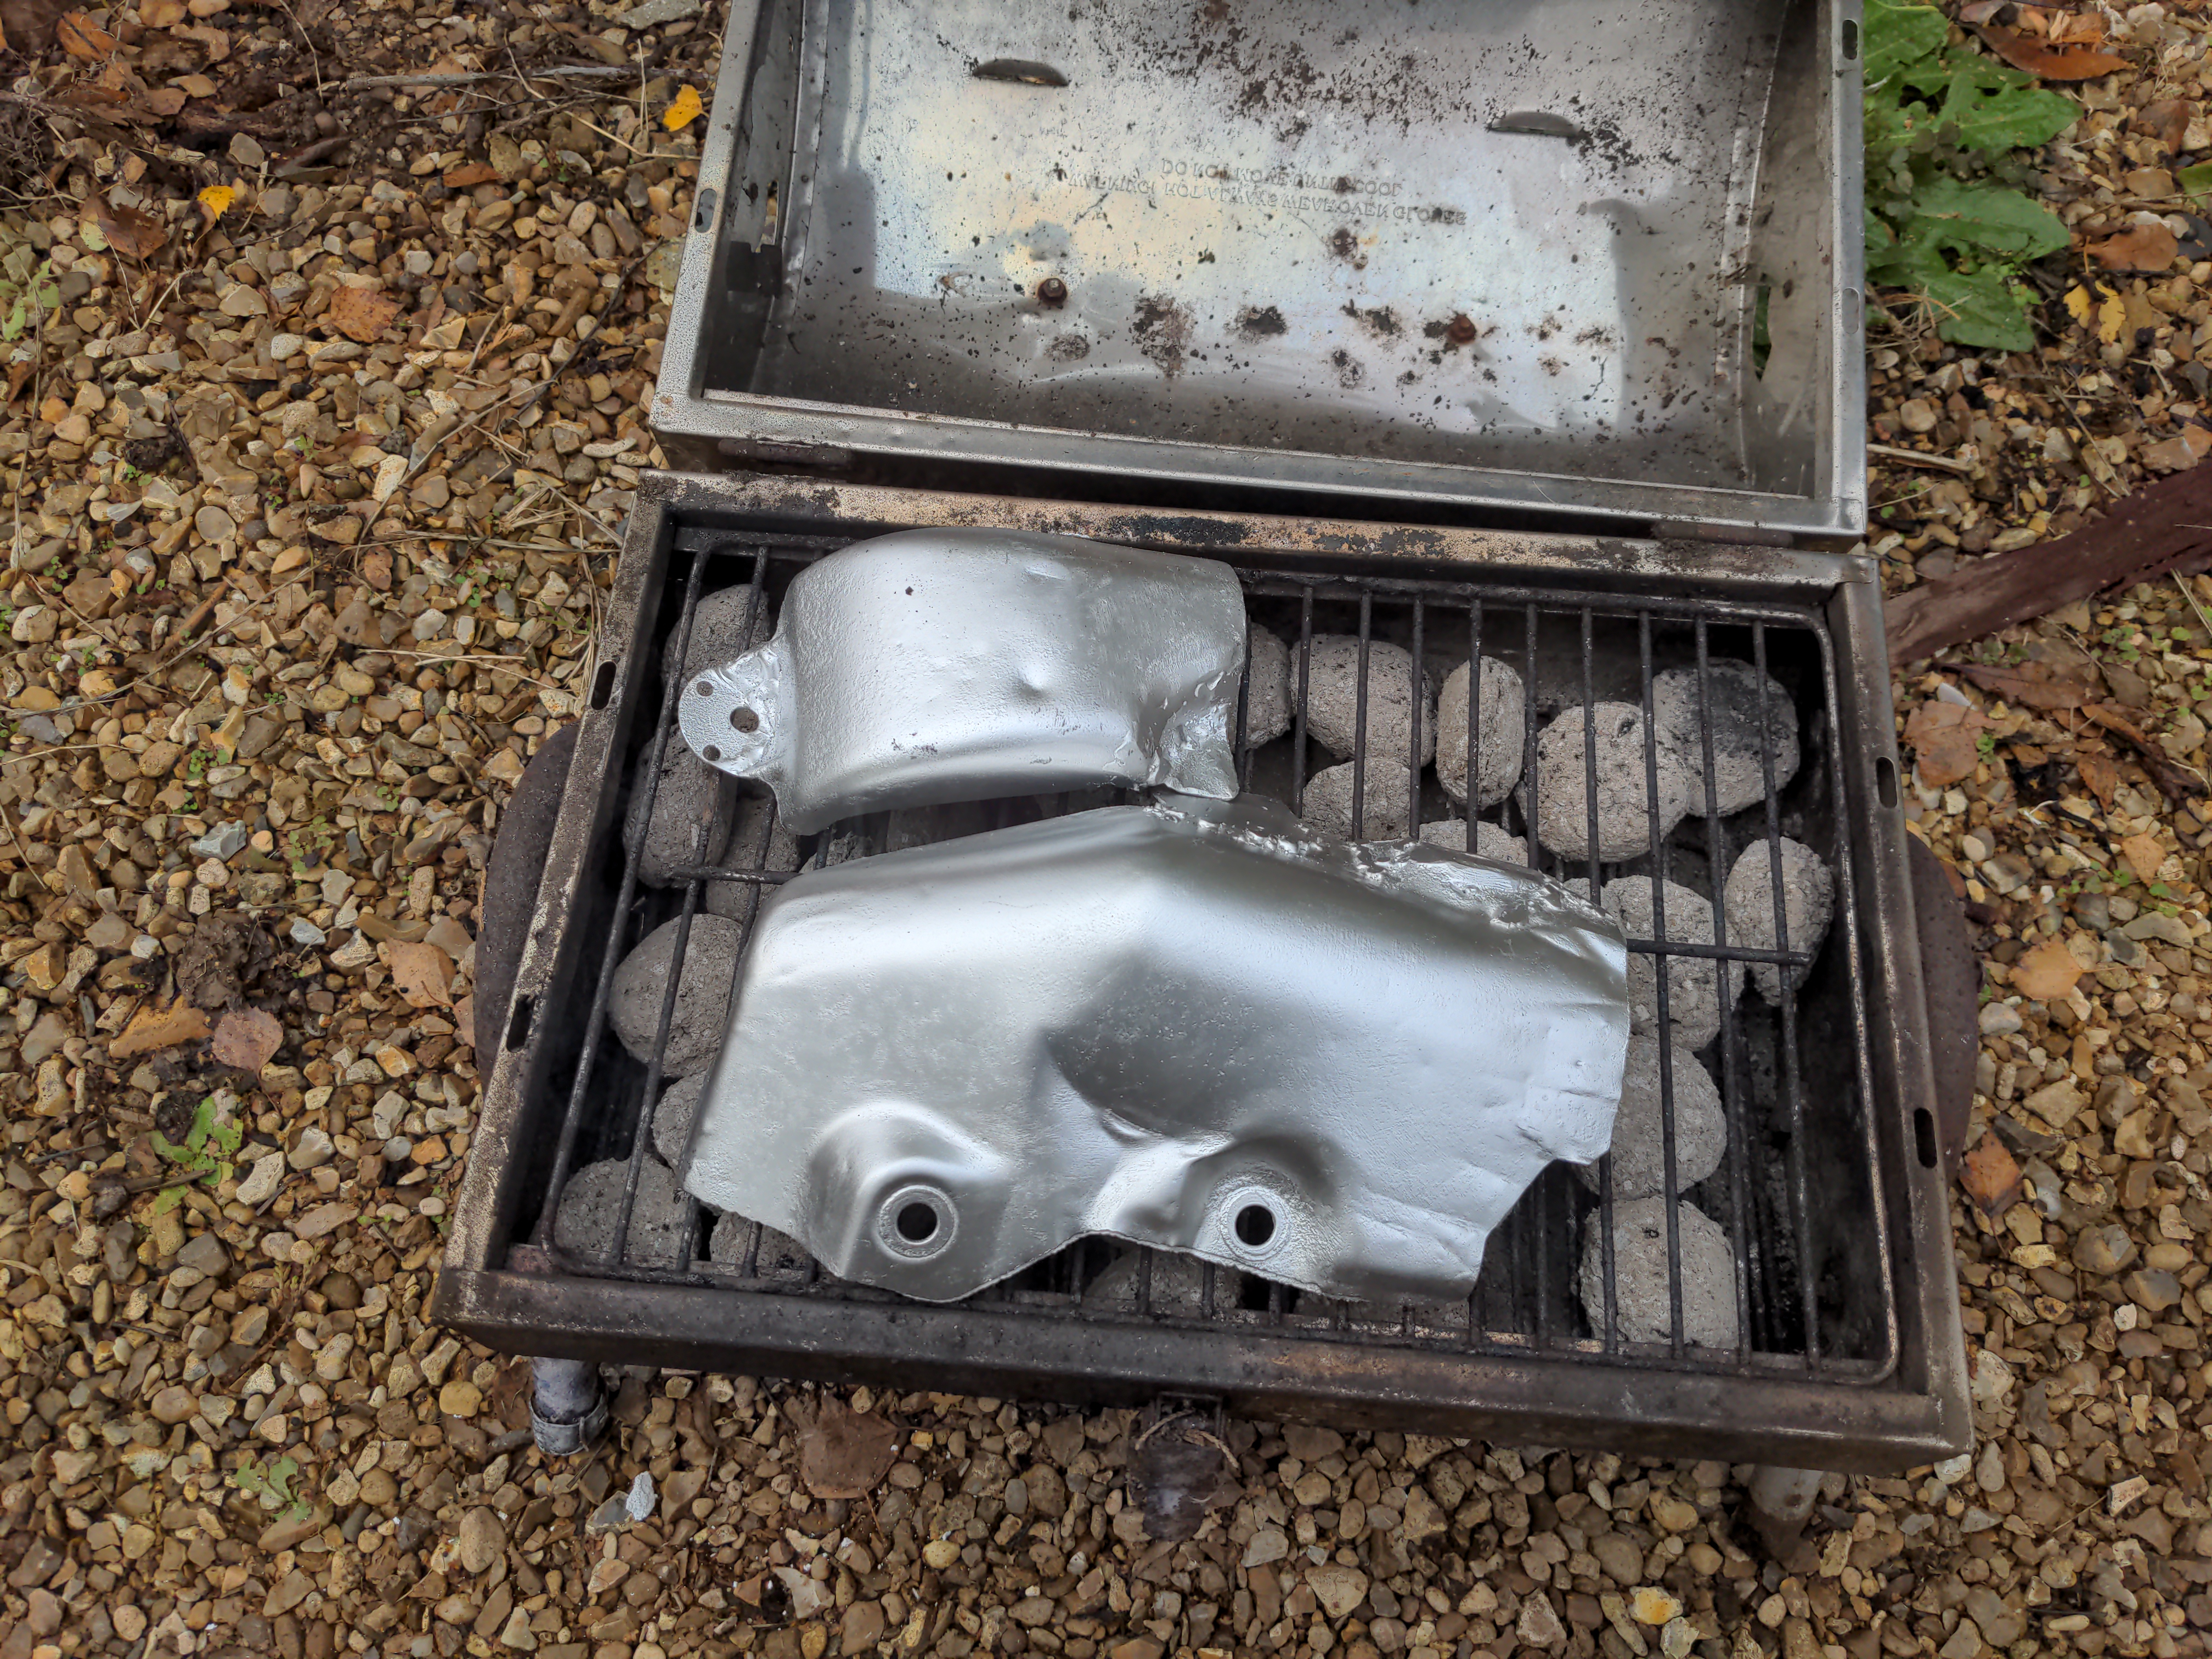
Dinner time!
After cooling, nothing came off in my hands, and after spraying with electrical contact cleaner and wiping it more thoroughly only a small amount of black came off. That is as obviously attributable to the soot from the BBQ as it was from the paint, so I called that a win.
And, I could have left it there! But the black paint is just cosmetic. Inspired by this post, I decided to give the heat shield some heat barrier properties as well. I experimented with a couple of self-adhesive materials here. I believe their rated temperature ranges; I wanted to know what their failure modes were when I exceed those temperatures. If I have a thermal problem down there I do not want anything to combust.
That is why I spent some time on a quiet Sunday afternoon setting things on fire with an oxypropane torch.
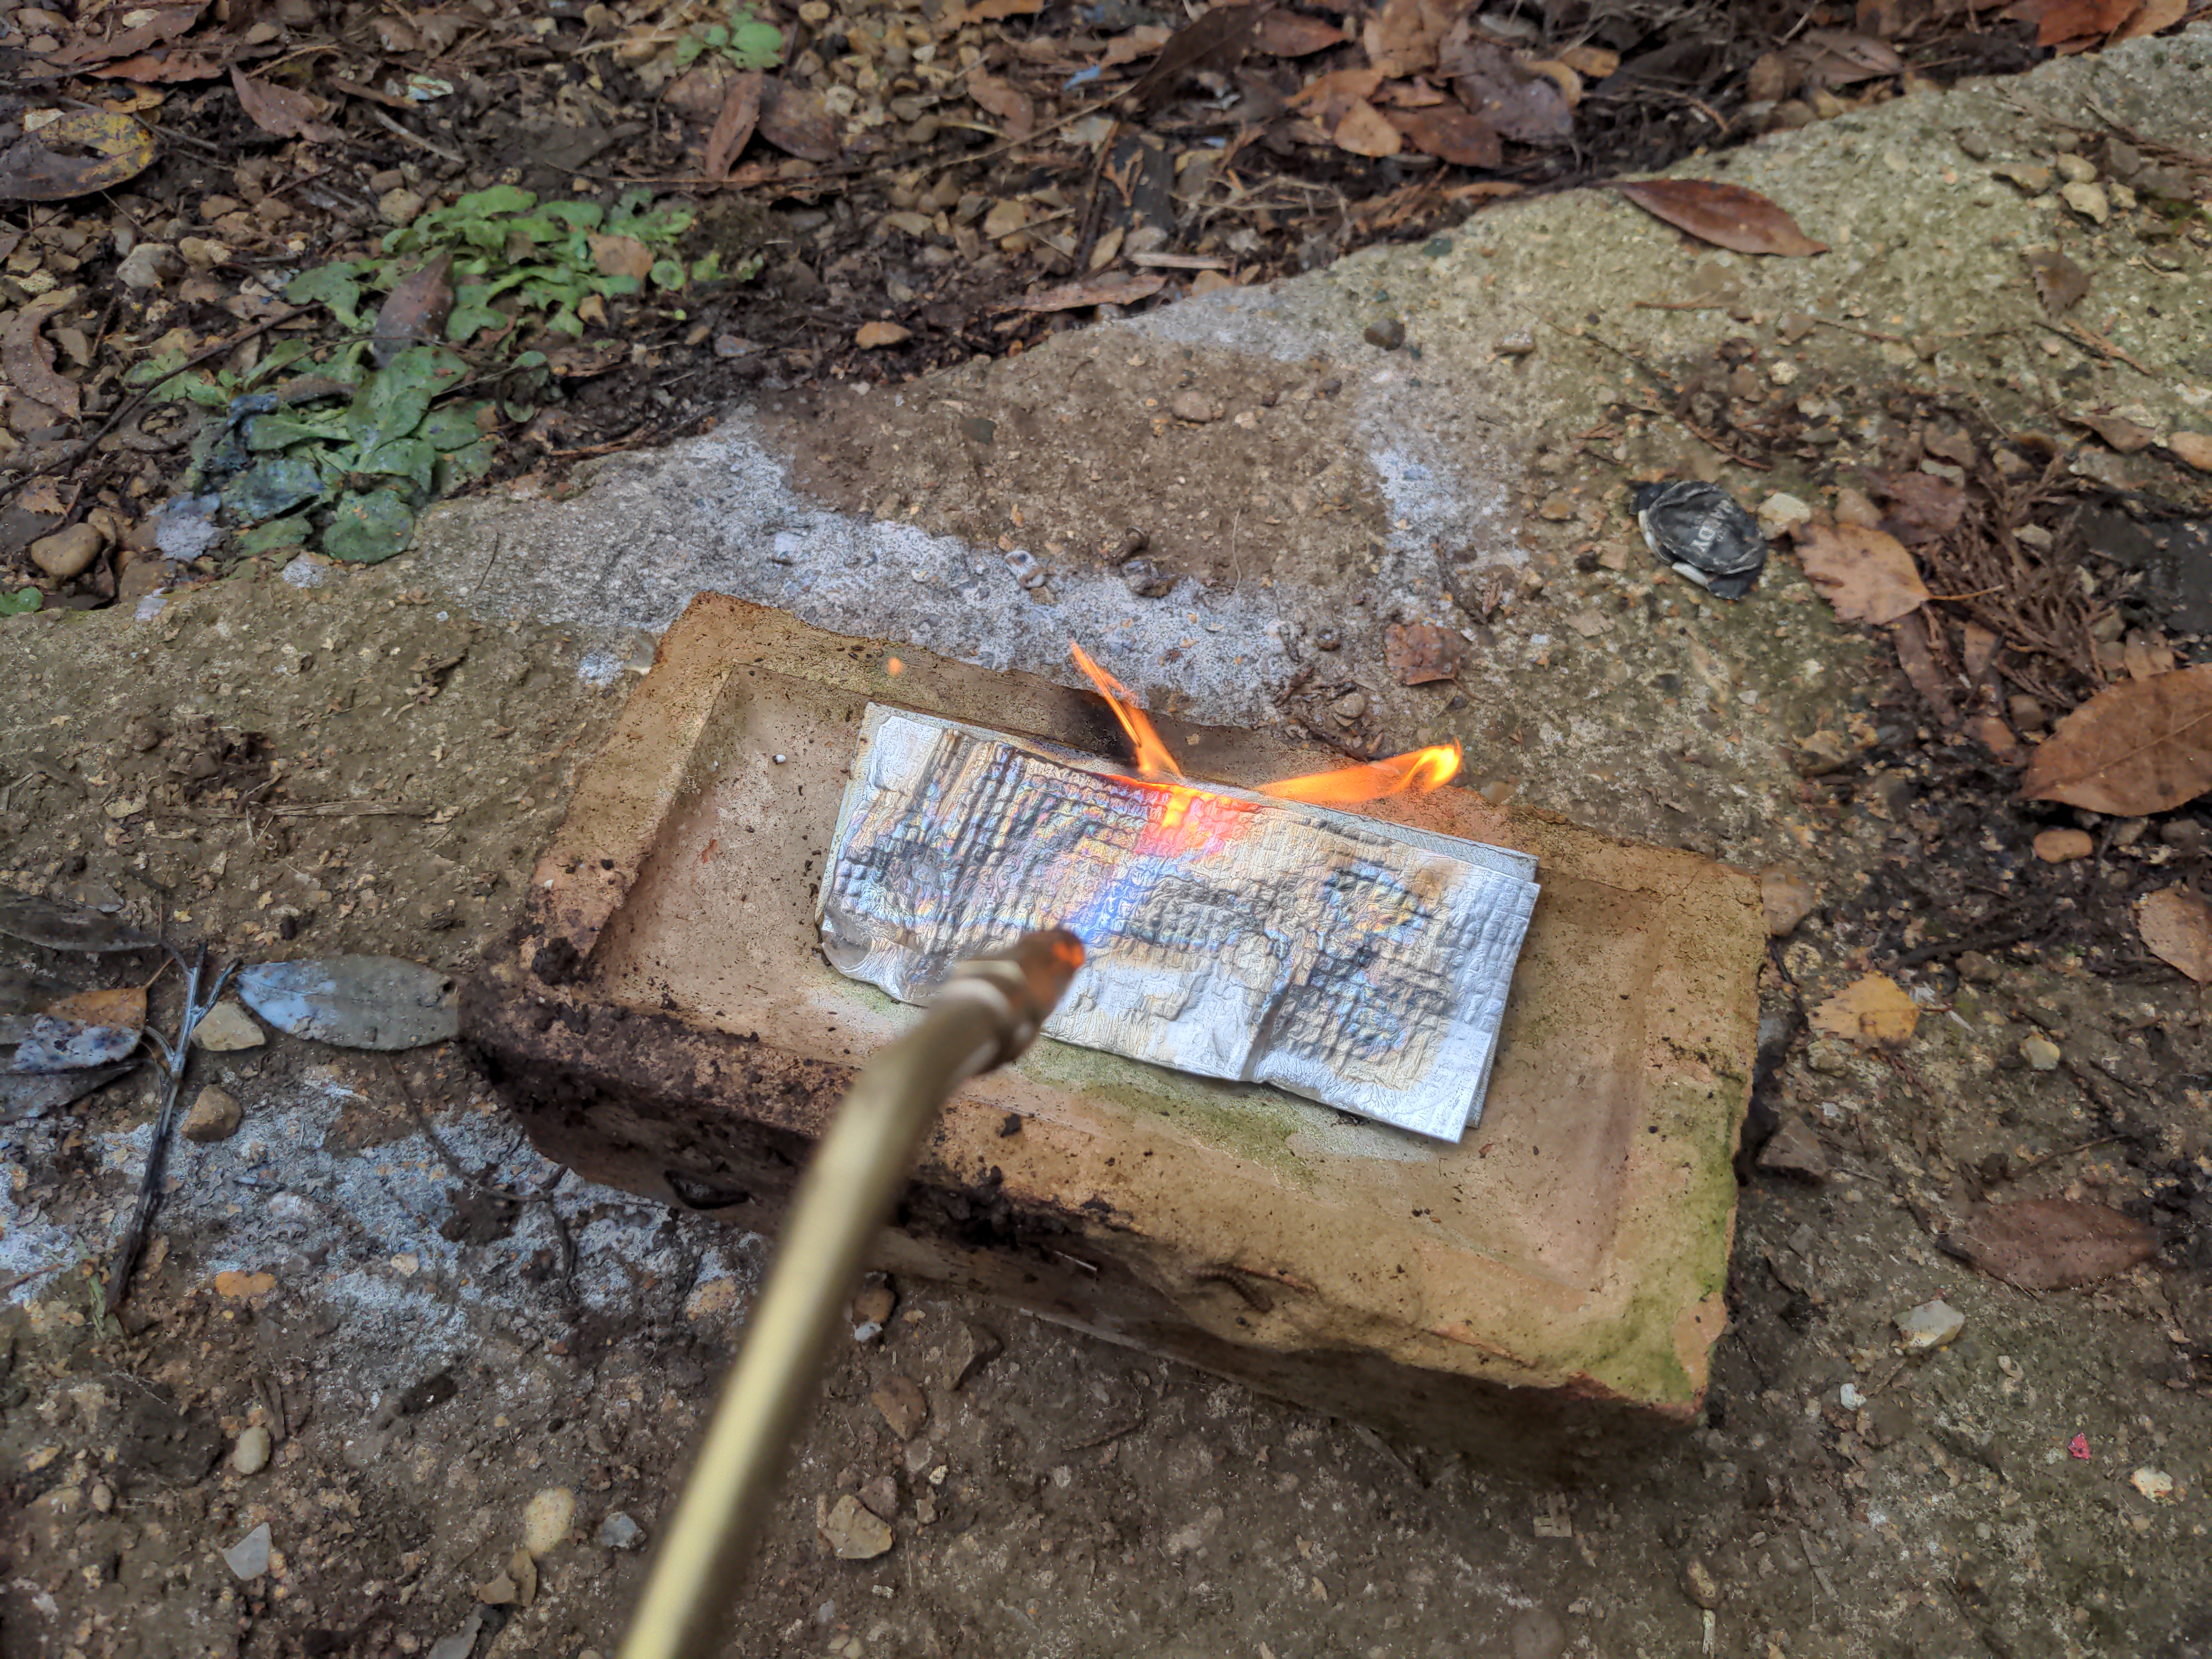
An oxypropane torch burns at about 2000°C (3600°F). That is about the same temperature that a UFO must endure while entering Earth's atmosphere; i.e. far beyond anything I am likely to see at my turbine housing, and far beyond anything these heat barrier materials are designed to withstand. I subjected it to these temperatures for two reasons. One, because it is very fun. Two, because extreme beyond-design-basis temperatures will illustrate the failure mode of the material.
The heat barrier pictured above caught fire at these temperatures. I'm not naming the material because I don't want to "name and shame" when I am subjecting it to temperatures far beyond anything it is designed for. This material may well yet be useful in future; I tested this material inside my BBQ as well while curing paint and it held up very well. I may well use the remainder of it to modify my BBQ to retain even more heat for future paint-curing exercises, and if it surprises you to read the words "modify my BBQ" here you might not know me very well.
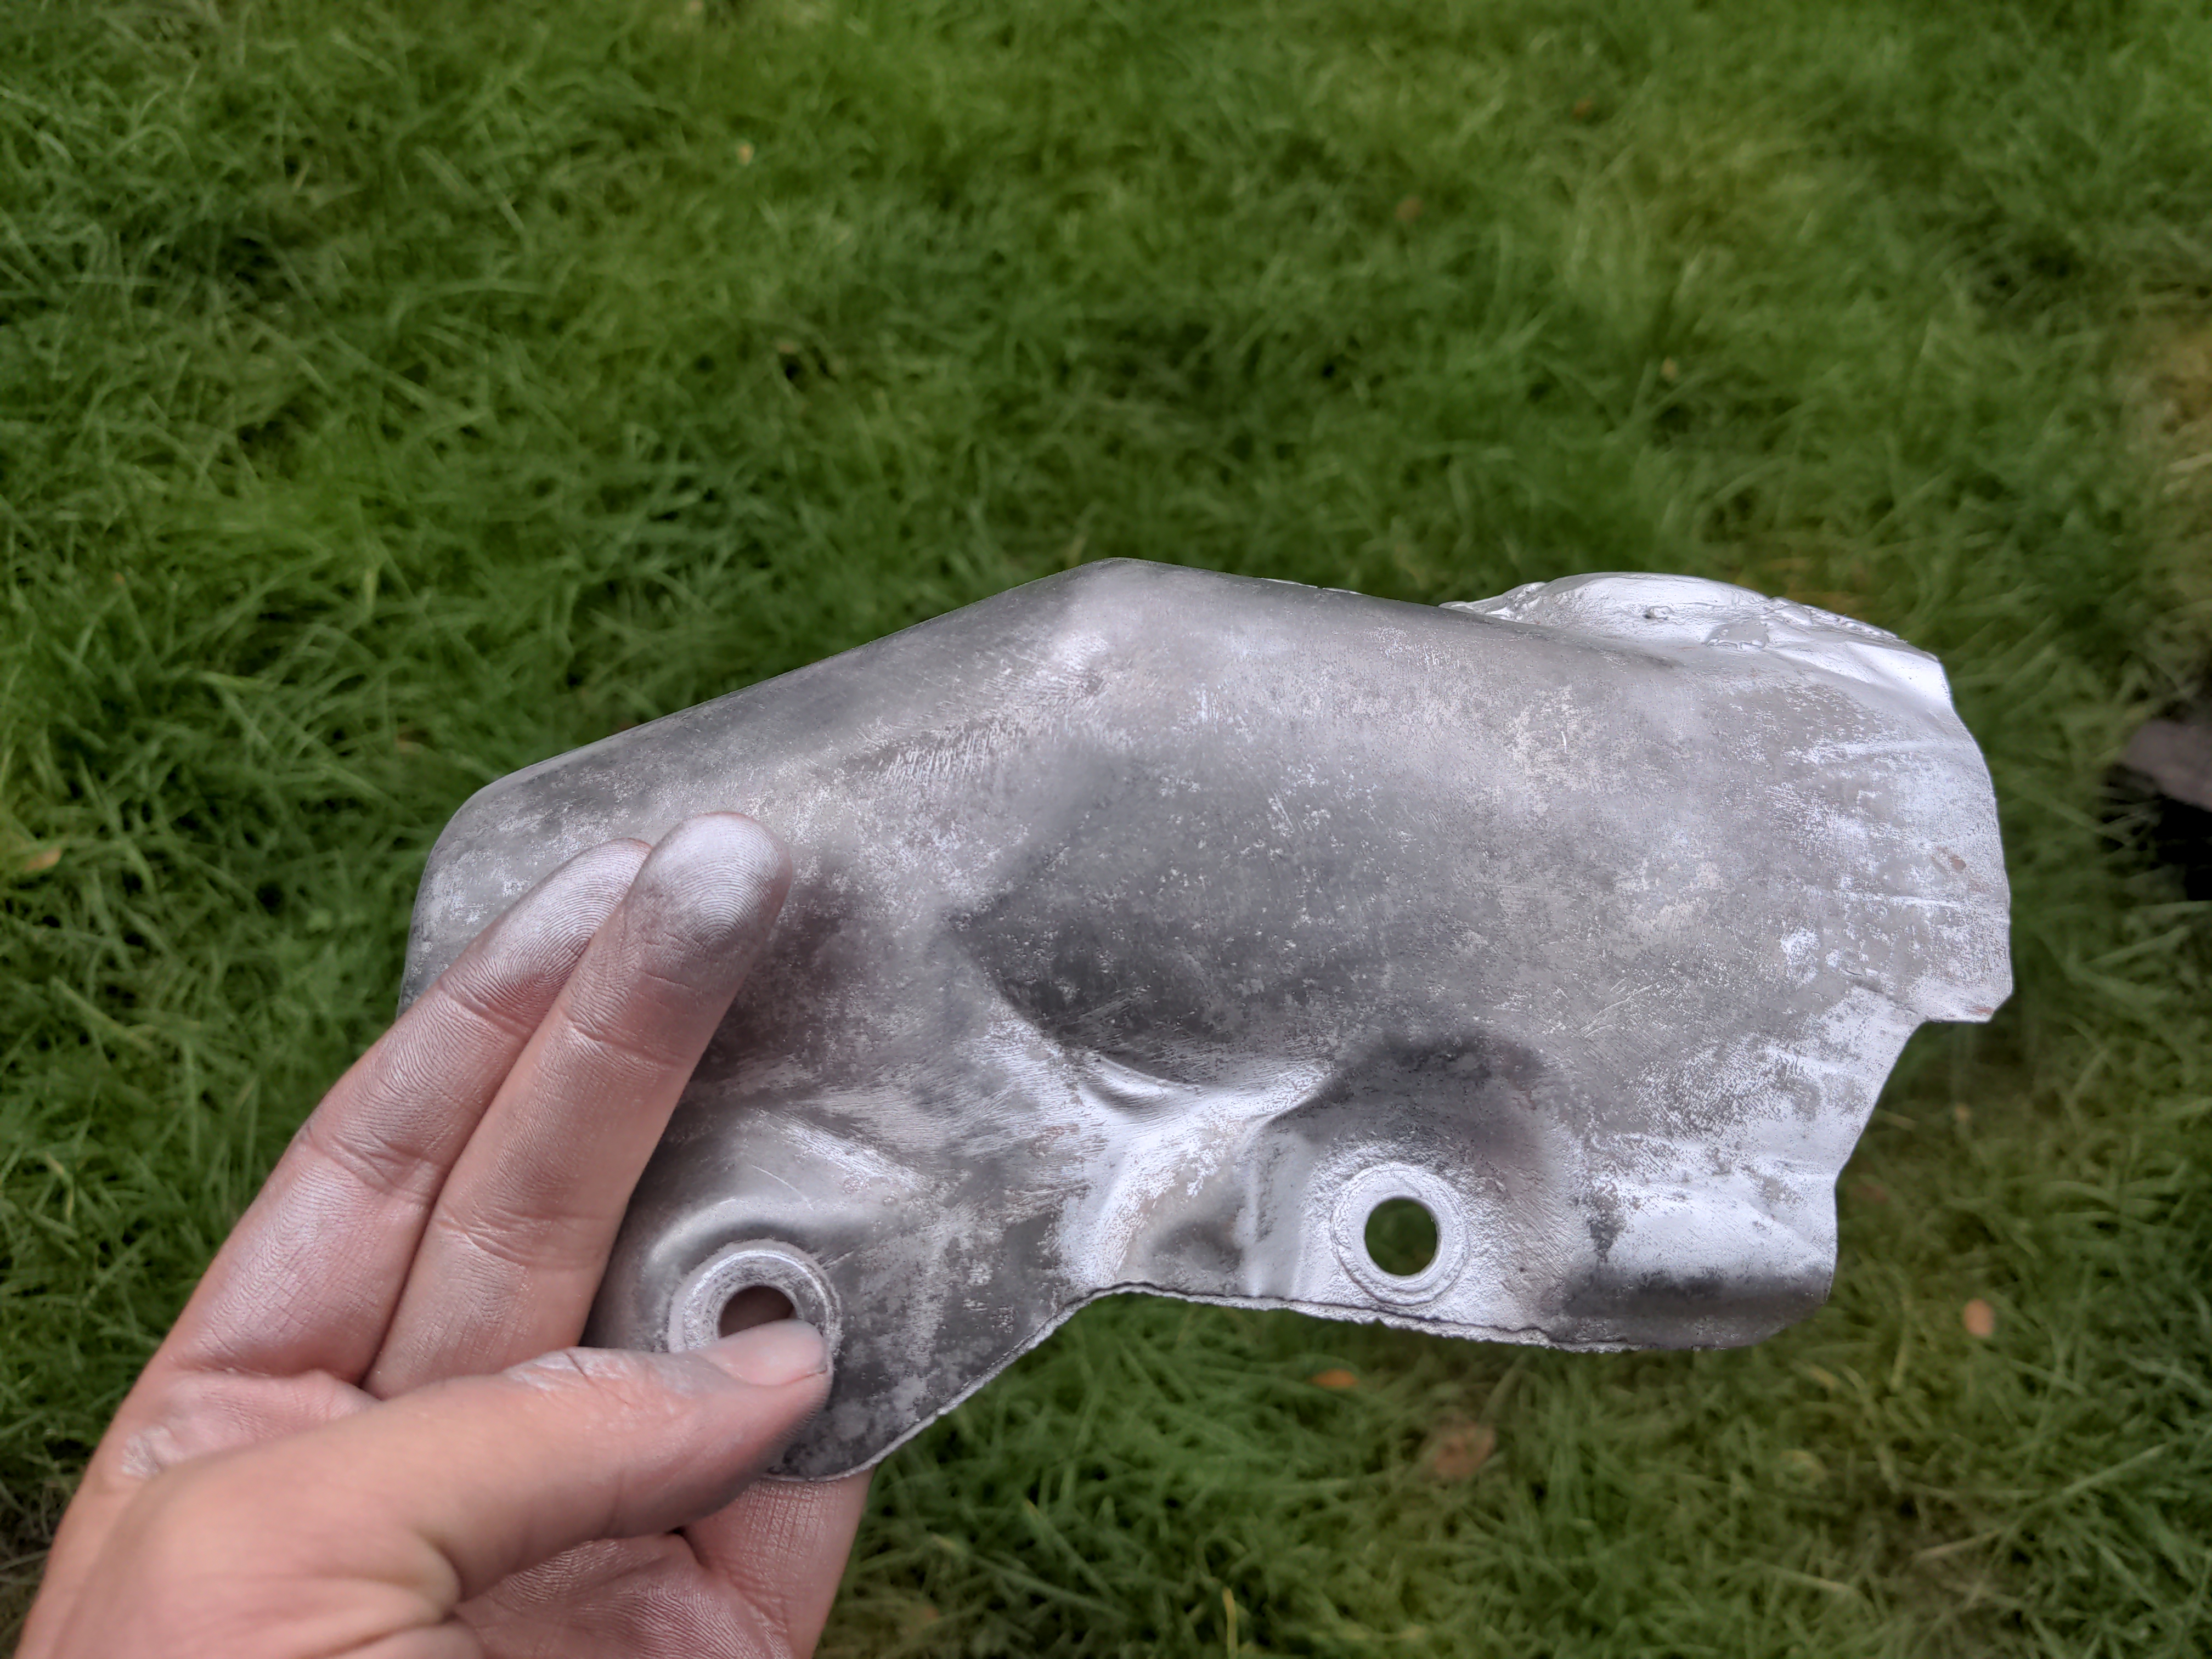
The winner was Thermo-Tec Aluminized Heat Barrier (which was also used in the post linked above). It is self-adhesive, bonded to fibreglass (violating a promise to myself to never work with fibreglass again; I was itching for days), bonded to a thin aluminised layer. It is rated to 1093°C (2000°F), which is somewhat hotter than the worst-case scenario temperatures near my turbine housing. More interesting (and more fun) than any of that, when it failed at the oxy-propane torch the adhesive and the fibreglass substrate hardened (rather than caught on fire) and the aluminised coating fell off. That is a graceful failure.
I found it easier to apply the heat barrier in multiple sections. The smaller part of my heat shield required three, the larger part needed two. It's fine for the sections to overlap at the edges; you are not sufficiently space-constrained for a tiny bit of extra thickness in places to be an issue, and a little overlap is better than leaving a small gap. I also found it very useful to make cardboard templates first; it has about the same flexibility as the heat shield material, but rather less awkward to work with, and it's free to make mistakes. Thermo-Tec very thoughtfully included some cardboard for this purpose, with their packaging.
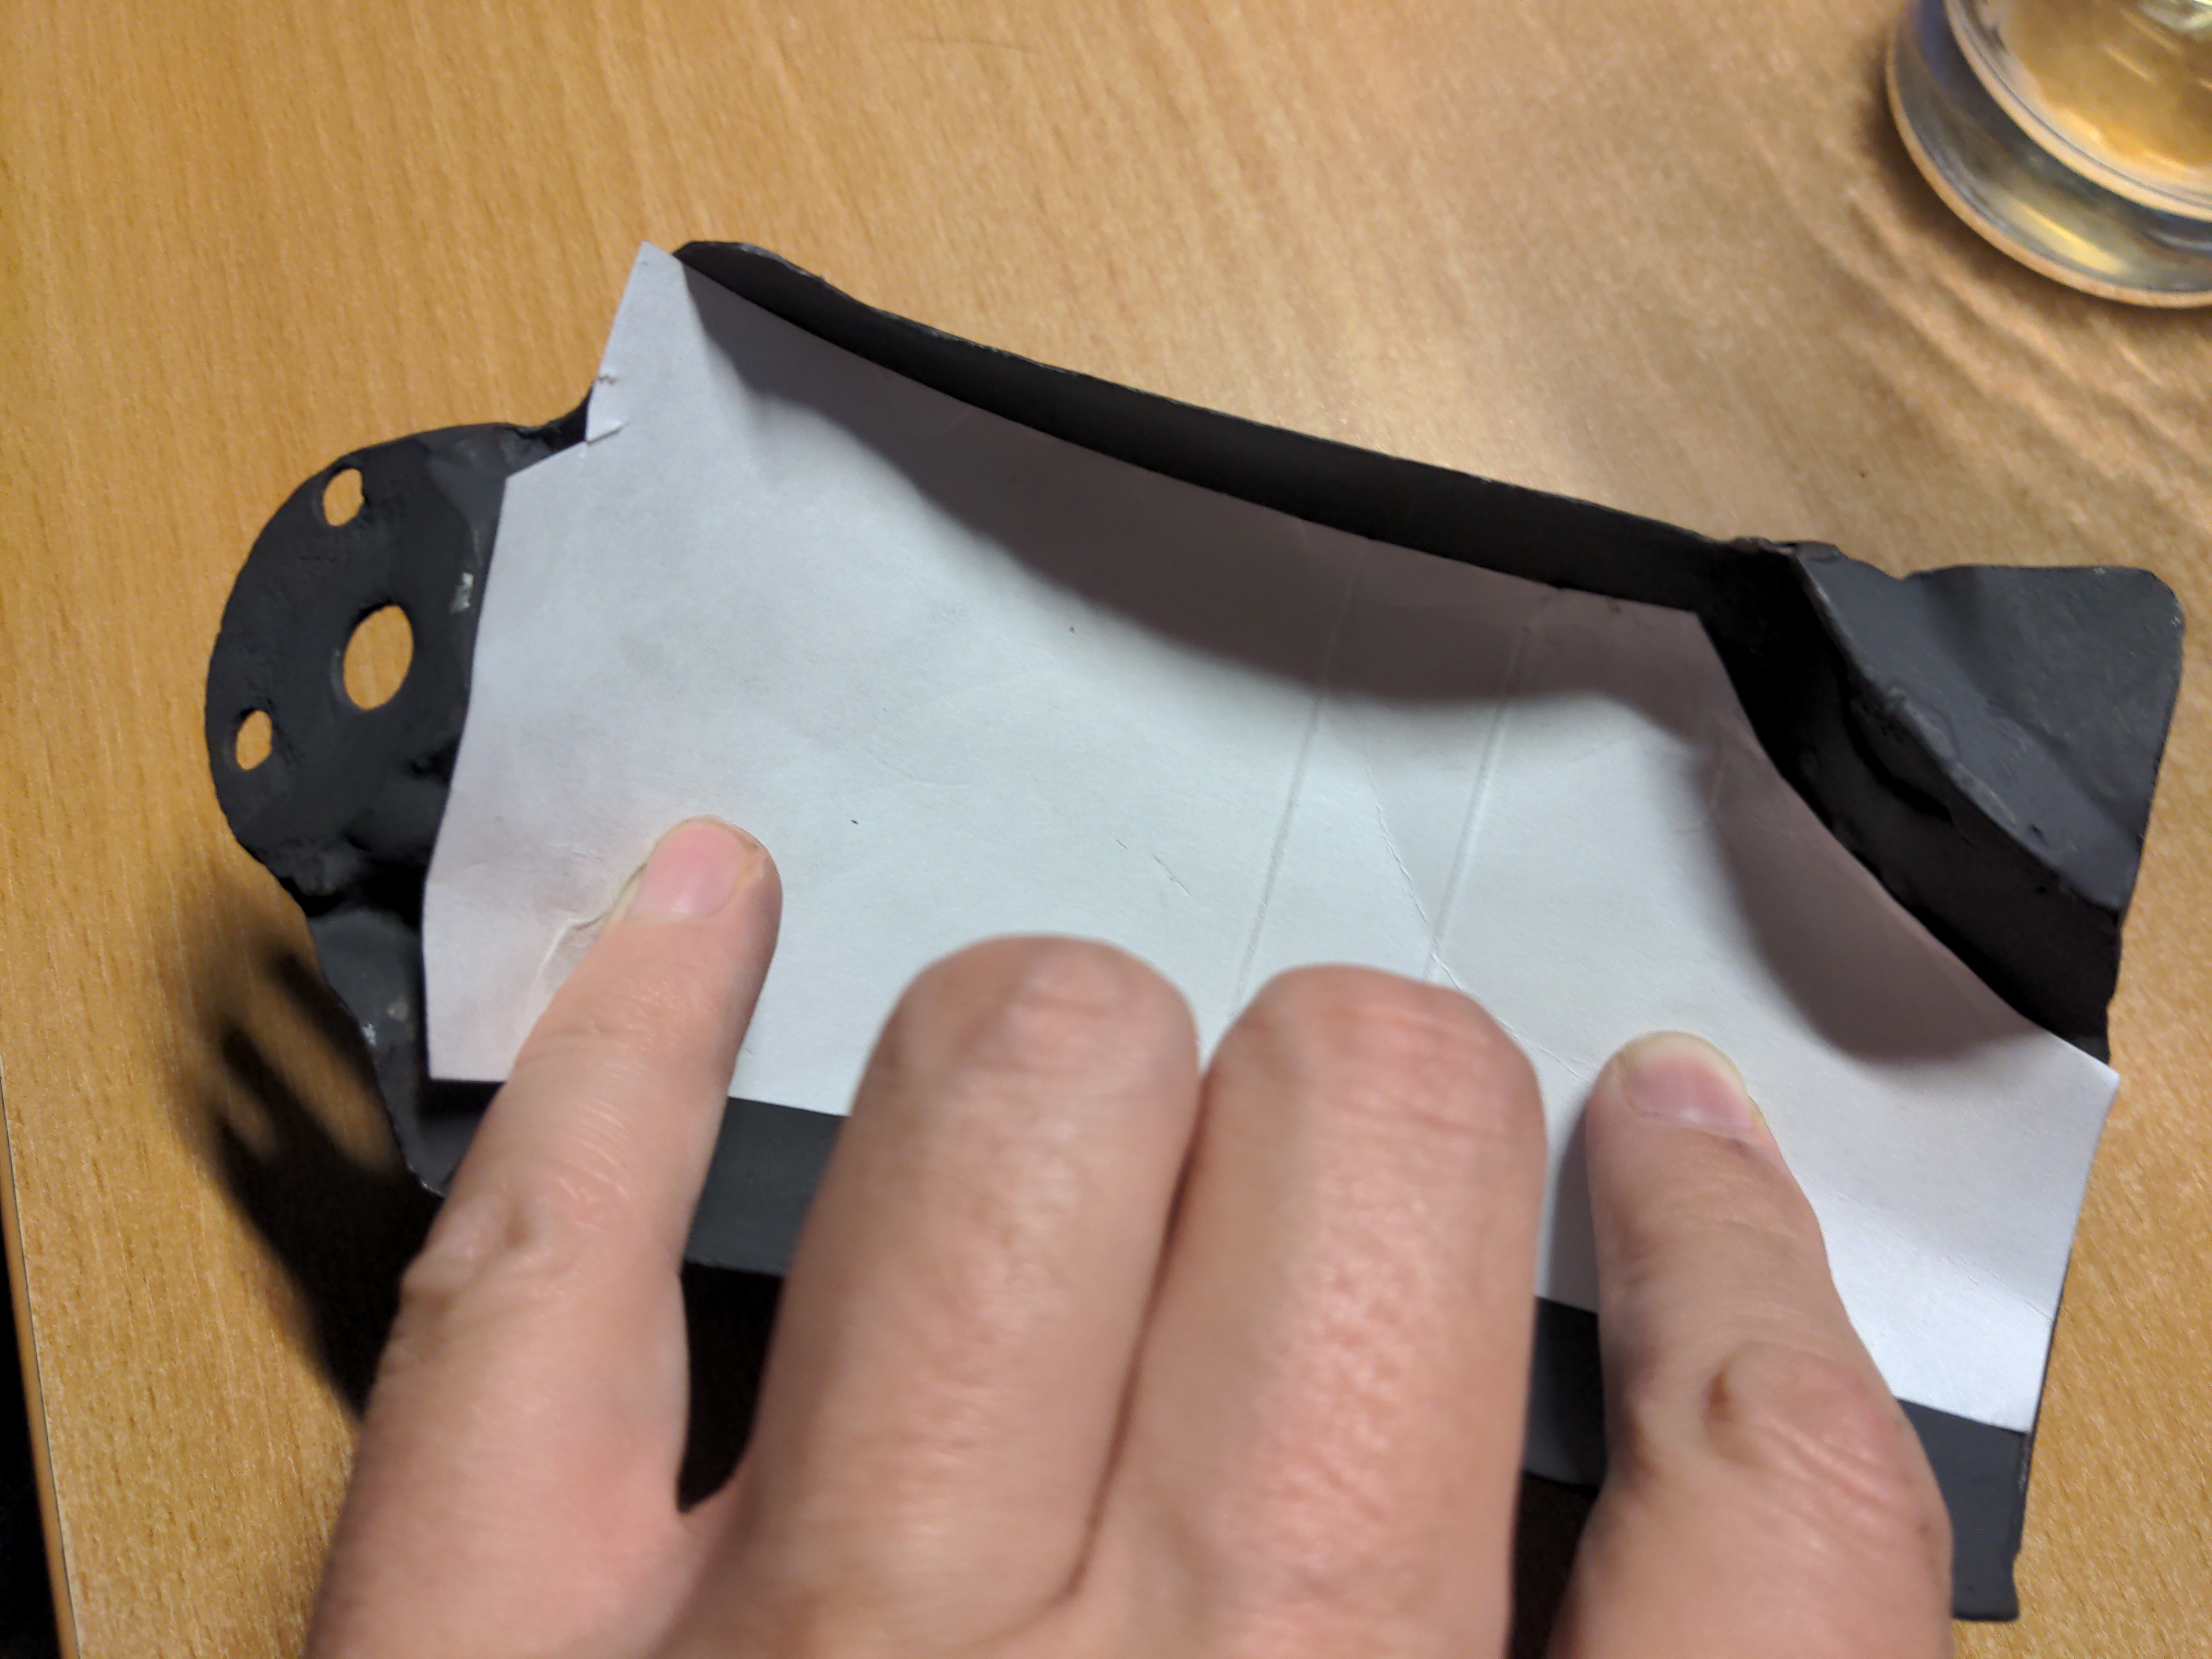
And if you're wondering, yes I made the obvious mistake when tracing around the cardboard out the material the first time. I won't tell you what that is; you will make the same mistake exactly once, and you won't feel bad about it because you know I did it too.
And with all that done, it looks pretty sweet, bad welding notwithstanding.
As always, with the car some distance away undergoing an engine rebuild I am doing all of this blind. I won't know it'll work until I run the car up to temperature for a sustained period of time, which is some time away. I must trust that the paint and the heat barrier are going to work at their rated temperatures, that my turbo isn't going to run vastly hotter than any turbo normally does. Other than a single hole to drill where the two sections overlap (which I cannot do until the exhaust manifold is back to allow me to bolt everything together, and its current absence is yet another story for later), I shall call that finished.
Onwards!
Part numbers mentioned in this post:
- Rust converter: Jenolite #89023
- Black BBQ paint: Jenolite #89096
- Self-adhesive heat shield: Thermo-Tec #13500